If you have certain applications to be used frequently, instead of searching for them every single time and opening them, you can quickly access those apps from the right-click context menu. This will save your time and effort.
In this article, let us check out a simple hack to add any application to the Windows 10, 11 right-click context menu.
Steps to be followed to add any application to the right-click context menu in Windows 10,11
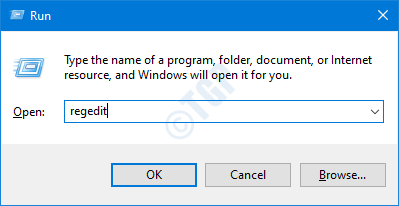
Step 1: Open the Run Dialog using the keys Windows+R.
Step 2: Type regedit and hit Enter.

Step 3: In the UAC window that opens asking for permissions, click on Yes.
NOTE:
Registry editing can harm the system even with the slightest mistake. It is advised to take the backup of the registry before proceeding. To take a backup, In the Registry Editor–> Go to File –> Export –> Save your Backup file.
Step 4: In the Registry Editor window, on the search bar at the top, copy-paste the following location
HKEY_CLASSES_ROOT\Directory\Background\shell
Step 5: Within the shell key, create a sub-key(sub-folder). To do so, right-click on the shell key and then choose New>Key.
Step 6: Name the newly created with the name that you want to be displayed on the context menu. For demonstration, we will add the Run Window. You can add any application of your choice.
Step 7: Within the Run Key create a subkey named command. To do so, right-click on the Run key and choose New>Key and name it as command.
Step 8: Now, minimize the registry editor and click on the search button on the taskbar.
Step 9: Type the name of the required application. In this case, the Run app.
Step 10: Right-click on the Run and choose the Open File location.
Step 11: Locate the required application and click on it and choose Open file location again.
Step 12: In the opening window, locate the required application and click on it. Once the app is selected, right-click on it.
Step 13: From the context menu, choose Copy as path.
Step 14: In the registry editor window, within the command folder, double-click on the (default) key on the right-hand side.
Step 15: In the Edit String window that opens, under the value data section, enter the absolute path of the application.
Step 16: Click on the Ok button.
That’s it you will now be able to see the Application in the context menu.
Right-click on the desktop, in the context menu that shows up, click on Show more options
In the appearing menu, you should be able to see the application that you added.
That’s All. Hope this helps.
Thank you for Reading.


