Audacity is free, cross-platform open-source tool which helps to record and edit audio easily. While editing audio tracks you must have encountered Sibilance. Sibilance refers to the high-frequency components of audio recordings, particularly the “s” and “sh” sounds which are harsh. It is annoying to have Sibilance in the audio tracks. Are you looking for a fix to get rid of it? Let’s see how to de-ess the Sibilance in Audacity without using extra plug-ins. We are trying to emulate the plugin here.
Steps to remove Sibilance in Audacity without additional plugins:-
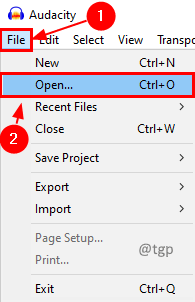
Step 1: Open the audio track selection window by clicking the File menu and Open menu options. Or simply press Ctrl + O.

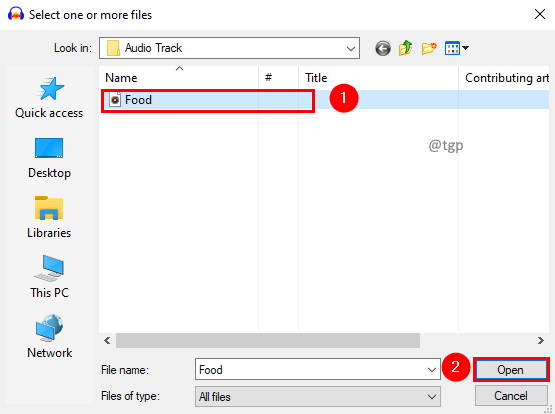
Step 2: Select the audio track and click Open.

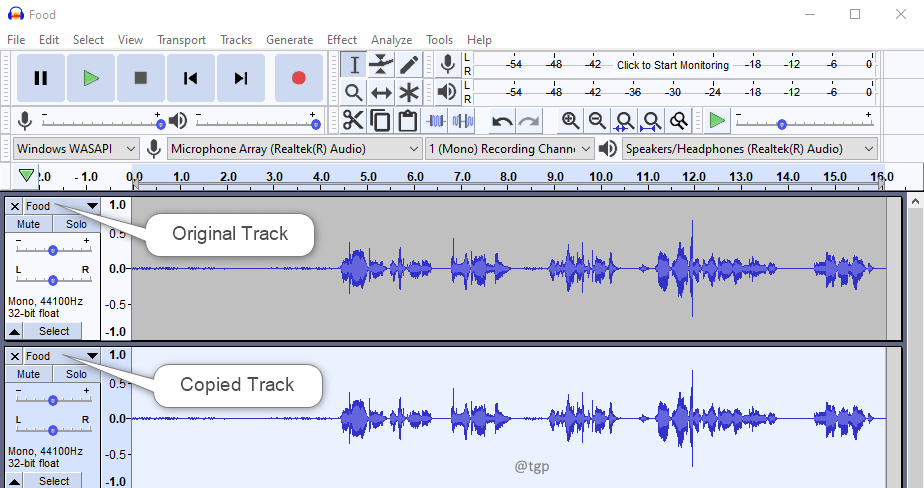
Step 3: Double click on the audio track and press Ctrl + C to copy the audio track.
Step 4: Click below the audio track and press Ctrl + V to paste. Now we have two identical tracks.

Step 5: Let’s rename copied audio track to Sibilance to make it easier for the explanation. Click on the drop-down and select Name. In the set track Name window give the name as Sibilance and click OK.


Step 6: Select the original audio track and in the Effect menu, click Filter Curve EQ.

Step 7: In the Filter Curve EQ window, get the curve between 5kHz to 10kHz down to -120 dB. Click OK. Yes, this will reduce the level of the original audio track.

Step 8: Now select the copied track and in the Effect menu, click Filter Curve EQ.

Step 9: In the Filter Curve EQ window, get the curve between 5kHz to 10kHz to 0 dB and everything at 0 dB to -120 dB. Click OK. Inverting the curve from the original one.

Step 10: Now apply compressor on copied track by clicking the Effect menu and then selecting a Compressor menu option.

Step 11: In the compressor window, keep the below settings or play around with them as per your track. Make sure the check box Make-up gain for 0dB after compressing is unchecked. Click OK.

Step 13: If you want to reduce Sibilance still you can apply one more compressor. But we recommend going to gain sections and applying gain.
Step 12: In the gain section, reduce the gain to -10 dB and check or play around as per your requirement.

There you go! You have removed Sibilance from an audio track. This is how the plugins will work, but here you will have more control as you are doing it manually.
We hope this article has been informative. Thank you for Reading.
Kindly comment and let us know if you found this helpful.
Also, let us know if you are facing any issues. We will be glad to help you out.