Do you hear any disturbance while listening to any recording or conversation? If yes, then this is the Background Noise that gets recorded along with the audio. These background sounds can be anything like fans, people talking, cars or trucks moving by, the buzz from audio wiring, or any other ambient noises. Repairing these background audio noises does not have to be complicated or time-consuming, but rather very simple. This is achieved by using the open-source software Audacity. This platform is simple to master and most podcasters find it enjoyable and simple to use.
In this article, we will show you how to use Audacity to remove annoying unwanted sounds while maintaining the integrity of your original audio.
How to Remove Background Audio Noise in your Recording
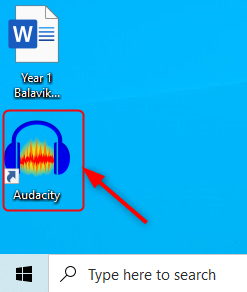
Step 1: Open the Audacity by Double-clicking on the shortcut icon present on your screen.

If you don’t have the Audacity Software, Click on the link below to download.
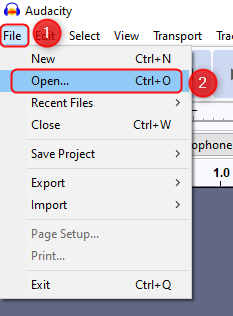
Step 2: Next, click on the File from the menu bar and select Open ( Cltr+O).

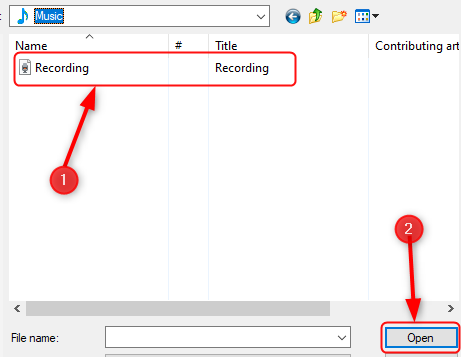
Step 3: Now, Select the Audio file that you want to remove the unwanted background noise.

NOTE: Audacity only opens some audio formats ( WAV, MP3, AIFF ). Make sure you have these audio formats only.
Step 4: Once the audio file is opened, click on the Play button to hear and observe where the noise is present.

Step 5: Now, click on Effect > Noise Reduction.

Step 6: Once the Noise Reduction window opens, Click on Noise Profile as shown below for Audacity to know what to filter out.

Step 7: Now, again double click to select the whole audio track. Then, go to Effect > Noise Reduction.

Step 8: Once the Noise Reduction window opens, Click on Noise Profile and change the settings as below.
Now, you can use your custom noise reduction values to reduce noise.
An example specific noise reduction values are given below.
Noise Reduction (dB) : 24 dB
Sensitivity : 6
Frequency Smoothing : 0

Step 9: Click on Preview to check if the noise is removed or not and click OK.

Step 10: Finally, you can see that the audio clip is free from noise and you can enjoy listening without any problem.
That’s all.
Hope this article is helpful. Please comment if you have any doubt.
Thanks for Reading.