If you are wondering how to remove the VLC options from the right-click context menu in Windows 10 PC, this post is for you. The right-click context menu in Windows 10 is a useful feature that allows you to not just use the cut, copy, paste and delete functions quickly, but also offers other shortcuts to get a print, view and modify file properties, share files or open a file with your preferred tool easily. You can even Rename files, Restore previous sessions or Open file location via the context menu.
However, as you start using different apps, they keep getting added to the right-click menu and eventually creating a mess. For instance, you may see shortcuts like Share with Skype, Open with WinZip, Play with VLC media player and/or Add to VLC media player’s Playlist. While these can be useful for some users, it can be messy for others. Therefore, we have explained a few methods below that may help you to remove the VLC options from the right-click context menu in your Windows 10 PC.
Method 1 – Uninstall and Reinstall VLC
The easiest method is to unintstall VLC and then again download and reinstall it without context menu option.
1 – Just Uninstall VLC
2 – Download and install VLC again.
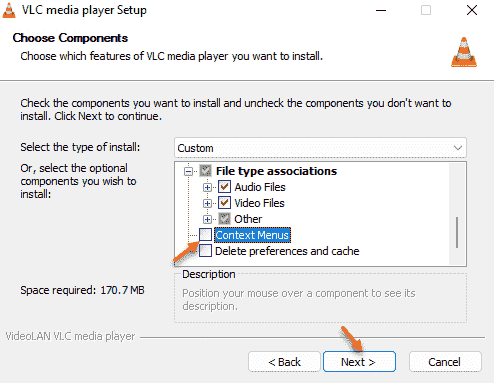
3 – While installation, when you reach choose components screen, Just uncheck Context menus options and click next.

Method 2 – How to Delete VLC Entries from the Right-click Context Menu
Step 1: Press the Win + R keys together on your keyboard to open Run command.
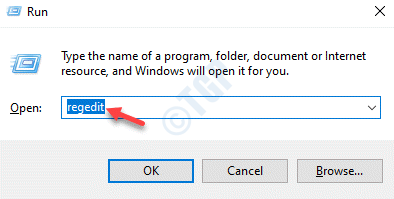
Step 2: In the Run command search box, type regedit and hit Enter to open the Registry Editor window.

Step 3: In the Registry Editor window, navigate to the below path:
HKEY_CLASSES_ROOT\Directory\shell
Now, under the Shell folder on the left, select the AddToPlaylistVLC key.

Step 4: Now, go to the right side of the window and right-click on an empty area.
Select New and then String Value.

Step 5: Rename the new string value as LegacyDisable.

Step 6: Now, select the PlayWithVLC key on the left under the Shell folder.
Again, go to the right side of the window, right-click on the white space, click on New and then String Value.

Step 7: Next, rename the newly created string value as LegacyDisable.

*Note – Before you proceed to make any changes to the Registry Editor data, make sure that you create a backup of the Registry editor settings. This is to ensure that you can recover any lost data during the process.
The changes are applied with immediate effect, so, you can now select a file or folder on your desktop and you should not see the VLC options in the right-click context menu – Add to VLC media player’s Playlist and/or Play with VLC media player’s Playlist.
Bonus Tip
You also have a choice to hide the VLC options in the context menu, if you want to use them occasionally and yet, don’t want to make the right-click menu messy. For instance, the VLC options will only be visible when you press and hold the Shift key on your keyboard and right-click on the file or the folder at the same time . However, this function need to be enabled through the registry editor. Let’s see how:
Step 1: Right-click on the Start menu and select Run.

Step 2: This will launch the Run command box.
In the search field, write regedit and press OK to open the Registry Editor window.

Step 3: Copy and paste the below path in the Registry Editor’s address bar and hit Enter:
HKEY_CLASSES_ROOT\Directory\shell
Now, under the Shell folder, select the AddToPlaylistVLC key on the left.

Step 4: Next, go to the right side, right-click on a blank space, select New > String Value.

Step 5: Rename this new String Value as Extended.

Step 6: Now, go to the left side of the pane and under the Shell folder, click on PlayWithVLC.
Navigate to the right side, right-click on an empty space, select New and then String Value.

Step 8: Now, rename the string value you just created as Extended.

Once done, the changes are immediately applied. Now, the VLC options will only appear when you hold the Shift key and right-click on the file or the folder.
*Note – Make sure to create a backup of the Registry editor settings. before you make any changes to the Registry Editor, so that, if any data lost during the process can be recovered easily.