Whether it is writing an essay for school homework, or preparing an official document, the dication tool on MS Word makes life a bit easier. So, while documenting something, if the dication tool doesn’t work, you can be in trouble. This problem, just like other issues in MS Word, can be treated with a few tweaks in the settings. So, without wasting any more time, follow these instructions to get back to dication typing.
Fix 1 – Do you have a MS Office 365
The dictation tool on Word works only if you have a Microsoft 365 Office subscription plan. So, if you are using a standalone version (like MS Office 2021, 2016), the dication tool is unavailable in there.
Fix 2 – Use the universal dictation tool
Instead of using the dictation tool in Word, you can use the dictation tool of Windows which helps you with dictation typing in Word as well.
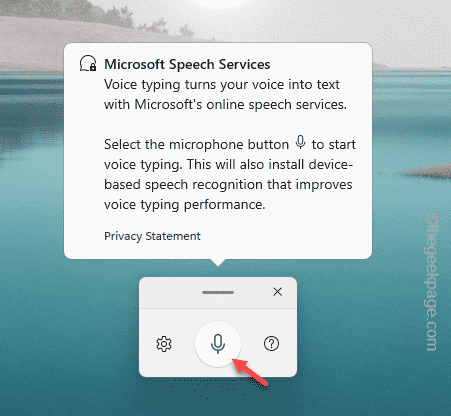
Step 1 – Press the Win+H keys together.
Step 2 – This opens up the Dictation tool. Tap the mic icon 🎙️ and you are good to go!
Try speaking your words that you want to write on the document. Continue your work with this alternative.
Fix 3 – Install the speech recognition module
The speech recognition module is a must-have feature if you want to use the dictation feature.
Step 1 – Go ahead and open the Settings. Press the Win+I keys at once.
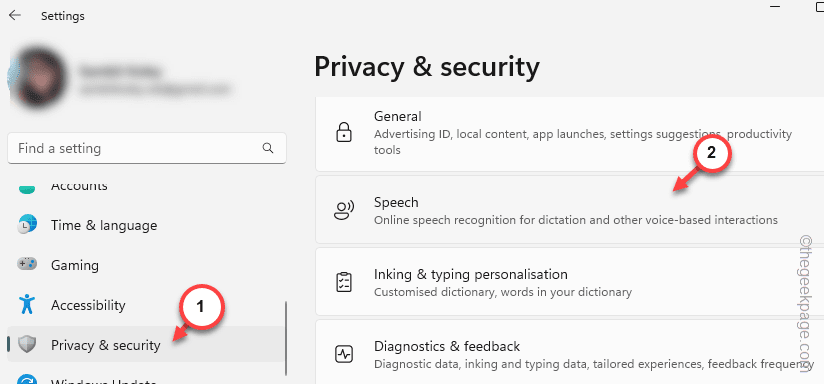
Step 2 – A separate pane for “Privacy & security” settings exists. Go there.
Step 3 – Now, on the right-hand pane, scroll down and find the “Speech” to open that up.
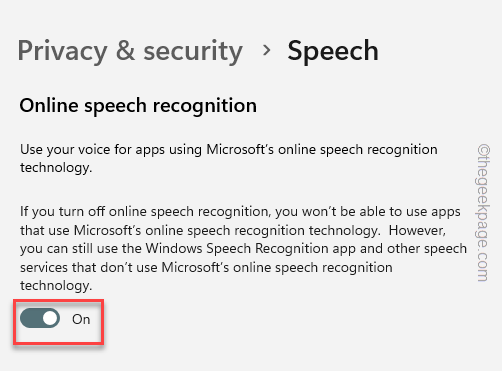
Step 4 – You will find the Online speech recognition module there. Now. toggle that to “On” mode from there.
After switching this to on mode, come back to MS Word and test whether you can actually use the dictation tool or not.
Fix 4 – Download the text-to-speech module
The text-to-speech module on your system needs to be locally available for the dictation process to work smoothly.
Step 1 – Open Settings and select the “Time & language” settings.
Step 2 – On the opposite end, open the “Language & region” setting.
Step 3 – Now, you will find all the language modules you have used at least once.
Step 4 – Select the language that you are using in Word click the dot button and click “Move up“.
This way, make sure the language is the at top of the stack.
Step 5 – Now, click the same button beside the language and click “Language options“.
Step 6 – Now, scroll down to find the “Text to speech” module. Tap “Download” to download that module.
Step 7 – After downloading the module, expand the ‘Speech Recognition’ module.
Step 8 – Download both the “Basic speech recognition” and “Enhanced speech recognition” modules on your system.
After getting all these modules, give the dictation process another try. You won’t have any problem working in MS Word.
Fix 5 – Test your microphone
Sometimes the microphone volume is too low for speech recognition to understand your voice and detect the speech.
Step 1 – On the taskbar, you will see the speaker 🔊 icon. Simply, right-click that and tap “Sound settings” to explore that.
Step 2 – As this takes you directly to the Sounds page, find the Input section.
Step 3 – You can manage the microphone settings directly from here. But, tap the “Headset” option once.
Step 4 – Now, click the “Allow” button beside the ‘Allow apps and Windows to use this device for audio‘ settings so that the apps can use the microphone.
Step 5 – Next, toggle the “Input Volume” to the max settings “100“.
Step 6 – Finally, click “Start test” to start the test of the microphone.
After hitting the test button talk in the microphone a bit. You shall be seeing the level of the microphone in there.
Fix 6 – Allow the microphone permission
The microphone must be allowed for the dictation feature to work properly.
Step 1 – To do this, launch the Settings panel.
Step 2 – Go to the same “Privacy & security” pane.
Step 3 – Scroll down enough to find the “Microphone” settings and open that up.
Step 4 – In the Microphone settings on the right-hand pane, find the “Microphone access” to “On” mode.
Step 5 – After this, set the “Let apps access your microphone” to “On” mode.
Step 6 – This isn’t enough. So, get down to find the “Let desktop apps access your microphone” setting and turn that On as well.
Close the Settings window after this.
Fix 7 – Reset the default microphone
Do you have multiple microphones connected to your system?
Step 1 – Hold the Windows button and the R buttons for one second.
Step 2 – As the Run dialog box appears, paste this and click “OK“.
mmsys.cpl
Step 3 – Go to the “Playback” pane.
Step 4 – There, you will see the list of microphones. Right-click the microphone that you want to use and click “Set as default“.
Step 5 – Now, you must save these modifications using the “Apply” and “OK” buttons.
Now when you try to dictate something in MS Word, Windows will use the default microphone for the process.
Fix 8 – Use the audio recorder troubleshooter
Still not able to dictate anything in Word? Try using the audio recorder troubleshooter to fix the problem.
Step 1 – At first, right-tap the Windows button.
Step 2 – Next, tap “Settings“.
Step 3 – Click the “System” settings. On the right-hand pane, choose the “Troubleshoot” to access that.
Step 4 – After this, open up the “Other trouble-shooters” to access that.
Step 5 – Find the ‘Recording Audio‘ troubleshooter and tap “Run” to run the microphone troubleshooter.

Follow the on-screen steps on the Get Help panel. It will apply the recommended solutions and then, test the dictation process again.


