If you want to perform multiple actions on a single email message with just one click then Microsoft Outlook’s Quick Steps can be helpful for you. Suppose you are in a meeting and you receive an email, you do not have time to go through the email and reply right away. In this scenario, you can send a quick response in a single click using quick steps. Don’t you think it is helpful? In this article, we will learn how to create, use, edit, and delete quick steps in outlook.
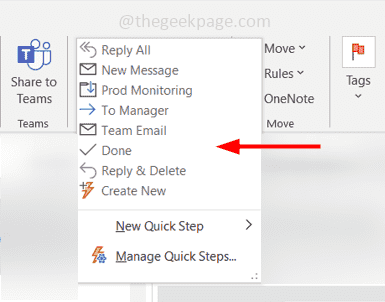
Before creating a new quick step it is good to know that there are a few quick steps already included in Outlook by default.
To Manager – If you want to forward the selected email to your manager then you can click on this quick step.
Team Email – It creates a blank message for your team members.
Done – Marks the message as read and moves it to a specified folder.
Reply & Delete – A blank reply message will open and after you send the reply, the original message will be deleted.
You can use them by selecting the email message for which you want to apply the quick steps and then clicking on the above appropriate quick step.
Create And Use Quick Steps In Outlook
Step 1: Open the Microsoft Outlook
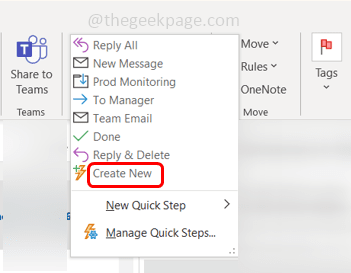
Step 2: In the Quick Steps group click on Create New. It opens the Edit Quick Step window.
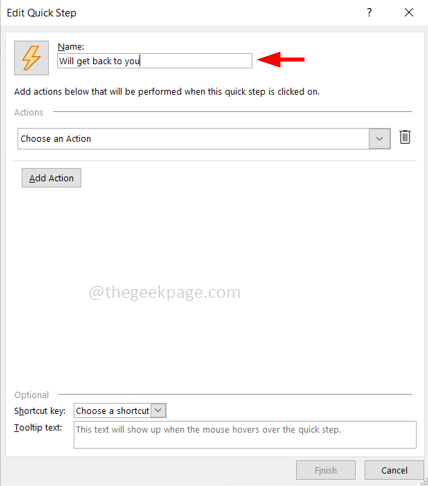
Step 3: Give a name to the quick step in the Name field.
Step 4: Select an action to your quick step from the actions drop-down list. Here I will select Set Importance from the drop-down.
Step 5: You can add multiple actions by clicking on the Add Action button and then selecting an action from the drop-down list. Here I will select Reply from the dropdown.
Step 6: Click on Show Options and fill in the additional details for your response.
Step 7: There are different options like subject, text, shortcut key, importance, etc. You can set them if required. For example, here I will enter a message ‘Thanks. Will get back to you’ as a response in the text field.
Step 8: You can also automatically send the text by clicking on the checkbox beside automatically send after 1 min delay.
Step 9: Update if you require any additional options like the flag, importance, shortcut key, etc and once the settings are done click on Finish.
Step 10: Now the quick step is created and you can see it above in the Quick Steps group.
Step 11: To use it, click on the email message for which you want to use the quick step. Click on the quick step you created, and the settings are applied to that message.
Edit The Quick Step
Step 1: To edit the quick step you can right-click on the quick step that you have created and select Edit from the list.
Or you can also click on the small arrow at the right bottom corner in the Quick Steps window. This will open a Manage Quick step window, select the particular quick step from the left then click on Edit.
This will open a Manage Quick step window, select the particular quick step from the left then click on Edit.
Step 2: Make necessary changes and click on OK
Step 3: Once done, to save it click on the Save button.
Delete The Quick Step
Step 1: To delete the quick step you can right-click on the quick step that you have created and select delete from the list.
Or you can also click on the small arrow at the right bottom corner in the Quick Steps window. This will open a Manage Quick step window, select the particular quick step from the left then click on Delete.
Step 2: A pop-up window will appear asking for the confirmation, click on yes. Click on OK. And it is deleted.
That’s it! I hope this article is easy to follow and helpful. Thank you!!


