You might need to insert your company’s logo in every document that you create, that too at multiple places in the same document. It doesn’t have to be a logo itself, it could even be a simple picture or shape that you need to insert. But if it has to be inserted multiple times manually, definitely that’s a headache. What if you can simply type in a keyword of your preference, for the respective image, and then the image will be automatically inserted into your document? Sounds exciting?
In this article, we explain in detail how you can easily insert an image by simply typing in a keyword so that every time you type in the keyword and hit the Enter key, the image gets inserted at that instant into your document. Hope you enjoy reading!
Solution
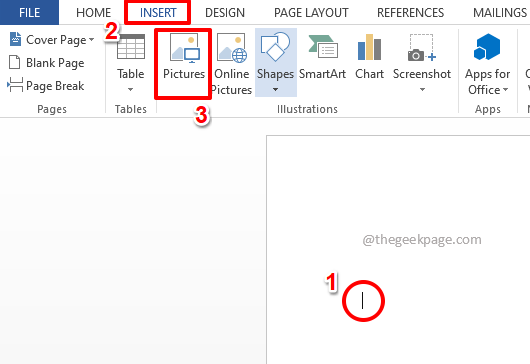
Step 1: Let’s insert an image first. For that, click anywhere on the Word document where you want to insert the image at.
Now, click on the INSERT tab from the top ribbon and click on the Pictures button under it.
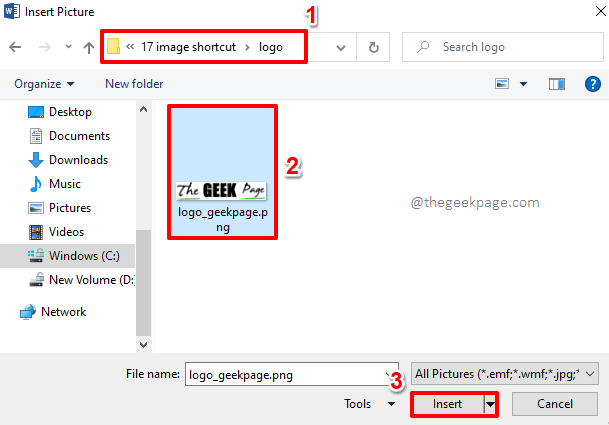
Step 2: When the Insert Picture window pops open, navigate to the location where your image is present, then click on the image to insert and then hit the Insert button at the bottom of the window.
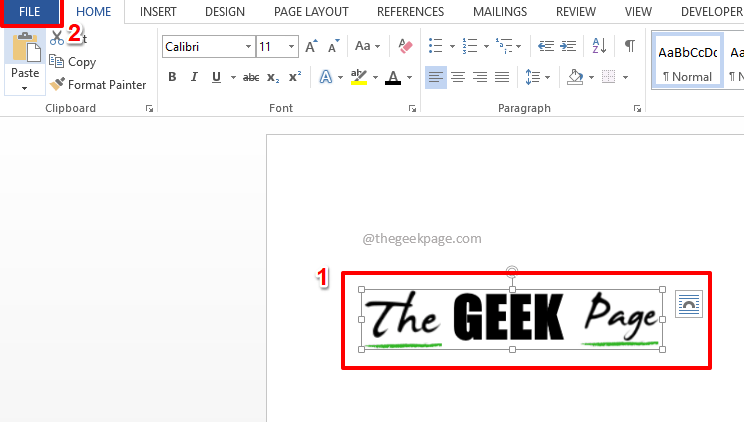
Step 3: If you now look at the Word document, you can see that the image is successfully inserted. Now, let’s assign a shortcut keyword to this image.
For that, click on the image first, to select it, and then click on the FILE tab from the top ribbon.
Step 4: On the left pane of the window that appears, click on the Options tab.
Step 5: Now Word Options window will open up. Click on the Proofing tab on the left.
On the right, under the section AutoCorrect options, click on the AutoCorrect Options button.
Step 6: In the AutoCorrect window, make sure you are at the AutoCorrect tab.
Now, make sure the radio button against Formatted text option is chosen.
Now, right under the text Replace, there will be a text field where you can enter a keyword of your choice for the image you selected in Step 3. Type in any keyword. We have given the keyword geekPageLogo.
Hit the Add button.
Step 7: You can see that the new entry is successfully added. Hit the OK button.
Step 8: Once again, hit the OK button.
Step 9: Now, on the Word document, type in the keyword that you added in Step 7. We have typed in geekPageLogo.
Note: You can enter geekPAGElogo also instead. The AutoCorrect keywords are not case-sensitive. Word treats them all as the same, as long as the spelling is correct.
Step 10: Hit the Enter key to see the magic yourself. The image gets inserted instantly, replacing the keyword that you typed in. Enjoy!
You can repeat the same steps for inserting any number of images or shapes.
Please tell us in the comments section if you have any concerns regarding any of the steps, we are always a comment away!


