After installing the latest update for your new Windows 11/10 device, you will notice the new print dialog box shows only “Printing from Win32 application” or “No preview available”. Now, there are some users who like the new look, but the rest of us haven’t liked the new print dialog. But, don’t worry. There are some ways that you can actually get back the former printing console without wasting much sweat! So, just follow each and every step and get back the
Fix 1 – Edit the particular printing registry
You can easily edit the registry to get back the legacy printing dialog box back. But don’t forget to create a registry backup first.
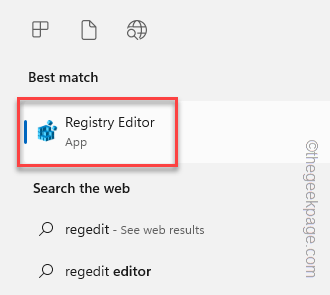
Step 1 – Click the Start button once and begin to write “regedit“.
Step 2 – Then, click “Registry Editor” once you see it in the search results.
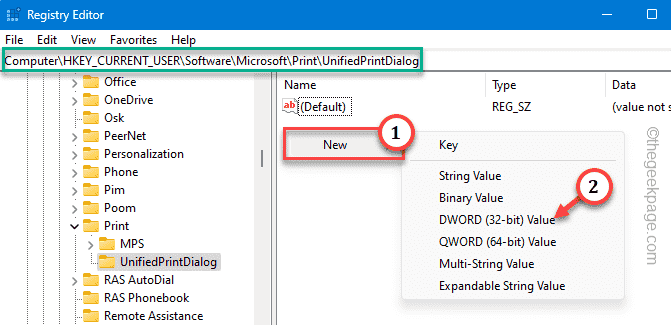
Step 3 – Go directly to this location following the left-pane –
HKEY_CURRENT_USER\Software\Microsoft\Print\UnifiedPrintDialog
Step 4 – Now, go to the right-hand pane, and right-click the space and tap “New>” and “DWORD (32-bit) Value” to create the value.
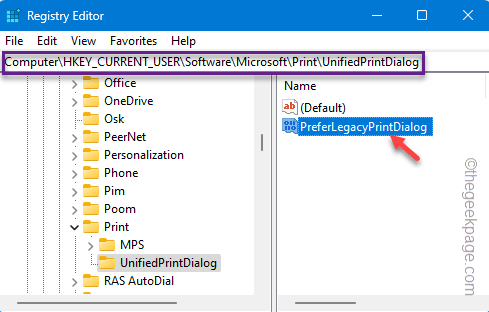
Step 5 – Now you have to rename this value “PreferLegacyPrintDialog“. Now, double-tap it to change it.
Step 6 – Next, set the value of PreferLegacyPrintDialog to “1“. Then, hit Enter to save the change.
Exit the Registry Editor. It won’t take effect until you restart the machine.
After this, try to print a random document. You will get back your legacy print prompt again in no time at all.
Fix 2 – Restore the legacy dialog box using CMD
If you don’t want to edit the registry, you can easily do it using the terminal instead.
Step 1 – Open a new CMD terminal with admin rights. So, type “cmd“.
Step 2 – Now, what you need to do is to right-click the “Command Prompt“. Then, choose the third option in the list “Run as administrator“.
Step 3 – Copy-paste this code in the terminal and hit Enter to add the registry value.
reg add "HKCU\Software\Microsoft\Print\UnifiedPrintDialog" /v "PreferLegacyPrintDialog" /d 1 /t REG_DWORD /f
Exit the terminal and restart your computer.
This way, you can easily get back to the print dialog box again. No matter what version of Windows you are using, the legacy dialog box won’t change.


