Got yourself a brand new printer but it isn’t working with your Windows 11 device? Don’t worry. It is not completely that your new printer is not working/connecting to the Windows 11 device. There can be a lot of reasons why your printer isn’t printing anything. But in the majority of the cases, the root cause usually lies in misconfigured printer settings.
Fix – 1 Check the manual connection
This can be a hardware issue. So, do these checks depending upon which type of printer you are using.
Steps for USB cable connected printer –
1. Test the USB cable that you are connecting the printer with. If it is defective by any chance, you have to replace it with a new one.
2. USB hubs have proven to be the root cause of the issue in some cases. So, if you are using one, connect the printer directly to a port on your system.
Steps for network-connected printers
1. Check the network connection settings.
2. Disconnect the printer from your WiFi or disconnect the ethernet cable.
Fix 2 – Run the official printer troubleshooter
When the printer isn’t working, the first thing you should try is to run the printer troubleshooter.
1. Pressing the Windows key and the I key opens the Settings page.
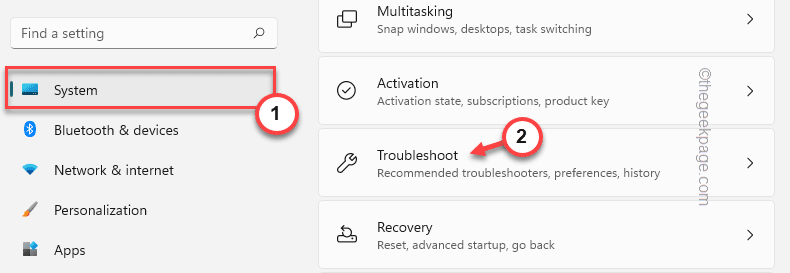
2. Go to the “System” on the left-hand pane.
3. On the right-hand side, you will notice the “Troubleshoot” settings. Tap on it.
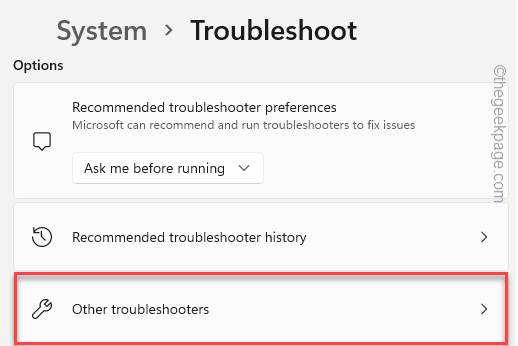
4. Click on the “Other troubleshooters“.

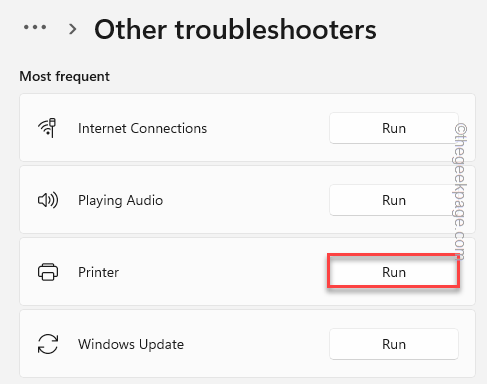
5. This will open up an extensive list of troubleshooters. Look for the “Printer“.
6. Just select the troubleshooter and tap “Run” to run it.
7. This will start the printer troubleshooter. Just tick mark the “Apply repairs automatically” option.
8. Then, tap “Next“.
9. Now you will be asked to select the printer from the list of printers associated with your system.
10. After that, tap “Next” to proceed.

11. Next, tap “Apply this fix“.

Once the fix is patched, you try to print something using your printer.
Fix 3 – Restart the Spooler service
Check whether the printer spooler service is running or not.
1. Open the Services page.
2. Type “services” in the search box.
3. Then, tap “Services” to access the Services utility page.
4. When the Services window opens up, scroll down slowly to look for “Print Spooler“.
5. Once you have found the service, right-tap the service and tap “Properties“.
5. When the Properties appear, go to the ‘Startup type:’ and set it to “Automatic“.
6. Now, carefully look for the ‘Service status:’ that says “Running” or “Stopped“.
7. If the Printer Spooler service is running, tap “Stop“.
If the service is already, stopped, tap “Start” to start the service.
8. Once you have stopped service, tap “Start“.
8. Finally, tap on “OK” to save these changes.
Close the Services after doing this. Try to print a test page using your printer.
Fix 4 – Clean the Printer Spooler cache
If troubleshooting the printer with the troubleshooter doesn’t work out, just try restarting the Printer Spooler.
1. Before you restart the Printer Spooler service, you have to stop all the printing processes.
2. To do that, hit the Windows key from your keyboard and type “cmd“.
3. Now, just right-tap the “Command Prompt” and tap on “Run as administrator“.
4. With just one command you can stop the spooler service. Paste this and hit the Enter button.
net stop spooler
Minimize the Command Prompt terminal page. You will need this later.
5. Now, open the File Explorer.
6. Navigate to this section –
C:\Windows\system32\spool\PRINTERS
7. You may see a permission-related prompt on your screen. Tap “Continue“.
8. Select everything you can find in this folder and press the “Delete” key from your keyboard.
You may close the File Explorer page after this.
Maximize the Command Prompt terminal.
8. Now, you have to start the spooler service that you have stopped in the first step. So, input these words and hit Enter.
net start spooler
Once you see the “The Print Spooler service was started successfully.” message has appeared on the terminal, you may close it.
Restart your computer immediately. Once you have restarted the system, try to print something and test.
Fix 5 – Set the printer as the default
Try to set this printer as the default one on your computer.
1. Just press the Windows key and the R keys together.
2. Type “control printers” and click on “OK“.
3. You will see the list of all the devices that you have connected to your system. Look for the printer you want to set as your default printing device.
4. Just, right-tap the printer and tap “Set as default printer“.
That’s it! This way, you can easily set this printer as your default printing device.
Fix 6 – Update the printer driver
Update your printer driver from the Device Manager.
1. You can open the Device Manager by pressing Windows key+X and tapping once on “Device Manager“.
2. When the Device Manager opens up, expand the “Print queues” and look for the printer.
If you can’t locate the printer there, expand the “Other devices” section.
3. Then, right-tap the printer and tap “Update driver“.
4. Now, tap “Search automatically for drivers“.
It will scan the internet for the latest driver for your device.
Once this process is done, close everything and restart your computer.
After doing all these, try to print a test page.
NOTE –
You can download the latest driver for your printer from the printer manufacturer’s website.
a. Go to your printer manufacturer’s website (like – HP, Epson, Canon).
b. Input your model number in the search box and hit Enter.
c. Now, tap “Download” to download the latest driver for the printer.
Run this downloaded file on your system to update it. This should fix your printer issues. Your problem will be solved.

