If you use Wi-Fi in your Laptop, you may have faced the problem of your Wi-Fi getting switched off when your Laptop is kept idle for few hours. This is a default procedure in Windows which is done to optimize the power management. It results in an increase of your battery life.
For some users who use their Wi-Fi for longer periods of time, it is somewhat annoying as they have to re-establish the Wireless Network Connection. For some ISP’s, re-establishing the internet connection requires username and password, and the user has to enter username & password every time he/she logs in. Thus, this process makes it even more frustrating.
Recommended: – Fix WiFi turning off frequently in Windows 10
How to prevent your Wi-Fi from turning off
In this article, we’ll follow certain steps on how to keep your Wi-Fi from turning off in Windows 10:
Step 1: Search View network connections in the search box.
Step 2: Now, click on the search result.

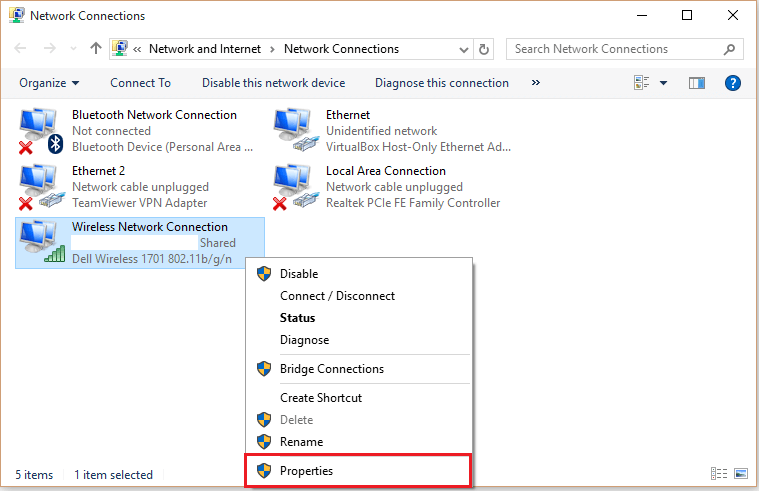
Step 3: Right click on your Wireless Network Connection (Wi-Fi) & click on “Properties”.

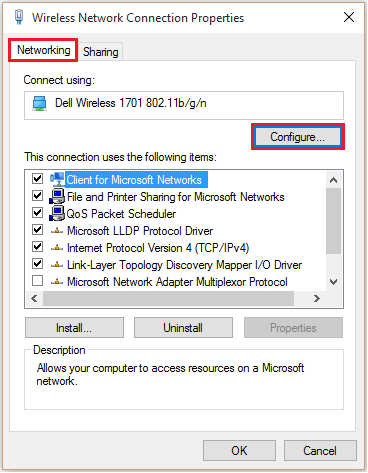
Step 4: In the “Wireless Connection Properties” window, click on “Configure”.

Step 5: Click on “Power Management” tab.
Disable the check mark which says “Allow the computer to turn off this device to save power” & click on “OK” to complete the whole process.

Note: Disabling the check mark may affect your battery performance. Therefore, it is advisable to enable this feature if you do not use your Wi-Fi frequently.