Why would a 40-minute clip show up in Premiere as eight seconds long? It plays fine in VLC. It also runs just fine on your phone. But when you drop it into a Premiere project and the timeline shows a stub! Here’s what’s going on:. Premiere doesn’t scan the whole file when you import it. It reads the header, and trusts it. A lot of phone recordings, screen captures, and game clips have headers that lie. Usually because the frame rate changes while recording (which is called variable frame rate, or VFR). Premiere reads the wrong length, stops there, and then caches that wrong answer so it keeps happening. So the fix is to give Premiere a file with an honest header. The tools below do exactly that, and none of them touch your picture quality.
Fix 1 – Clear the Media Cache and Re-Import
Start here, because if Premiere already read the file wrong once, it’ll keep using that cached read no matter what else you do. Wondering why re-importing didn’t help before? This is why.
1 – Open Premiere Pro.
2 – Click Edit in the menu bar, hover over Preferences, and click Media Cache.
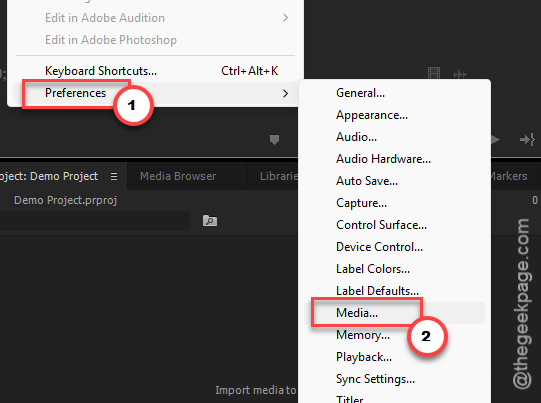
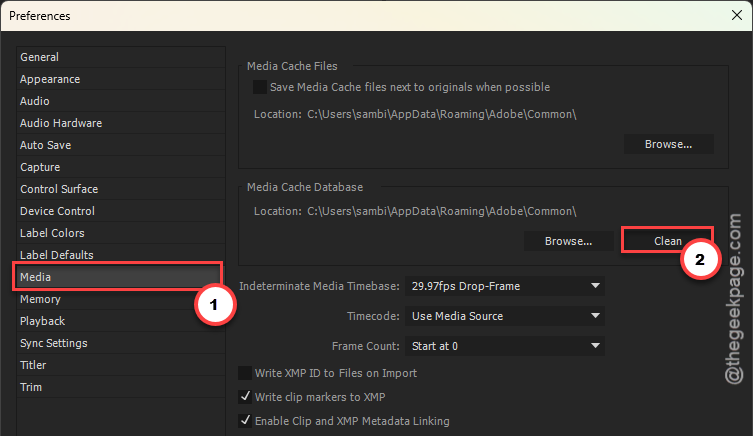
3 – Next to Remove Media Cache Files, click Delete. (If your are using older Premiere Pro, tap Clean.)
4 – Choose Delete all media cache files from the system and click OK. It may take a minute on a big project.
5 – Close Premiere.
6 – In File Explorer, right-click the video file and click Rename,
7 – Then, change the name (adding -v2 at the end is enough).
8– Reopen Premiere and import the renamed file.
And the rename matters. Premiere matches cache files by name, so a new name forces it to read the clip from scratch and build new peak files (the waveform and thumbnail data). If the full length shows up now, you’re done.
Fix 2 – Rewrap the File With Shutter Encoder
This is the one I’d use to resolve this issue.
1 – Download Shutter Encoder and install it.
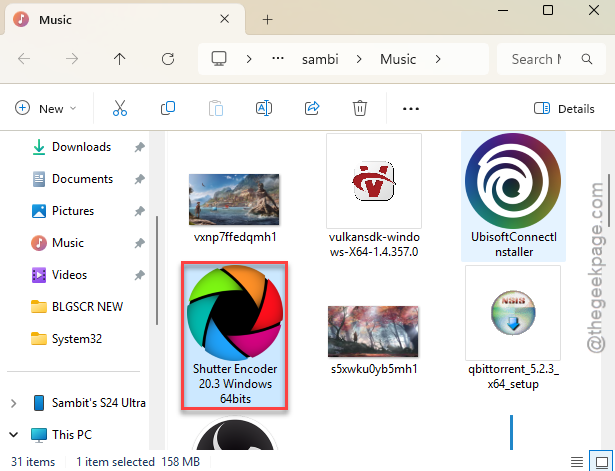
2 – Open it and drag your video into the big box at the top left.
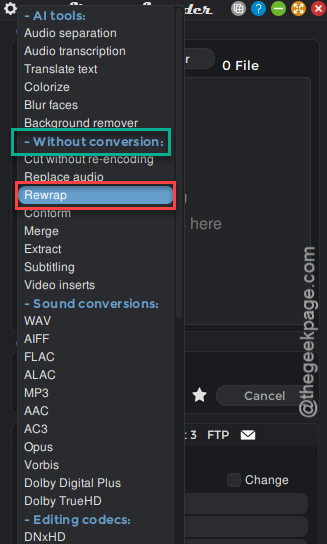
3 – Click the Choose function dropdown.
4 – Under Without conversion, click Rewrap.
5 – On the right side, pick .mp4 or .mov as the output. Either works for Premiere.
6 – Click Start function at the bottom.
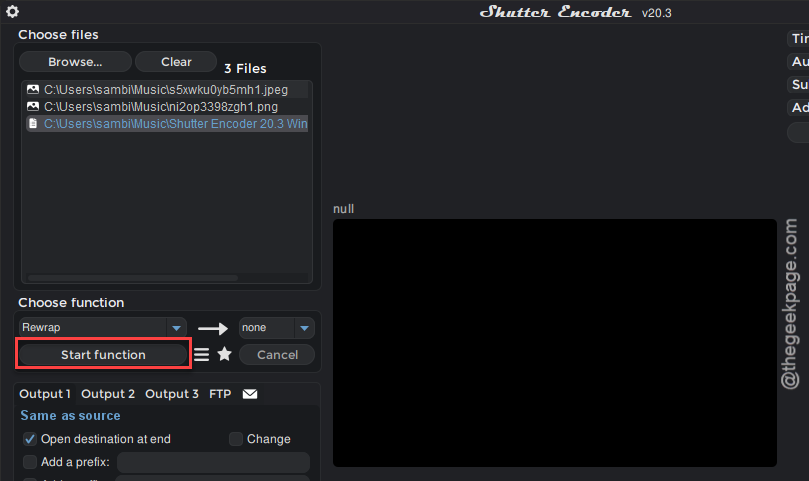
7 – Import the new file into Premiere (it lands next to the original with a new name).
And that’s usually it. The rewrapped clip shows its full length because the header now matches the content. Keep Shutter Encoder installed, by the way. You’ll use it again.
Fix 3 – Run It Through HandBrake at a Constant Frame Rate
If the clip came from a phone, OBS, or a game capture, it’s almost certainly variable frame rate, and a rewrap alone sometimes isn’t enough. HandBrake (also free) re-encodes the clip at one steady frame rate, which is what Premiere expects. You lose a tiny bit of quality. But at HandBrake’s default settings you won’t see it.
1 – Download HandBrake and open it.
2 – Drag your video onto the window, or click File and pick it.
3 – Click the Video tab in the middle of the window.
4 – Under Framerate (FPS), select Constant Framerate. It’s a pair of radio buttons just below the frame rate dropdown.
5 – Leave the frame rate dropdown on Same as source.
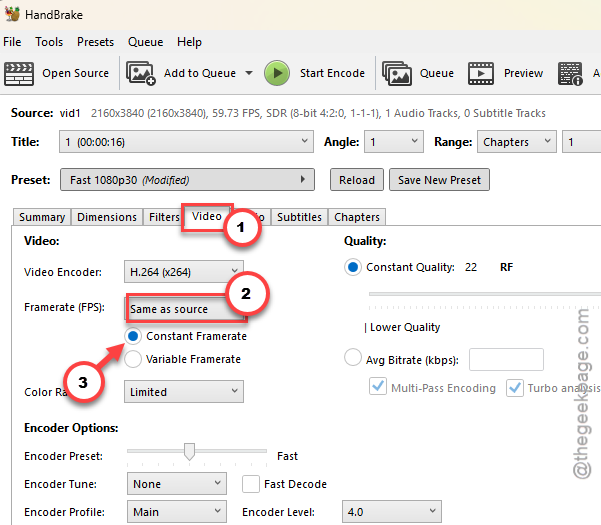
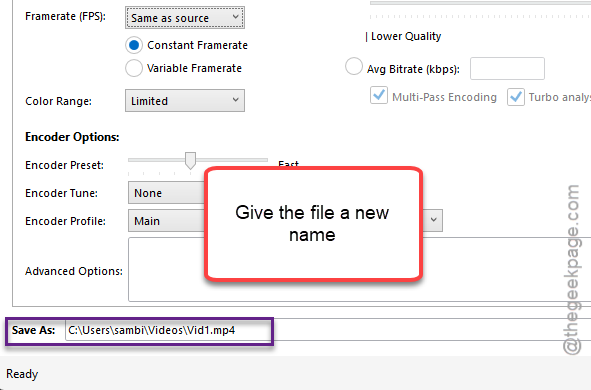
6 – Check the Save As box at the bottom and give the file a new name.
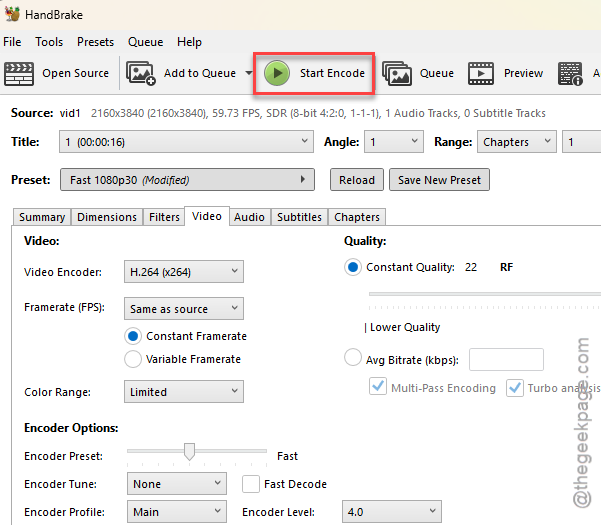
7 – Click Start Encode at the top. A progress bar runs along the bottom, and a 40-minute clip takes maybe ten minutes on a decent PC.
Import the result. Full length, every time, in my experience.
Fix 4 – Convert It in Adobe Media Encoder
Already have Media Encoder installed with Premiere? Then you don’t need any extra downloads. It reads the file more forgivingly than Premiere does and writes out a clean new one.
1 – Open Adobe Media Encoder from the Creative Cloud app.
2 – Then, click the + button in the Queue panel on the right. Then, choose your video.
3 – In the Format column, choose H.264 for a small file, or QuickTime with a ProRes preset if you want the best quality for editing.
4 – Click the blue output name to choose where the new file goes.
5 – Click the green Start Queue button in the top right corner.
You must wait for the checkmark next to the job. Then, you can import the new file into Premiere.
Fix 5 – Split the Video and Audio With ffmpeg
Last one, for the stubborn files. Sometimes the audio track is what’s confusing Premiere, not the video. Splitting them into two files lets Premiere read each on its own, and you line them up in the timeline. ffmpeg is a command-line tool, so this one involves typing. But only two lines.
1 – At first, download ffmpeg Then, unzip it into a folder.
2 – Next, copy the ffmpeg.exe into your video folder.
3 – Open that folder in File Explorer, click the address bar, type cmd, and press Enter. A Command Prompt opens already pointed at the folder.
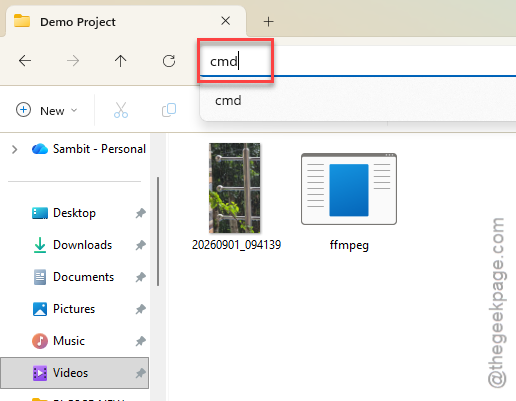
4 – Type this code, and press Enter, swapping input.mp4 for your file’s name.
ffmpeg -i input.mp4 -an -c:v copy video.mp4
5 – Then, execute this code:
ffmpeg -i input.mp4 -vn -c:a copy audio.m4a
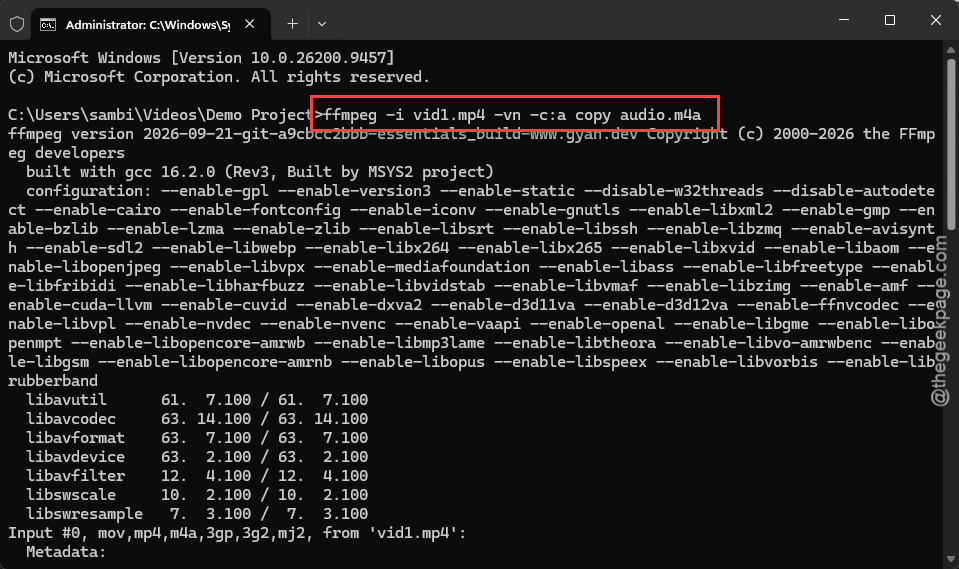
6 – Import both new files into your project bin.
7 – Drag video.mp4 onto the timeline, then drag audio.m4a underneath it so they start at the same frame.
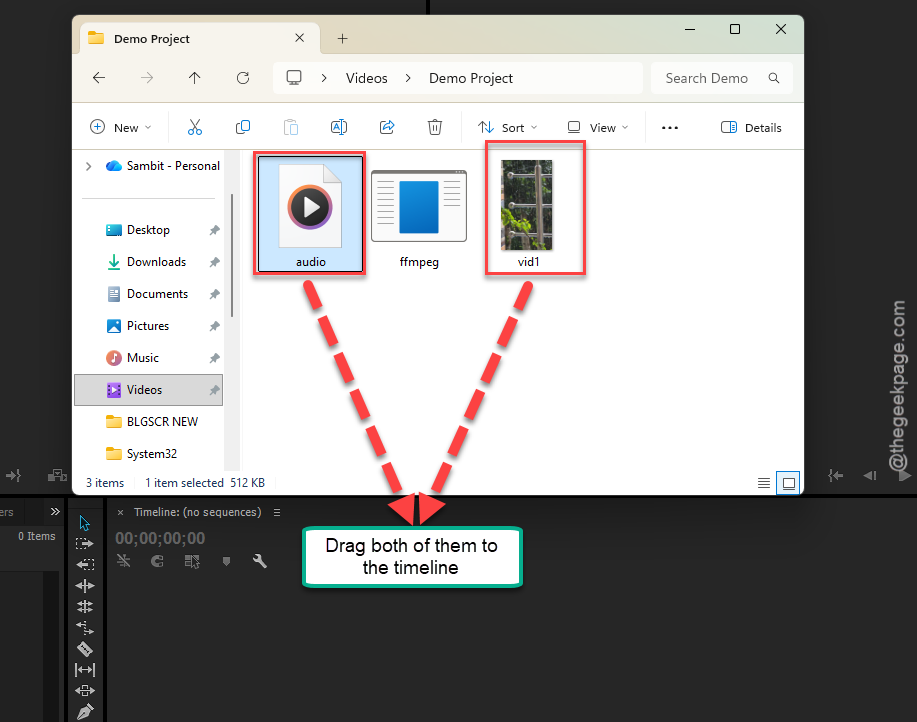
Both commands copy the streams without re-encoding, so they finish in seconds. If Premiere still shortens video.mp4, run that file through Fix 3 as well.
Keep It From Coming Back
- Record at a constant frame rate whenever you can. In OBS, that’s a single setting under Output. But phones and screen recorders often can’t, so plan on a rewrap for those clips.
- Rewrap phone and screen recordings before they ever touch Premiere. Thirty seconds in Shutter Encoder. Saves you the mystery later.
- Clear the media cache once a month or so (Edit, Preferences, Media Cache). It grows huge and holds onto bad reads.
People Also Ask
Why does Premiere Pro only import part of my video?
The file’s header says it’s shorter than it really is, and Premiere believes the header. This is common with variable frame rate clips from phones, OBS, and game capture. Clear the media cache and rename the file first. If it’s still short, rewrap it in Shutter Encoder or re-encode it in HandBrake at a constant frame rate.
How do I fix variable frame rate video for Premiere Pro?
Convert it to a constant frame rate before importing. Shutter Encoder’s Rewrap function is faster and lossless, and often enough on its own. And in the future, set your recorder to a constant frame rate if it has the option.