How To Start A Picture Slideshow In Windows 10 With Windows Explorer:- The next time you have to show your family the recent pictures from your college, don’t search for external applications. You can do it all right from your Windows explorer without the help of any of the external applications. There is an inbuilt slideshow feature in Windows explorer using which you can easily start slideshows in Windows and for that, here’s what you need to do:
STEP 1
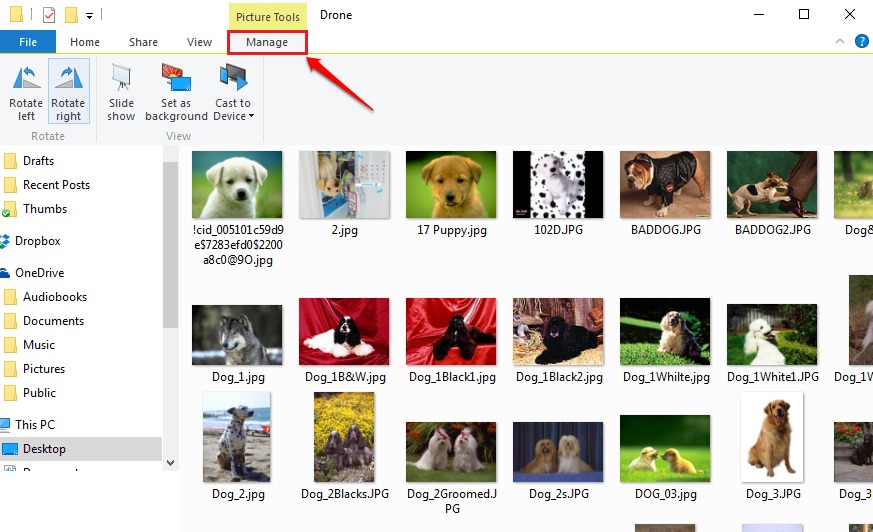
- In Windows 10, the folders which contain images have an extra option called Picture Tools right above the manage tab. Click on the tab named Manage to view the different set of options available to manage your images.
- Note: – If manage option is not there , just select all or few images, it will appear.
STEP 2
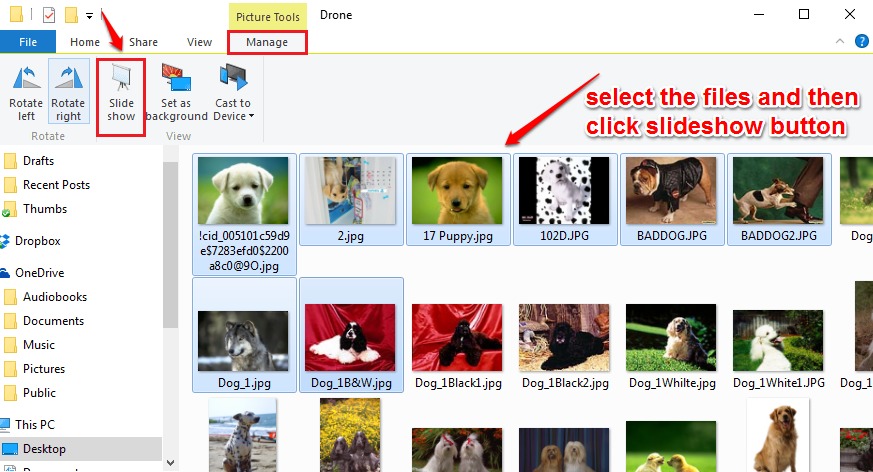
- Under the Manage tab, you will be able to see a number of options to manage your pictures. You can select an image or set of images and rotate them left or right using the Rotate Left and Rotate Right options respectively. To start a slideshow, select the images that you want to be in the slideshow and hit the Slideshow button as shown in the following screenshot.
STEP 3
- Once the slideshow starts rolling out, you can control its speed by right clicking anywhere. There are 3 options to control the speed of the slideshow. They are Slow, Medium and fast. There are options to Shuffle or Loop the images in the slideshow. If you want to stop the slideshow, you can hit the Exit option.
Do not run after external applications to set up a slideshow in Windows anymore. Try out these steps today itself. If you have any suggestions or doubts, please leave out comments such that we can get back to you. Thank you for reading.


