Recycle bin is the folder which contains all the files or anything that gets deleted by the user temporarily. Unless it is permanently deleted, all the deleted files / folders remains in the recycle bin for a specific number of days and after which it gets permanently deleted. But if you want to recover the deleted files / folders back, then you can get it back from recycle bin. In this article, we are going to show you how to open recycle bin in Windows 11 in many ways.
Method 1: Using Run dialog box
Step 1: Open Run dialog box
Press Windows + R keys together on your keyboard.
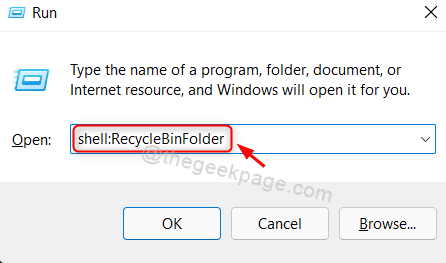
Step 2: Then, Type shell:RecycleBinFolder and hit Enter key.

This will open the Recycle bin on your system.
Method 2: From Recycle bin icon on Desktop
Step 1: Go to Desktop
Press Win + D keys together on your keyboard.
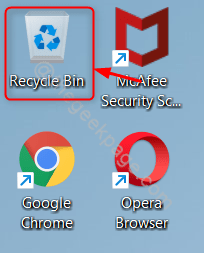
Step 2: Locate the Recycle bin on the Desktop.
Double click on recycle bin.

Recycle bin will be then launched on your system.
NOTE:- If the Recycle Bin icon is missing on your desktop, then kindly follow these steps below.
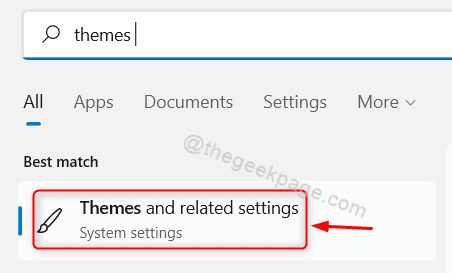
1) Press Win key on your keyboard and type themes and related settings.
2) Then, Select the Themes and related settings from the search results.

3) In the Themes page, Click on Desktop icon settings as shown.

4) In the Desktop Icon Settings window,
Click on Recycle bin checkbox as shown below. Make sure it is checked.
Then, Click on Apply and OK to make changes.

Now you can find Recycle bin icon on the desktop of your system.
Method 3: Using Command line tool
Step 1: Open any command line tool such as Command Prompt or PowerShell
Press Win + R keys together on your keyboard.
Type cmd and hit Enter key.

Step 2: In the Command Prompt
Type start shell:RecycleBinFolder and hit Enter key.

This will open up the Recycle bin folder on your system and this above command works in PowerShell application also.
Method 4: From File Explorer
Step 1: Open File Explorer
Press Win + E keys together on your keyboard.
Step 2: In the File explorer
In the address bar, just before Quick access there is a dropdown arrow icon.
Please click on it and select Recycle Bin from the dropdown list as shown in the below screenshot.

Recycle bin folder will show up on your laptop.
Method 5: Pin to Start menu
Step 1: Go to Desktop
Press Win + D keys together on your keyboard.
Step 2: Right click on the Recycle Bin icon.
Select Pin to start from the context menu.

Step 3: Press Windows key on your keyboard.
Scroll the Pinned apps in the start menu window.
You will find Recycle Bin icon in the Pinned apps section as shown below.

This method is also useful to open Recycle Bin folder on your system.
Method 6: Using Keyboard Shortcut
Step 1: Go to Desktop
Press Win + D keys together on your keyboard.
Then, Right click on the Desktop and select New > Shortcut from the context menu.

Step 2: In the Shortcut window
Type %SystemRoot%\explorer.exe shell:RecycleBinFolder in the location of the item field.
Then, Click Next to proceed.

Step 3: Then, give the shortcut an appropriate name like RecycleBinShortcut.
Once done, Click Finish.

Step 4: After the RecycleBinShortcut icon appears on the Desktop
Right Click on it and select Properties from the context menu as shown below.
NOTE: You can press ALT + ENTER keys together after clicking on RecycleBinShortcut icon to open the properties window.

Step 5: In the Properties window
Click on Shortcut key field and press any letter key on your keyboard to set the shortcut.
It will automatically append the CTRL + ALT to the letter key you pressed.
Then, Click Apply and OK to make changes.

So to open the recycle bin folder, you just need to press CTRL + ALT + R keys together on your keyboard.
NOTE:- You can set any letter key for shortcut to open recycle bin.
Method 7: Add Recycle Bin to ‘This PC’ using Registry Editor
Step 1: Open Registry Editor
Press Win + R keys together on your keyboard.
Type regedit and hit Enter key.
Then, Press Yes on the UAC prompt window to continue.

Step 2: In the Registry Editor
Copy and Paste the below path in the address bar and hit Enter key.
HKEY_LOCAL_MACHINE\SOFTWARE\Microsoft\Windows\CurrentVersion\Explorer\MyComputer\NameSpace
Right Click on the Namespace registry and select New > Key from the context menu.

Step 3: Then, Rename the newly created key to {645FF040-5081-101B-9F08-00AA002F954E} and hit Enter key.

Step 4: Open File Explorer
Press Win + E keys together on your keyboard.
Then, Click on This PC in the left pane of the window.
You will notice that Recycle Bin icon has appeared before C: drive as shown below.

That’s all guys.
Hope you found this article helpful and informative.
Please leave us comments below if you have any queries.
Thank you for reading!