If you have noticed that 3D viewer application is missing after upgrading your operating system to Windows 11, then it is probably because Microsoft has removed some of the applications while launching windows 11. You can get it back on your system by installing it from the Microsoft Store which is free of cost for all the licensed Windows OS users. Make sure you have enough space in your system and keep your system up-to-date. Let us see how to install 3D Viewer in Windows 11.
How to Install 3D Viewer in Windows 11 via Microsoft Store
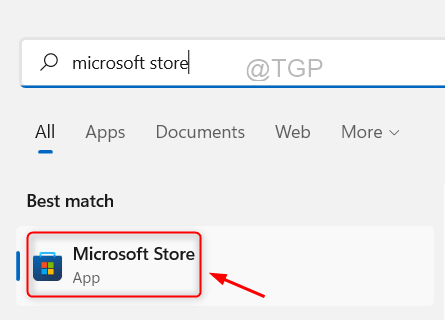
Step 1: Open the Microsoft Store application.
Press Win Key on your keyboard and type microsoft store.
Hit Enter key.

Step 2: Go to Search bar and Type 3D viewer in it.
Then, Select 3D Viewer app from the search results as shown below.

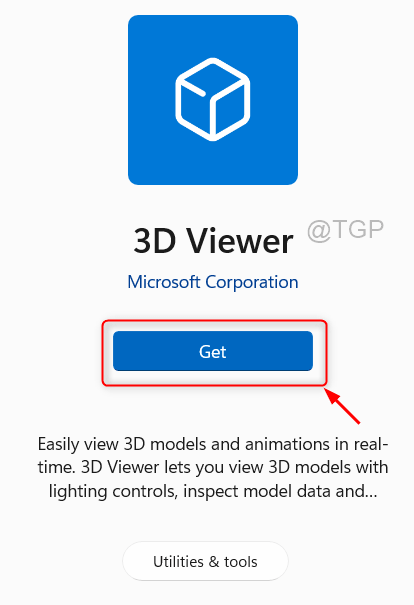
Step 4: Next, Click on Get button for the 3D Viewer application.

Step 5: After you click Get button, please perform the on-screen prompts for installation process to complete.
This way you can install 3D Viewer from Microsoft Store easily.
How to re-register 3D Viewer in Windows 11 via Command Prompt
Many windows 11 users have reported the issue of of not being able to open the 3D Viewer app properly. So it is always better to re-register the application and it can be effectively done using command prompt explained in the following steps.
Step 1: To open command prompt as admin, press win key on your keyboard.
Type cmd and right-click on Command Prompt.
Then, click on Run as administrator from the context menu.

Step 2: After the command prompt opens, Type the below command.
PowerShell -ExecutionPolicy Unrestricted -Command "& {$manifest = (Get-AppxPackage *Microsoft3DViewer*).InstallLocation + '\AppxManifest.xml' ; Add-AppxPackage -DisableDevelopmentMode -Register $manifest}
Hit the Enter key on your keyboard.

Step 3: Now, you can close the command prompt window by typing exit and pressing Enter Key.
These steps allows you to re-register the 3D viewer application from the Microsoft Store using Command prompt script.
How to Repair / Reset the 3D Viewer application in Windows 11
Step 1: Press Win Key on your keyboard and type 3D Viewer.
Then, Right-Click on the 3D Viewer application.
Click on App settings from the context menu.

Step 2: After the App settings page opens
Scroll down the page till Reset section below.
Then, Either Click Repair if the app is not working and data is not deleted OR Click Reset button to completely reset the application where data gets deleted.

Step 3: Please follow the on-screen instructions if any to complete the process.
Hope this article was informative and helpful. Please leave us comments if any clarification needed.
Thank you for reading!