Many Android users have been facing the Couldn’t refresh feed Instagram error recently. There are many reasons why this error could be happening and we have covered all of them and their respective solutions in the sections below. But before heading on, we would suggest that you restart your device once and check if that fixes the issue, as a simple restart has fixed the issue for many users.
So, without wasting time anymore, please try out the solutions below one by one, and after trying each solution, try restarting your device and check if your issue is fixed. Hope you enjoy reading!
Solution 1: Check Whether Instagram Servers are Up and Running
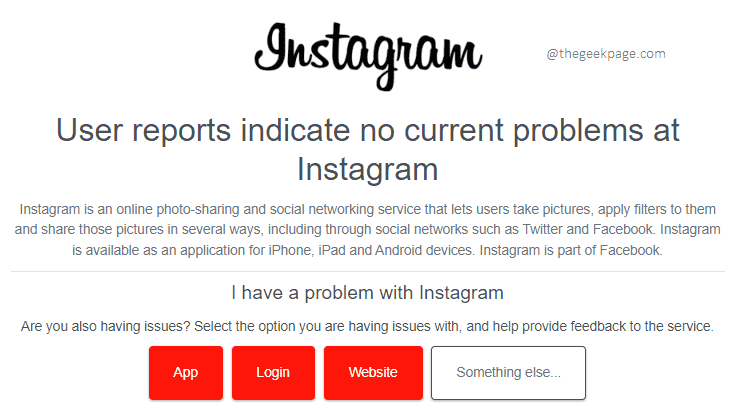
The very first thing you should make sure of, is that the Instagram servers are up and running. If the Instagram servers are down, no matter how hard you try, your issue will not be resolved, as the issue would be server-side in that case.
You can check whether Instagram servers are up or not, using popular website down detectors. Downdetector is one such example. You can straight away click here to view the current running status of Instagram servers.
If the servers are currently down, you have no option but to wait for some time before you try again. Else if the servers are up, please go ahead and try out the solutions listed below one by one.
Solution 2: Check Whether your Network Connection is Stable
Instagram will not be able to refresh the feed if your network connection is slow or unstable. So, if you are connected to the Internet via cellular data, try switching to a WiFi connection. If you are already connected to a WiFi network, then try switching to a different one. Once you have changed your network connection, try checking whether your issue is resolved or not.
Solution 3: Logout of Instagram and Login Back
A simple logout and login do the trick at times. Let’s see how.
Step 1: Launch the Instagram application.
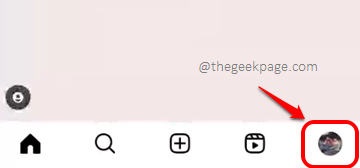
Step 2: When the app launches open, click on the profile icon located at the lower right corner of the screen.
Step 3: Now click on the 3 horizontal lines icon located at the upper right corner of the screen to see the More Options menu.
Step 4: Then click on the Settings option.
Step 5: At the very end of the list, click on the Log out option.
When you launch the application again, you will be asked to enter your login credentials. Log in and check if your issue is resolved.
Solution 4: Set Correct Date and Time
Allowing your device to set its time automatically using the network-provided date and time has readily fixed the issue for many users. Let’s see how it can be done.
Step 1: Launch the Settings application. You can do it by pulling down your notifications panel and then by clicking on the Gear icon at the top right part of the screen.
From the list of settings options available, click on the General management option. You can alternatively use the Search bar at the top of the screen to search for the date and time settings.
Step 2: On the General management screen, click on the Date and time option.
Step 3: As next, turn on the toggle button against the option Automatic date and time. That’s it. Restart your device, launch Instagram, and check if the Couldn’t refresh feed issue is resolved or not.
Solution 5: Update Instagram Application
Sometimes the issue can be caused because Instagram is missing some important updates. So let’s update your Instagram to the latest version available.
Step 1: Open the apps drawer and launch the Play Store application.
Step 2: Search for the Instagram application and click on the app from the search results.
Step 3: If there are any pending updates to be downloaded and installed, you will see the Update button as shown below. Click on it to get the updates installed.
Once the updates are installed, try launching Instagram and check if your issue is gone.
Solution 6: Clear Instagram Application Data and Cache
Another reason why Instagram might not be able to show you feeds is because of the cache that got built up. So, let’s try clearing off your Instagram application data and cache now.
Step 1: Open the apps drawer, locate and long-press on the Instagram application icon.
From the tiny popup, hit the App info option.
Step 2: Click on the Storage option next.
Step 3: Now at the bottom part of the screen, click on the Clear data and Clear cache buttons respectively to clear off your application data and cache respectively,
Once the app data and cache are cleared off, you can try logging in. You will have to enter the login credentials again as the application data is cleared. Check if your issue is now resolved.
Solution 7: Try Connecting through a VPN Network
Some users have reported that simply connecting to the Internet through a VPN network has solved the issue for them. So, let’s try that out in the steps below.
Step 1: Launch the Play Store application from the apps drawer.
Step 2: Search for the application turbo vpn using the search bar at the top and click on the Install button against the Turbo VPN application.
Note: You can use other VPN applications as well.
Step 3: Once the application is installed, hit the Open button to launch the app.
Step 4: You will be asked to agree to the terms and conditions of the application. Hit the Agree & Continue button to proceed.
Step 5: Next, you need to hit the Connect button to connect to the Internet through a VPN.
Step 6: When the following Connection request window pops open, hit the OK button to proceed.
Step 7: That’s it. You will now get the following window, indicating that you are connected to the Internet through a VPN. Try launching Instagram and check if your issue is resolved.
Solution 8: Allow Background Data Usage
You can try this solution if you are connected to the Internet using a cellular data connection. If you are connected via WiFi, this method wouldn’t make a difference.
Step 1: Long press on the Instagram application icon and click on the App info button at the top.
Step 2: As next, click on the Mobile data option.
Step 3: Now, make sure the toggle button against the option Allow background data usage is turned to ON state.
Restart your device and launch Instagram. Check if the feed is now fine or not.
Solution 9: Reset Access Point Names to Default
Step 1: Launch the Settings application.
Step 2: From the Settings options, click on the Connections option.
Step 3: From the Connection settings, hit the Mobile networks option.
Step 4: As next, click on the Access Point Names option.
Step 5: Then click on the 3 vertical dots option located at the top right corner of the screen.
Step 6: Hit the Reset to default option now to reset your Access Point Names to their defaults.
Before checking for the Instagram feed issue again, make sure to restart your device.
Solution 10: Make Sure Network Mode is Correct
If you are connected to the Internet via cellular data and have chosen the network mode as 5g, and you are in an area that supports only till 4g, then definitely you will have issues connecting to the Internet. So let’s try changing your network mode in this solution.
Step 1: Pull down the notifications panel and hit the Gear icon to launch the Settings application.
Step 2: Click on the Connections option next.
Step 3: Then click on the Mobile networks option.
Step 4: Click on the Network mode option next. If there are 2 SIM cards, you will have the option to change the network modes of them both.
Step 5: Try selecting a different network mode than the one already selected.
That’s it. Restart the device and your issue should be resolved.
Solution 11: Reinstall Instagram Application
As one of the final solutions, let’s try uninstalling and installing your Instagram application in this solution.
Step 1: To get to the App info screen of the application, long press on the application icon and click on the App info button as shown below.
Step 2: At the bottom part of the screen, hit the Force stop button.
Step 3: When the following Force stop confirmation window pops open, hit the OK button to proceed.
Step 4: Now go ahead and hit the Uninstall button to uninstall the application.
Step 5: Hit the OK button to confirm the uninstall operation.
Step 6: To install the application again, launch Play Store from the apps drawer.
Step 7: Search for the Instagram application and hit the Install button against the search result.
Step 8: Once the application is installed, hit the Open button to launch the app.
Step 9: Login using the credentials or using your Facebook account.
Once logged in, your feed issue should be long gone.
Solution 12: Leave Instagram Beta Program
Beta program seats are precious. You get to experience all the latest features of an application/software through its beta program. However, because the beta releases are not completely tested, the chances of errors in these versions are alarmingly high. So, if no other solution worked for you and you are a beta tester of Instagram, we suggest that you leave Instagram’s beta program and check if that resolves your issue.
Note: Please remember that beta program seats fill up pretty fast. So if you leave the beta program once, it might be difficult for you to get back in.
Step 1: Launch the Play Store application.
Step 2: Search for Instagram using the search bar and click on the Instagram app as shown below.
Step 3: Scroll down and find the section named You’re a beta tester. Hit the Leave button to leave the program. That’s it. Launch Instagram and check if your feed is refreshing fine now.
Note: The You’re a beta tester section would be visible to you only if you are a beta tester of the application.
Note: Based on your phone’s model and version, the steps and the screenshots used in the article might slightly vary. However, the configurations would all be present in your device, under different names.
Please tell us in the comments section which method did the trick for you. Stay tuned for more and more useful tricks, tips, how-tos, solutions, and hacks!


