With the launch of Windows 11 came some new features, whole lot of design changes and some interesting ways to customize the overall look and feel of the OS. One of the customization option includes how you can increase or decrease the fox size in Windows 11. While there is a dominant way to customize the font size, you can also make changes to the Display by scaling the size of the text, apps and other items as per your convenience.
From the position of the Windows Start button, the menu layout, changes to the Taskbar, Focus Assist, design of the Settings to some small changes of the look and feel of the display, there have been quite a few significant changes that is attracting the Windows 10 users. So, today, in this post, we will discuss how to increase or decrease the font font size on your Windows 11.
Method 1: Through the Accessibility Settings
This method will help you to change only the text size of your system. Let’s see how to increase or decrease the font size of your Windows 11 PC through Accessibility settings:
Step 1: Press the Win + I keys together on your keyboard to open the Settings app.
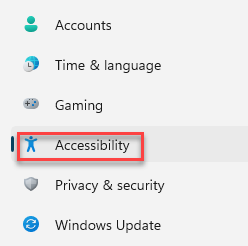
Step 2: In the Settings window, click on Accessibility on the left.

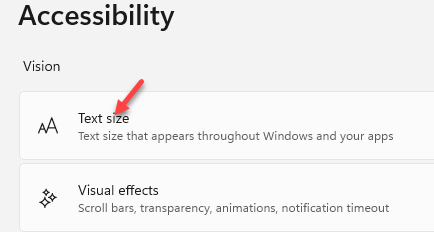
Step 3: Now, on the right side of the pane, click on the Text size option.

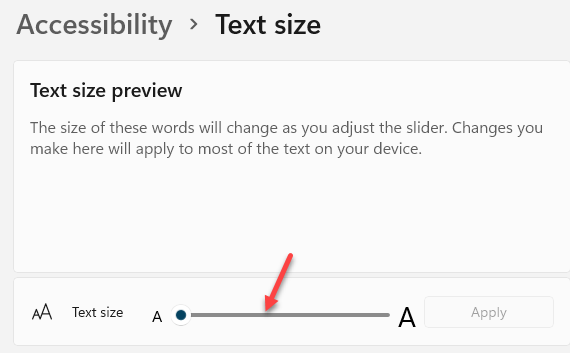
Step 4: Next, in the Text size preview section on the right, go to Text size and move the slider to the right to increase the Font size and move to the left to decrease the font size.

This is the direct way to increase or decrease the text size on your Windows 11 PC.
Method 2: Through System Display Settings
This method helps you to change the size if UI elements that includes the adjusting the size of the apps, text and even other items. This will help apply the changes for the overall Windows OS UI. Follow the below instruction to adjust the size of the text for the entire Windows UI:
Step 1: Right-click on the Start icon (center of the Taskbar) and select Settings from the context menu.

Step 2: In the Settings window, click on System on the left.

Step 3: Now, go to the right side of the Window and select Display.

Step 4: Navigate to the right side, scroll down and under the Scale & layout section, go to Scale (change the size of text, apps and other icons).
Here, click on the drop down and select 125%.

This will change the size of the apps, icons, text and other items for the entire UI.