While printing a PowerPoint presentation directly on your printer, you may have noticed an anomaly of fonts in the printed version of the presentation. This problem has happened to many users and quite common. You will be glad to know that there are some quick resolutions that may get the desired font in the printed presentation output.
Fix 1 – Convert the presentation to pdf
The fonts and style in the presentation can become messy if you try to print the presentation directly. Just convert the presentation into a pdf and retry.
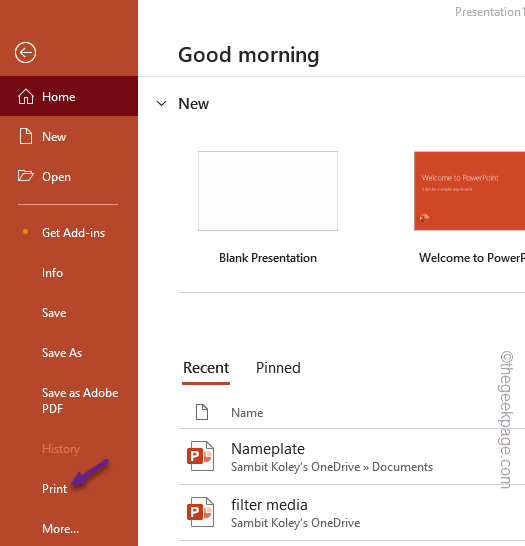
Step 1 – It is very simple. Just go to the “File” while you are in the Microsoft PowerPoint.
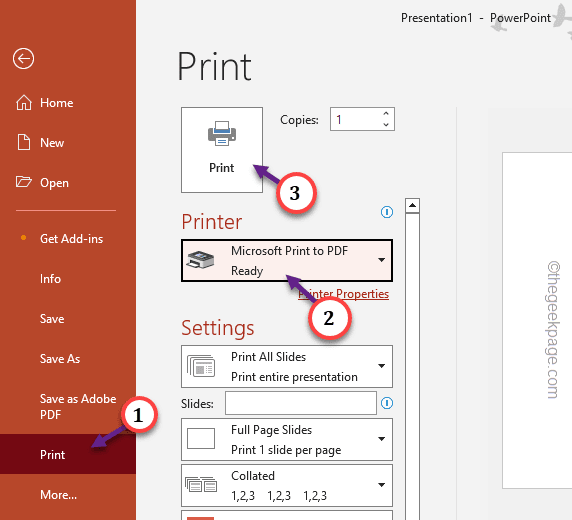
Step 2 – Next, tap the “Print” option on the left ribbon.
Step 3 – Now, set the ‘Printer’ and choose the “Microsoft Print to PDF” option to select that printer.
Step 4 – Finally, click the “Print” option to start the printing operation.
This way, you will get the printable presentation in the pdf format.
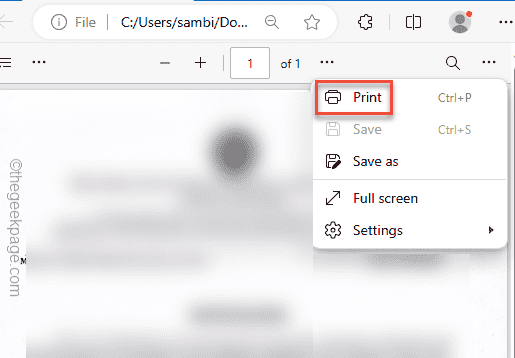
Step 5 – Open the pdf that you have just created and tap the “Print” option from the context to start the printing process.
Step 6 – Now, just select the appropriate printer and print the pdf file directly.
There won’t be any more fonts error in the printed copy.
Fix 2 – Use Embed fonts option
Before printing the presentation file, make sure the embed fonts are enabled.
Step 1 – On the PowerPoint presentation you are working on, tap the “File” button.
Step 2 – Then, go to the “Options“.
Step 3 – In the PowerPoint Options page, go to the “Save” pane.
Step 4 – Navigate to the ‘Preserve fidelity when sharing this presentation’ section and tick mark the “Embed fonts in the file” box.
Step 5 – This time, select the “Embed all characters (best for editing by other people)” option.
Step 6 – Finally, tap “OK” to save the embed fonts settings.
Go ahead and print the presentation directly.
This time the printed presentation won’t have any issues with the fonts.
Fix 3 – Use Shapes or text boxes
You can use Shapes or boxes and transpose the text in there to keep them intact. The printer will treat them as objects or shapes instead of texts.
Step 1 – Go to the slide where you have written something.
Step 2 – Select the texts that is not printing correctly. Right-tap the selected text and tap “Cut” or “Copy” on the context menu.
Step 3 – Go ahead and tap the “Insert” option and choose “Shapes“.
Step 3 – Click to select the Text box.
Step 4 – Draw a suitable text box in the slide and paste the copied text there.
Step 5 – Now, right-click the text box and tap “Outline“.
Step 6 – Set that to “No Outline“.
Now, go ahead and print the presentation once more. This time, the text fonts won’t change automatically.
Fix 4 – Use basic fonts for wide support
If you are working with an old office printer, it may not be compatible with the fonts that you have used in the presentation. So, it is better if you stick to the basic fonts (like Times New Roman, Arial) that is supported on all the printers.
This way, the printed output won’t be anything else.


