All of us have a different app preference to open a specific type of file. For example, by default, the .pdf extension is opened with Microsoft Edge in Windows 10. However, one might want to use Acrobat Reader to open the PDF files. Now, let’s say, you have changed the app preference for certain file types and want to retain the same file associations for the new user that you create or for the new build of Windows, changing the file types again might be cumbersome and time-consuming.
Windows provides us a feature to export the current file associations to an XML file and then import it in the new user account or new windows build. In this article let us discuss how to Import and Export the File Associations effectively in Windows 10.
Exporting File Associations
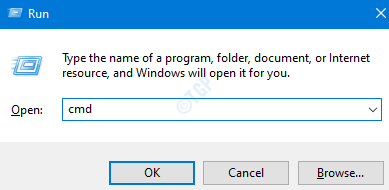
Step 1: Open Run Dialog pressing the Windows logo key and R together.
Step 2: Enter cmd and press the keys Ctrl+Shift+Enter to open the Command Prompt with Admin Rights

Step 3: In the User Access control window that shows up asking for permissions, click on Yes.
Step 4: In the command prompt window that opens, just type the below command and hit Enter
dism /online /Export-DefaultAppAssociations:"<Location Where XML must be Created>\FileAssociations.xml"
For Example, let’s say we want to create the file in the Desktop location, specify the below command, and hit Enter:
dism /online /Export-DefaultAppAssociations:"%UserProfile%\Desktop\FileAssociations.xml"

Importing File Associations
Step 1: Open the new user account or Windows 10 build where you want to import the file associations.
Step 2: Open the Command Prompt with Admin rights(Refer Steps 1,2 and 3 from Exporting File Associations section)
Step 3: In the command prompt window that opens, just type the below command and hit Enter
dism /online /Import-DefaultAppAssociations:"<Location Where XML is stored>\FileAssociations.xml"
Let’s say we have created the File Associations XML on desktop, while importing, we have to revoke the file from the desktop itself. Following command can be used:
dism /online /Import-DefaultAppAssociations:"%UserProfile%\Desktop\FileAssociations.xml"

Restoring to Default File Associations
After importing the File Associations, if you want to revert back to the default file associations, then do the following:
Step 1: Open the Command Prompt with Admin rights(Refer Steps 1,2 and 3 from Exporting File Associations section)
Step 2: Run the below command and hit Enter
Dism.exe /Online /Remove-DefaultAppAssociations
That’s All. We hope this helps.
Kindy comment ad let us know in case you find this article useful.
Thank you for Reading