Kiosk Mode allows Google Chrome users to utilize a single window of their computer. Simply, it blocks the user’s access to any other part of the computer. If you want to set up kiosk mode in Google Chrome, here is our full guide on how to do it on your computer.
Set up Kiosk Mode in Google Chrome Browser
To set up Kiosk Mode in Google Chrome, follow these steps-
1. Open the Google Chrome window on your computer.
2. Now, click on the User account icon on the upper left corner of the Chrome window, and then click on “Add“.

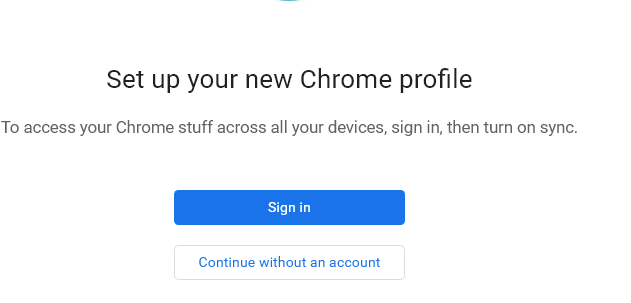
3. You can click on continue without an account.

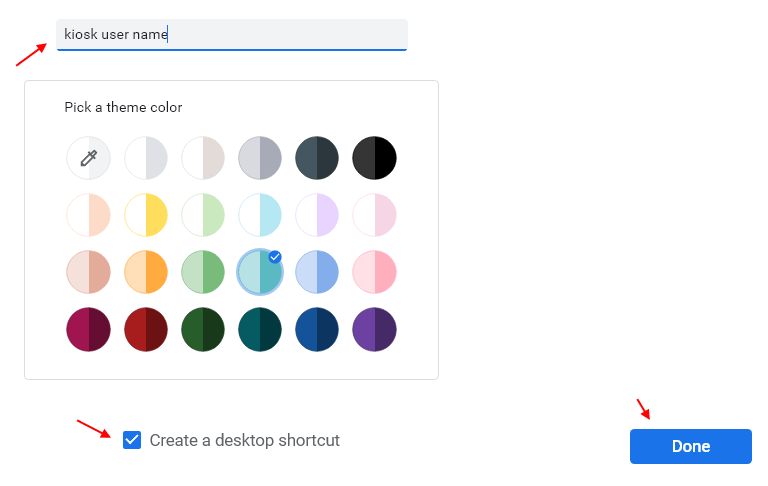
4. In this window, under ‘Add person‘ give a name to the account. Now, select any icon of your choice for the account.
5. Make sure, “Create a desktop shortcut for this user” option is checked. Finally, click on “done” at the bottom right corner of the window, to complete the process.

5. A new Chrome browser window will be opened for the guest account. Close all Google Chrome windows which are already opened on your computer.
6. Now, go to the desktop and then right-click on the new chrome shortcut and then click on “Properties“.

7. In the Properties window, go to the “Shortcut” tab, then add –kiosk at the end of ‘Target‘.

8. Finally, click on “Apply” and “OK” to save the changes on your computer.
9. Now, click on this shortcut again to open chrome in kiosk mode.
Note: – To get out of Kiosk mode , just press Alt+ tab keys together from your keyboard and then close the chrome from right clicking on taskbar chrome icon.