How to Reinstall Microsoft XPS Document Writer in Windows 10 / 11

If you have accidentally removed Microsoft XPS document writer from your computer or XPS Document writer is missing in windows 10, then this article is here to help you reinstall Microsoft XPS Document writer on your windows 10 Computer. Most of the users using quickbooks are also facing this problem as they are not able to save the document as pdf due to absence of microsoft xps viewer.

Solution 1 – Via Apps and Features

1. Press Windows key + R together to Open RUN.

2. Now, write optionalfeatures in it and click OK.
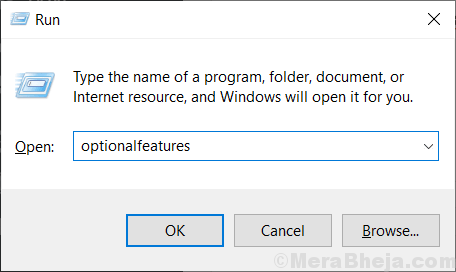
 

Optional Features Min


3. Now, make sure that Microsoft XPS Document writer is checked. If not then check it.
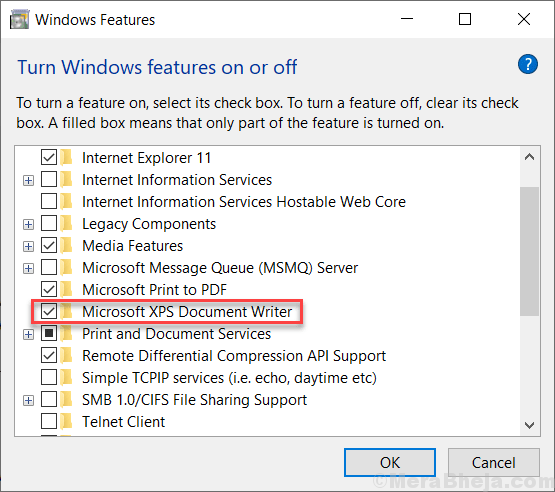
 

Microsoft Document Writer Min


4. Now, Click on start button and then gear shaped icon to open settings.
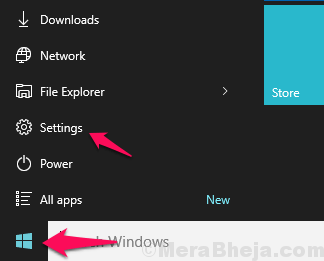
 

Settings Default


5. Click on Apps

6. Click on Apps & Features from the left menu.

7. Click on Manage Optional Features


Manage Optional Features Min


8. Click on Add a Feature


Add Feature Min


9. Locate XPS viewer from the list and install it

Xps Viewer Min

For Windows 11 users

1 – Search Optional Features in Search Box of Windows 11 PC and then click on search result.

Optional Features 1 Min

2 – Now, Click on View Features

View Features 1 Min


3 – Search XPS Viewer in the search box and select the check box to the right of the search result which appears.

4- Click on Next and add the XPS viewer to your Windows 11 PC.

Xps Viewer 1 Min

Solution 2 – Via Control panel

1. Download Windows 7 XPS document writer drivers files from here

2. Extract / Unzip it.

3. Copy and paste this extracted folder to C:\Windows\System32

4. Press Windows key + r together to Open run command box.

5. Write Control.exe Printers in it and click OK.


Control Exe Printer Run Min


6. Now, right click on Microsoft XPS document writer and choose remove device.


Remove Microsoft Xps Document Writer Min

7. Click on Add a Printer.


Add A Printer Min


7. Now, choose a A printer that wasn’t listed


The Printer That I Want Is Not Listed Min


8. Now, select add local printer with manual settings and click on next.


Add Local Printer Network Printer With Manual Settings Min


9. select create a new port with Local port as option.


Create New Port Local Port Min


7. Name XPS as a port name and click OK.

Xps Port Min


8. Now, choose have disk.


Have Dsik Min


9. Now, click browse .


Browse Min


10. select prnms001 file from the extracted folder from step 3 given above.

Prms001 Min

11. Select replace Current drivers and click next.

12. Type a printer name will show up as Microsoft XPS Document Writer.

13. Click next and Finish.


14 thoughts on “How to Reinstall Microsoft XPS Document Writer in Windows 10 / 11”

  1. You are a genius!! After trying a number of suggested fixes the only help I found was that I needed to turn the print spooler off before I could get the XPS document writer option turned on .
    Your Solution 2 fixed my problem and now Quickbooks will create pdf files again.

  2. HEY, THIS WORKED!!…nothing else did, tried a lot of things…ITS SIMPLE
    1. Window+R
    2. Type “optionalfeatures”
    3. Find Microsoft XPS Document Writer (it was there but was not showing in my list of printers)
    4. Uncheck Microsoft XPS Document Writer
    5. Hit OK, let Windows run
    6. Repeat steps 1-3
    7. Check Microsoft XPS Document Writer
    8. Hit OK, let Windows run

  3. Had this issue after an update and quickbooks couldn’t PDF anything. This solution worked and was very clear to follow. Thank you!

  4. Like others, I spent hours trying to get this fixed. I had to signup for support with QB for $90 and they still could not do after 2 hours fix it. It took 10 minutes following your steps.
    Thanks

  5. Karen, you select the file your saved. Microsoft XPS document writer and it will be in that folder.

    This saved the day. Thank you.

  6. I don’t have a Microsoft XPS device to remove. So I went forward but there isn’t a prnms001 options. Any other suggestions?? 3.5 hours on the phone with QB’s yesterday with nothing resolved.

  7. Not being able to Save to PDF for Quickbooks reports has plagued me for a year. You solved it. Thanks very much. I only wonder why Quickbooks has never addressed this issue.

Comments are closed.