Embedding a Word document allows the user to input the Word document directly in the Microsoft Excel file. You can copy-paste data from Word to Excel any time you want. This copy-pasting does let you transfer the data from the document directly to the spreadsheet, but the format of that Word document can get misaligned in the process. So, embedding the Word document directly into the Excel spreadsheet should be your choice.
How to embed a Word document in Microsoft Excel
There are two methods you can use to embed a Word document into your Excel spreadsheet.
Method 1 – Embed the Word document as an object
Step 1 – First, launch Microsoft Excel and load the workbook where you want to input the Word document.
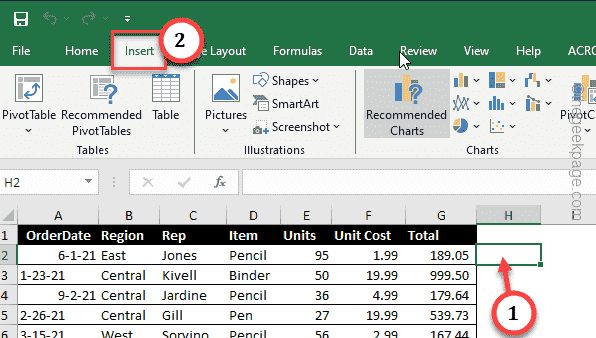
Step 2 – Next, select the cell where you want to embed the document.
Step 3 – Now, go to the “Insert” tab.
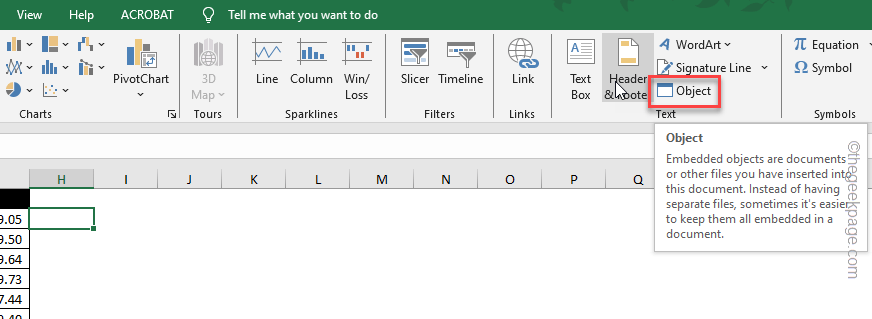
Step 4 – There should be a Text group, tap “Object” there.
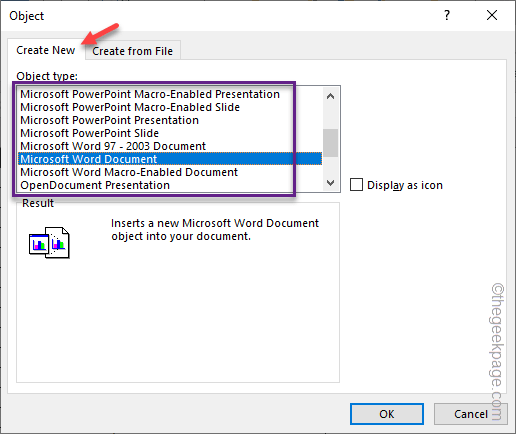
Step 5 – In the Object dialog box, there should be two tabs.
If you want to create a new document, go to the “Create New” tab. There you can choose which document to create from the drop-down list.
Step 6 – Otherwise, go to the “Create from File” tab.
Step 7 – Choose the “Browse” option.
Step 8 – Go ahead through your files and reach the address of the Word document you want to embed.
Step 9 – Later, select the same document and tap “Open“.
Step 10 – Coming back to the Object dialog box, you should see the entire path of the selected Word document.
Step 11 – Finally, tap “OK“.
Now, just wait for a few seconds and you shall see the Word document embedded in the selected Excel cell. You can move it around, and resize that to fit according to your requirements.
This is what the final results look like –
Method 2 – Use a Hyperlink to embed the document
The second method is to use a hyperlink instead of injecting it as an object. These are the steps you should follow –
Step 1 – Load up the spreadsheet in MS Excel.
Step 2 – Once you have done that, select the cell where you want to embed this document.
Step 3 – Now, go to the same “Insert” tab once more.
Step 4 – Tap the “Link” option to insert the hyperlink.
Step 5 – The Insert Hyperlink dialog box opens up. Select the “Existing FIle or Web Page” from the left pane.
Step 6 – Now, use the options to get to the address of the Word document.
Step 7 – Now, get down select the document, and tap “OK” to add the hyperlink.
Step 8 – You will see the Word file hyperlinked in the selected cell.
After this, if you tap the hyperlink, it will open up the document directly.


