A SmartArt is a visual representation of the information in a word document. It includes the use of different structured diagrams & colors which provides specific meaning to the user. With the use of SmartArt feature, we can explain a complex piece of information in a much simpler way.
Also see: – How to insert and Edit Charts in Word 2016
In this article, we’ll follow certain steps on how to insert & use “Smart Art” in Microsoft Word 2016:
Step 1:
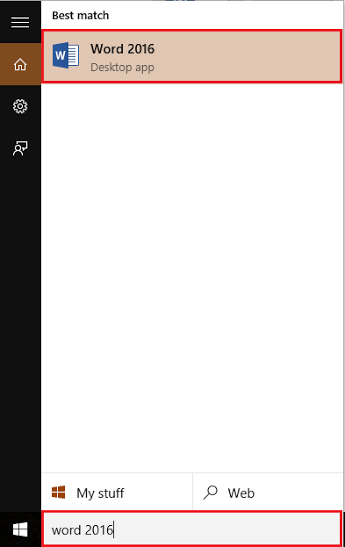
Type “word 2016” in the Windows Search Bar located next to the Start icon. Click on the first option provided.

Step 2:
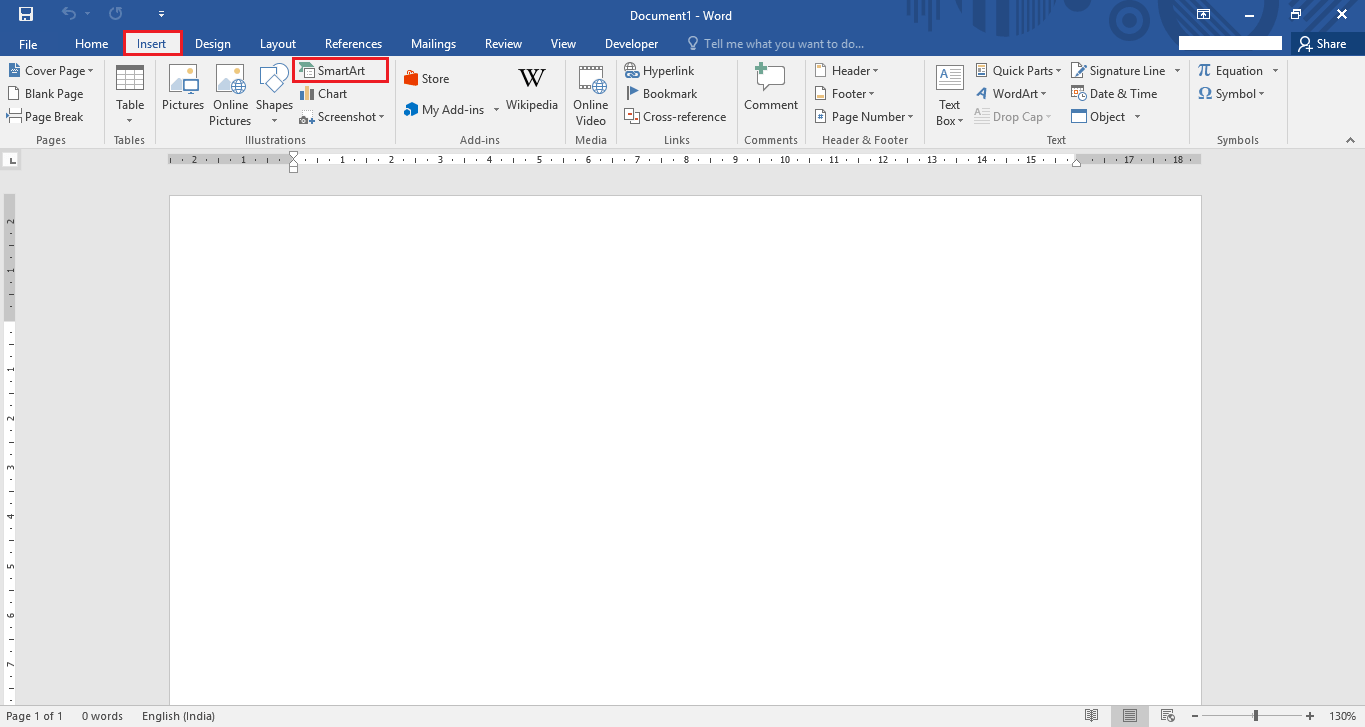
Click on “Insert” tab located at the top left corner of the “Word” window. After clicking, a ribbon toolbar will appear providing numerous options like paging options, tables, illustrations, symbols etc.

In the “illustrations” section, click on “Smart Art”.
Step 3:
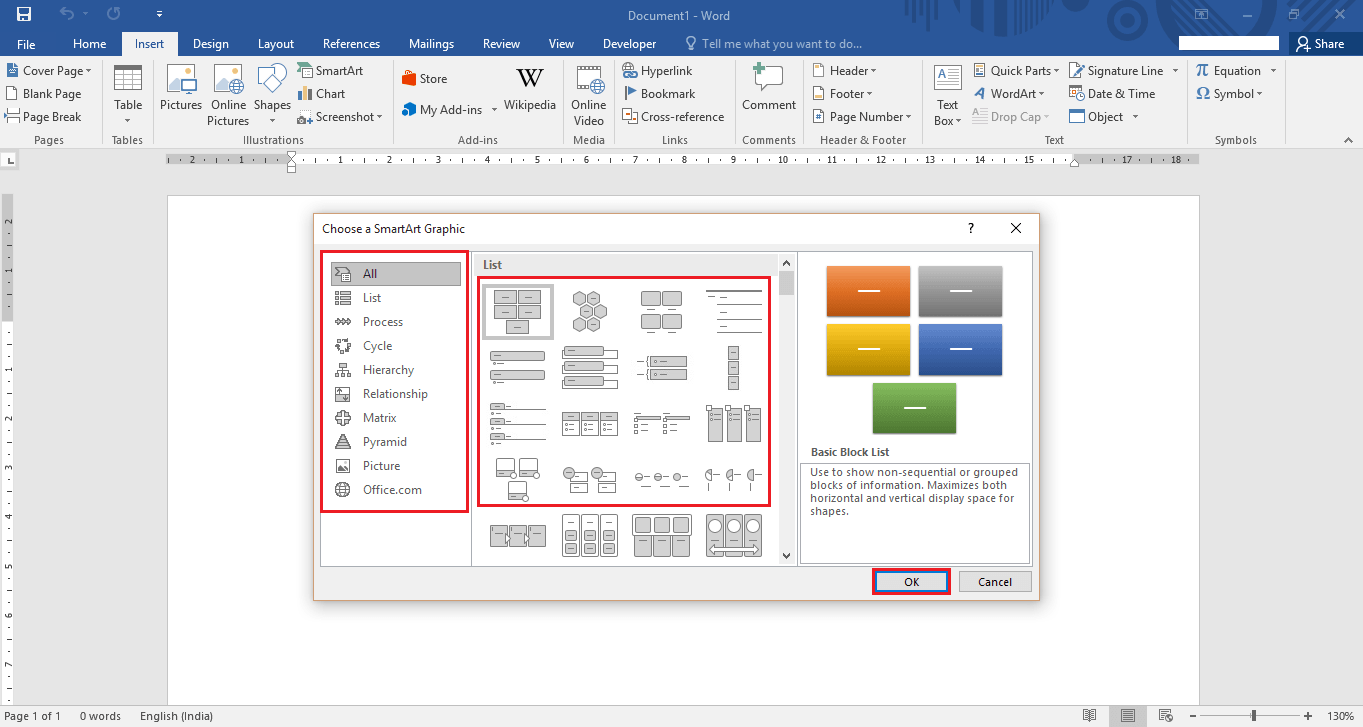
Choose one of the SmartArt Graphics from the left section of the “SmartArt Graphic” window.

You can also select your SmartArt from the “All” List in the right section of the given window.
For instance, we’ve selected a “Basic Process” diagram which shows a progression or sequential steps in a task, process or workflow. To select this, click on “Process” located at the left section of the “SmartArt Graphic” window & select “Basic Process”. Click on “OK” to use this diagram.

Step 4:
Now, type the parameters in the given “Text Pane” window which are used in this workflow.

For instance, we’ve entered the basic process in the development of a software. We have included stages like Basic, Intermediate & Advanced.
Step 5:
If you need to enlarge the size of any of the boxes, click on any of the box and drag the circle icon away from the box to make it appear larger.

Hence, it’ll appear like this:
Step 6:
If you wish to change the color of the boxes, click on “Change colors” and select a suitable color by clicking over it.
For instance, we’ve selected “colourful – accent colors” which has orange, grey & yellow colors respectively.

Step 7:
If you wish to change color of a specific box, right click on the box & click on “Fill”.

Now, select any of the themed colors by manoeuvring your cursor over it. Click on the desired color to change the current color of the box. For instance, we’ve selected blue color from the list of theme colors.

Step 8:
If you wish to change outline of a specific box, right click on the box & click on “outline”. Thus, outline will provide you the list of outline colors and weight of outline colors. The larger the weight will increase the thickness of the outline.

Now, select any of the theme colors by manoeuvring your cursor over it. Click on the desired color to change the current outline color of the box.
For instance, we’ve selected an outline weighting 2¼ pt. having a black themed color.
Step 9:
If you wish to change the style of a specific box, right click on the box & click on “Style”. Style changes the font color as well as the appearance of the theme color in the given box.

Step 10:
If you wish to change the shape of a specific box, right click on the box & click on “Change Shape”. You can select any shape from the list of the given shapes by clicking on the desired shape.

For instance, we’ve selected a “mirror imaged triangle” from the flowchart section.
Now, it’ll appear on the word page as in the given screenshot:

That’s it!