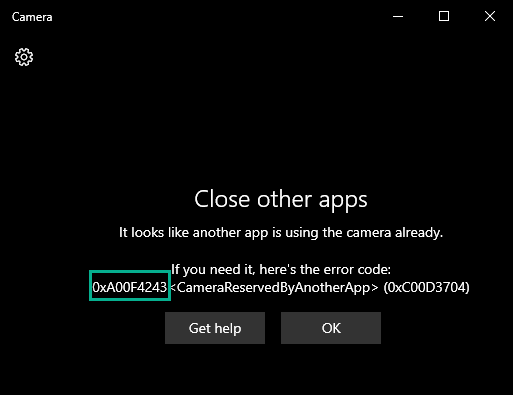
The camera app on Windows shows up the error message “Close other apps. It looks like another app is using the camera already. If you need it, here’s the error code:0xA00F4288<AllCamerasAreReserved>” when you try to open the app while some other apps (like Zoom, Teams) are using it. Besides this reason, there are many reasons that you can blame for this issue. If you are in this situation and looking for a solution, you have just landed in the right place.
Fix 1 – End other camera-related apps
The most apparent reason behind this issue is other camera-related apps denying camera access to the Camera app.
1. You can find all the tasks and processes in the Task Manager.
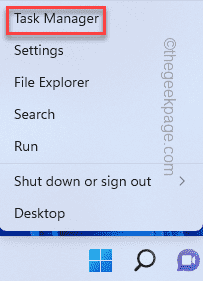
To open that, press the Win key+X keys together and tap “Task Manager“.
2. Once the Task Manager opens up, visit the “Processes” tab.
3. Here, in this list of ‘processes’, look whether you can find any apps that may use the camera.
Like – Any video-conferencing app, Zoom, Teams, Skype for Business, etc, or any imaging softwares.
4. If you come across such a process, select it and click “End task” to kill that app.
5. This way, kill all the camera-related apps one by one.
Don’t forget to scroll through the ‘Background Processes’ thread to check whether any such app is still running.
Once you are done, close the Task Manager app and launch the Camera app.
Fix 2 – Modify the system registry
There is a simple registry trick that has solved the issue for many users.
1. You have to press the Win key and type “regedit“.
2. Then, you see the “Registry Editor” in the search results, and click on it.
Warning – Adding or removing values in the registry editor is a risky procedure and any wrongdoing may lead to a fatal system error. So, before you go through the full process, you should create a new registry backup.
a. Once you have opened the Registry Editor screen up, tap on “File” from the menu bar.
b. You can click on “Export…” to export the current registry data.

Now, you should store this backup in a discrete location.
3. On the left-hand side, go here –
Computer\HKEY_LOCAL_MACHINE\SOFTWARE\Microsoft\Windows Media Foundation\Platform
4. You are going to add a new value.
5. So, on the right-hand side, right-tap on the space and tap “New>” and tap “DWORD (32-bit) Value” to create a new value.
5. Set the name of the value as “EnableFrameServerMode“.
6. Now, just double-tap the item to edit it.
7. Click on the ‘Value data:’ and set it to “1“.
8. Finally, click “OK” to save this change.
Exit the Registry Editor and restart your system. After rebooting the system, open the Camera and check.
Fix 3 – Check the camera permissions
The camera app can show that error code due to the lack of proper permissions.
1. At first, open the Settings app. You have to press the Win key+I keys together.
2. On the left-hand pane, tap the “Privacy & security” tab.
3. Now, on the right-hand side, scroll down and click the “Camera” settings to access it.
4. Now, make sure the ‘Camera access’ is turned “On“.
5. Then, set the ‘Let apps access your camera’ option “On” setting.
6. Next, just toggle the “Camera” app to “Off” and “On” settings.
Now, you may close the Settings page. Then, launch the Camera app and test if this works.
Fix 4 – Repair/ Reset the Camera app
You can repair the Camera app and reset it if needed.
1. You have to right-tap the Windows icon and tap “Apps and Features“.
2. When the Apps and Features page opens up, you will see all the apps on your machine there.
3. Look for the “Camera” app until you find it. Click on the three-dot menu and tap “Advanced options“.
4. If you go down through the right-hand pane, click “Repair” to repair the app.
Wait for Windows to repair the app within a minute. Once it is done, launch the Camera app and check if the issue still persists.
If the issue still persists, come back to the Settings page.
5. This time, tap “Reset” once and click “Reset” to reset the app.
After resetting the app, launch the Camera app and test if this works.
Fix 5 – Revoke all other camera permissions
You can revoke the camera permissions from the apps that you do not directly use as a camera app.
Step 1 Kill the camera-related apps
You have to stop all camera-related apps.
1. Press the Win key+X keys together and tap “Task Manager“.
2. You will find all the processes in the “Processes” tab.
3. Look for any app-related process (any video-conferencing app, Zoom, Teams, etc.) that may use the Camera. Just select it and click “End task” to kill that app.
Once you have ended those apps, close the Task manager.
Step 2 Revoke the permissions
Now, you can revoke camera permission from all the other apps except the Camera app.
1. Open the Settings utility window.
2. Then, tap on the “Privacy & security“.
3. Next, click on the “Camera” to explore it.
4. Now, on the right-hand side, you can find all the apps that have access to the camera.
5. Now, turn this access “Off” for all the apps that you don’t use as a camera app
Make sure that you don’t turn this access for the “Camera” app.
This way, no other unnecessary apps except the Camera will be able to use the camera.
Launch the Camera app using the search box and check if the issue is resolved or not.
Fix 6 – Run the Camera troubleshooter
You can run the camera troubleshooter to check and fix the issue.
1. Open the Settings.
2. Now, click on the first option on the left pane “System“.
3. Next, you can tap the “Troubleshoot“.
4. This will launch the troubleshooter page.
5. On the right-hand side, click on “Other troubleshooters“.
6. On this page, you can find all the troubleshooters.
7. Now, click on the “Camera” troubleshooter. Now, tap “Run” to run the troubleshooter.
The camera troubleshooter will now check and fix any camera-related issues. Once you have done troubleshooting the camera app, test if this works out.
Fix 7 – Uninstall and reinstall the camera driver
Uninstall the camera driver and then, reinstall it. Check if this works for you.
1. Press the ⊞ Win key+R keys together.
2. Then, type in that box and click “OK“.
devmgmt.msc
3. You have to click on the “Camera” device.
4. In that list, when you notice the camera driver, just right-click that and click “Uninstall driver” to uninstall it.
5. You will receive a warning message. Tap “Uninstall” to finish the process.
6. After uninstalling the webcam driver, you can just tap “Action” from the menu bar.
7. Next, click “Scan for hardware changes“.
Now, you should restart the system and Windows will automatically reinstall the driver.
Fix 7 – Update the Camera driver
Update the webcam driver on your system.
1. Pressing the Windows key and the X keys together should bring up the context menu.
2. Just tap “Device Manager” to open it.
3. On the Device Manager page, expand the “Camera” section. Just, expand it to see your camera device.
2. Just, right-tap the camera driver and tap “Update driver“.
3. In the next step, just click on “Search automatically for drivers“.
Close the Device Manager. Launch the Camera app and test again.
If webcam doesn’t update automatically, follow these steps.
1. Launch the Settings window.
2. Now, just click on the “Windows Update” section on the left pane.
3. Just, click on the “Advanced options” menu on the right-hand pane.
4. Now, you will see the camera driver. Just check all the drivers on the page.
5. Next, just tap “Download & install” to install those updates.
Windows will now download and install the latest version of the webcam driver available.
These driver updates should work just fine without a system restart.
Just manually restart the system. Test if this solves your issue.

