One can safely claim that the Settings app is one of the most frequently used applications, when it comes to Windows. For anything and everything, you need to open the Settings app, that too multiple times in a day. There definitely is the Win + I key combination that you can use to open the Settings application. However, not everyone is a fan of too many key presses, nor is anyone equally good at remembering too many key combos.
Well, how about having the Setting app icon right on your Windows start menu from where you can launch the Settings app with just a single key press? In this article, we explain in detail how you can quickly access the Settings application right from your Windows start menu icon. Read on to learn this simple trick to boost your productivity.
Steps to Add the Settings to the Start Menu
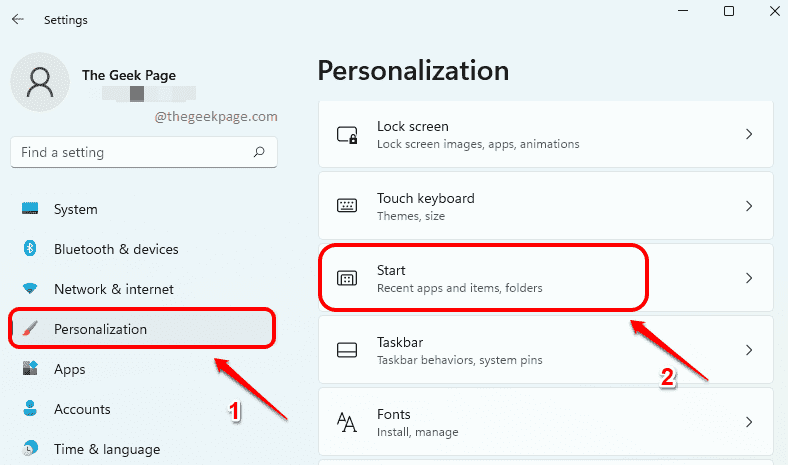
Step 1: Press the WIN + I keys together to open the Settings application.
Once opened, in the left window pane, click on the Personalization tab and in the right window pane, click on the Start tab.
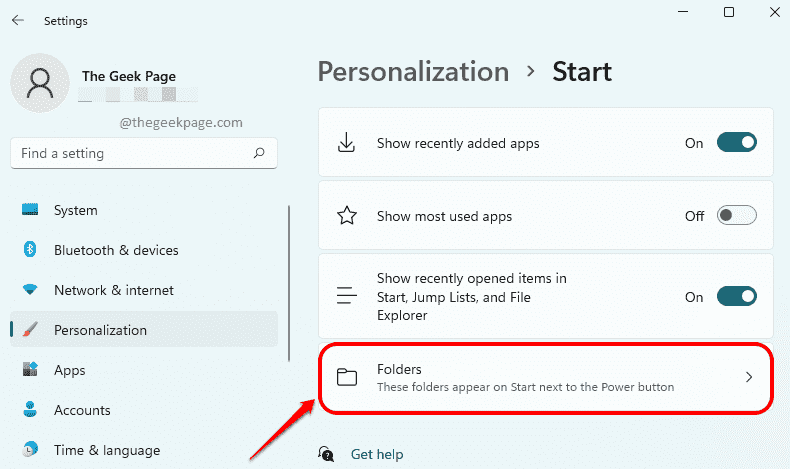
Step 2: Under the Start settings, click on the tab named Folders.
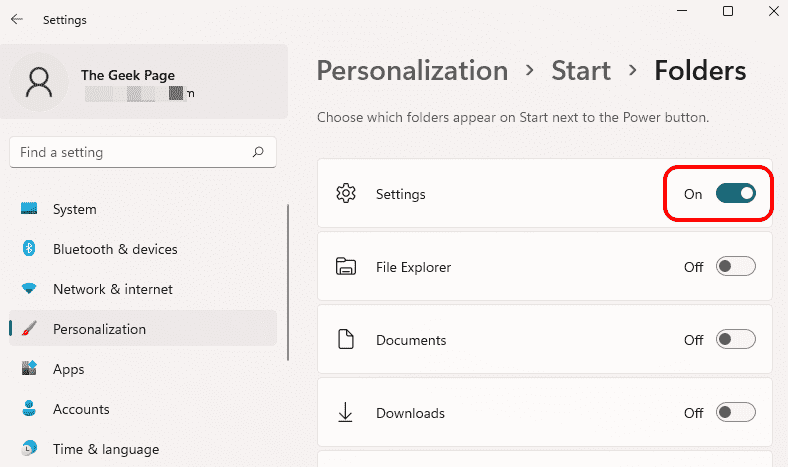
Step 3: Finally, turn the toggle button to On state against the Settings option.
Step 4: That’s it. If you now click on the Windows start menu icon on the taskbar, you can see that Settings app icon is successfully added.
Please tell us in the comments section whether you found the article useful.


