Is the Ethernet icon showing up on the Taskbar instead of the WiFi signal bar? At the beginning you may not realize the issue before the internet connection fails and the network gets disconnected. This usually depicts your computer is connected to the Ethernet and WiFi both and it is primarily using the Ethernet to connect to the internet.
Fix 1 – Disable the Ethernet
You should disable the ethernet adapter. So, that the computer directly uses the
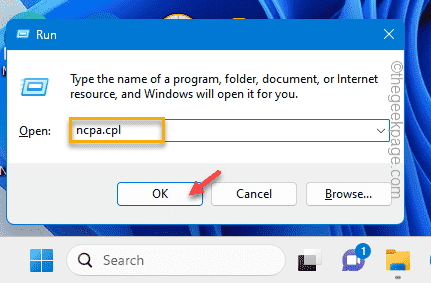
Step 1 – At first, hold the Windows+R keys together to open the Run panel.
Step 2 – Next put this in the code and click “OK“.
ncpa.cpl
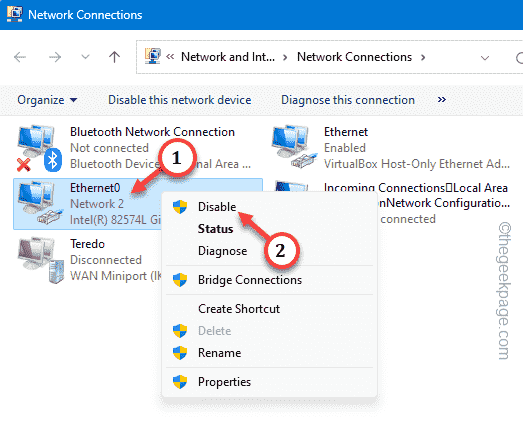
Step 3 – Inside the Network Connections settings, you may find all the adapters you have on your computer.
Step 4 – Look whether you can find the WiFi adapter and the Ethernet adapter.
Step 5 – Now, right-tap the Ethernet adapter and tap “Disable” to disable the adapter.
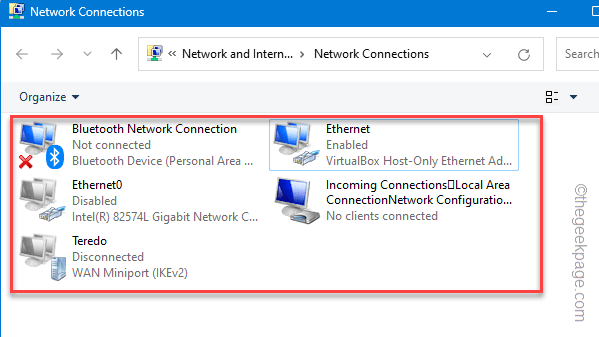
Step 6 – Look whether you can find any other ethernet adapters here.
Step 7 – Disable those ethernet adapters one-by-one. But do not disable the WiFi adapter.
Close the Networks Connections window, after disabling the adapters.
This way, your device will automatically connect to the WiFi and you shall see the signal bar on the Taskbar.
Fix 2 – Test the network adapter physically
There are some things you should clarify before jumping ahead to the software side of the solution.
Step 1 – Check the Ethernet cable. Test whether the cable is properly plugged into the system or not.
Step 2 – Windows choose the maximum strength network. So, if you are too far from the WiFi range, it will automatically prefer the more stable, consistent Ethernet instead.
Fix 3 – Add the WiFi button
You can use the Taskbar Corner Overflow to add the WiFi button on the Taskbar as well.
Step 1 – On the top-bottom corner, tap the network icon box on the Taskbar.
Step 2 – Then, hit the “🖊” icon to access the Taskbar Corner Overflow.
Step 3 – Make sure to pin the WiFi icon in the elevated pane.
Step 4 – Finally, click “Done” to save the changes.
This way, you can set the WiFi icon on the Taskbar.
Fix 3 – Reset the network settings
Reset the network settings on your device. Resetting it may help resolve the issue.
NOTE – A piece of advice before you proceed. Resetting the network will make your system forget all the network settings. So, keep the WiFi or other network credentials handy to
Step 1 – Go to the Windows Settings. So, go to the “Network & Internet” settings.
Step 2 – As you go to the right-hand pane, scroll down and see “Advanced network settings“.
Step 3 – Scroll down to the bottom part and tap “Network reset” settings to access that.
Step 4 – You will see the “Reset now” option there. So, use that once.
Step 5 – Again, tap “Reset” to confirm the network resetting operation.
Soon after resetting the network settings, use the proper network credentials to login to the WiFi and use that again.
As you are not setting up the Ethernet connection, the WiFi icon will appear on the Taskbar.
Fix 4 – Fix the network adapter
There is a troubleshooter that you can use to fix this issue of the network adapter.
Step 1 – Start to write “troubleshoot settings” into the search box.
Step 2 – Next, choose the “Troubleshoot settings” to access that.
Step 3 – Head on to “Other troubleshooters“.
Step 4 – Find the “Network & Internet” troubleshooter. Run this particular troubleshooter to do that.
After running the troubleshooter, you should be able to view the WiFi icon on the Taskbar.
Fix 5 – Reboot the Windows Explorer process
Restart the Windows Explorer process, if the Ethernet icon is still appearing instead of the WiFi icon.
Step 1 – Quickly, right-click the Start button and tap “Task Manager” to open that.
Step 2 – Next, locate the “File Explorer” and select that.
Step 3 – Finally, right-tap that and use the “Restart” option to reboot the File Explorer.
File Explorer should be restarted immediately. Check whether you can find the WiFi button on the Taskbar.


