Some Windows 10 users are facing trouble when they are trying to update their Windows 10 devices. According to them, Windows 10 Update is getting stalled showing an error code on their computers. If you are in the same situation, don’t worry. In this article, we are going to discuss ‘Windows Update Error Code: 0x800f0922‘. The main reason behind this error is the absence of some crucial Dot Net features on your computer. But, before going ahead for more complex solutions, we will suggest to try out these simpler workarounds to solve this problem.
Initial Workarounds–
1. Reboot your computer. Sometimes Windows Update requires a restart to finalize the update process. Check if you can update your device without the issue or not.
2. Check if the internet connection on your computer is working or not. Disconnect the internet connection from your computer. Wait for a few minutes. Then connect the internet connection to your computer. Now, check if you are still facing the error with Windows Update or not.
If any of these workarounds aren’t able to solve the problem on your computer, go for these fixes-
Fix-1 Turn ‘ON’ DotNet features on your computer-
Turning DotNet features ‘ON‘ on your computer will solve the problem.
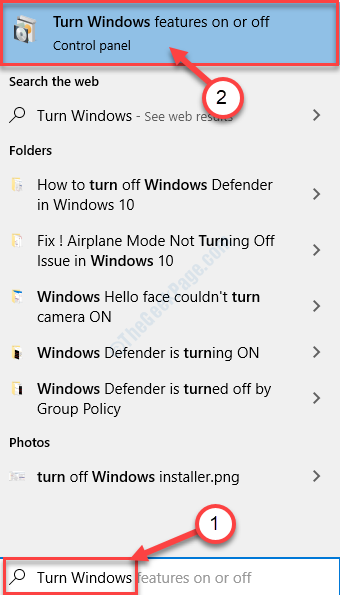
1. Press Windows key and then type “Turn Windows“.
2. Then, click on the “Turn Windows Features On or Off“.

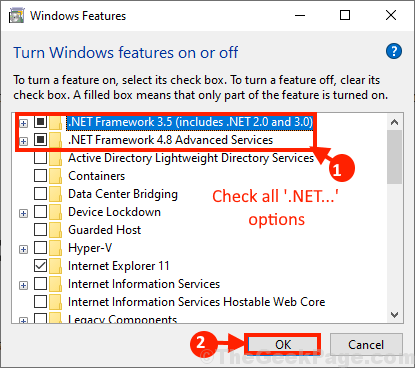
3. When the Windows Features window appears, in the list of the features, check all the “.NET Framework” features (check both the options “.NET Framework 3.5 (includes .NET 2.0 and 3.0)” and “.NET Framework 4.8 Advanced Services“).
4. Now, click on “OK” to save the changes on your computer.

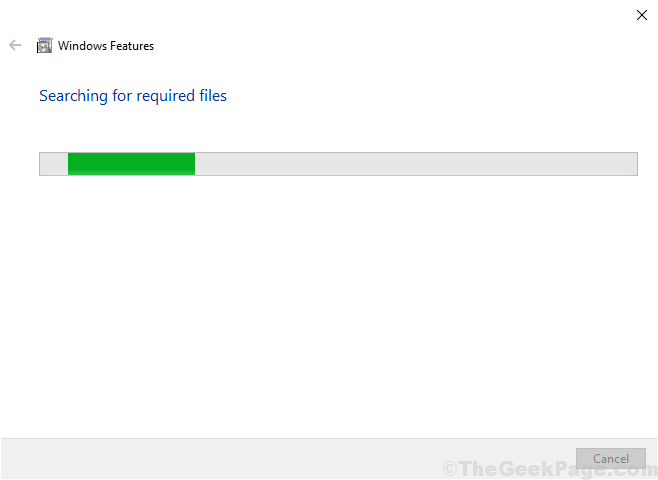
5. Windows will install this feature on your computer.

Reboot your computer once the process is complete.
After rebooting your computer, try to update your Windows again. The problem should be solved on your computer.
Fix-2 Start and automate ‘App Readiness’ service-
Starting and automating the ‘App Readiness‘ service has solved the problem for many users. Follow these steps-
1. By pressing ‘Windows key‘ and ‘R‘ you can easily open a Run terminal.
2. In that Run terminal, writer “services.msc“. Click on “OK“.

3. In the Services window, find and double click on “App readiness” to open its properties.

4. In the App Readiness Properties window, click on “Start” to start the service on your computer.
5. Now, in “Startup type:” click and choose “Automatic” from the drop-down.
6. Finally, click on “Apply” and “OK” to save the changes on your computer.

Close Services window.
Reboot your computer to save the changes.
Fix-3 Turn off Firewall temporarily on your computer-
[NOTE-Try this fix only if you are using a Private network. If you are on Public network, you should switch to a private network first and then try this fix. ]
Turning the firewall ‘OFF‘ temporarily on your computer can solve this problem on your computer.
1. Pressing Windows key+ R will launch Run.
2. Type this command in that Run window and hit Enter.
control firewall.cpl
This will open Windows Defender Firewall settings in Control Panel.

3. Now, in the Windows Defender Firewall window, in the left pane, click on “Turn Windows Defender Firewall on or off“.

4. Now, under the Private network settings, click on “Turn off Windows Defender Firewall (not recommended)“.
5. Click on “OK” to save the settings on your computer.

Now, try updating your Windows 10. Check if you are still facing the issue or not.
Fix-4 Run SFC and DISM Commands
1. Search cmd in windows 10 search box.
2. Right click and run as administrator to open Command prompt as admin.
3. Run the commands given below one by one to fix the issue.
dism.exe /online /cleanup-image /restorehealth
SFC /SCANNOW
Close the cmd window and try again.