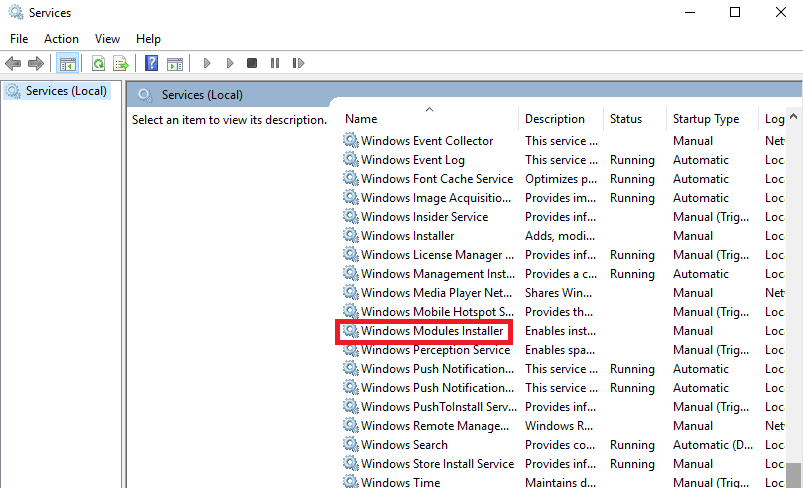
Many users face the same problem of their Windows Modules Installer Worker occupying a much higher CPU usage than the rest. If you don’t know what is Windows Modules Installer Worker, then here is a quick knowledge for you. It is nothing but a Windows Update Service and it is constantly in search of the latest upgradations and also performs the work of installation.
How can you solve the problem?
Basically, there are two different procedures in which you can solve this problem and both of them are explained below.
Procedure 1: By selecting the manual mode for your Windows Update
Procedure 2: By updating the device drivers
Procedure 1: By selecting the manual mode for your Windows Update
Step 1: You will find the Windows key on the left-hand bottom line of your keyboard. Press that and R together. The Run box will open.
Step 2: In the Run box, write the command services.msc and then select OK.
Step 3: Scroll down the window and you will get Windows Modules Installer. Double click on the option.
Step 4 – In the startup type, choose the option Manual. Then click on Apply and then on OK.
Step 5: The previous Services window will appear again. A little towards the bottom you will find Windows Update. Double click on it.
Step 6: There too you have to select Manual in the Startup Type. After that click on Apply and then on OK.
Step 7: Once you have done this, the usage percentage of CPU should be normal but in case that doesn’t happen you should follow the second procedure. And if the first procedure is successful, then you can stop the automated installation of updates in Windows 10.
This is how it can be done-
Method 1: If you are on a Wifi Network
Step 1: From Start select Settings. After that click on Network & Internet. From there select Wifi and then choose Manage Known Networks.
Step 2: From the list of networks, choose the correct one and then click on Properties.
Step 3: Then turn the Metered Connection to On position.
Method 2: If you are on an Ethernet Network
Step 1: Open the Run dialog box by pressing R and Windows key together.
Step 2: In the box, type the command regedit and then click on OK.
Step 3: In the User Account Control or UAC box that will appear, select Yes.
Step 4: In the Registry Editor that opens, select HKEY_LOCAL_MACHINE. After that click on Software. From the list, select Microsoft. Then click on Windows NT followed by Current Version. After that click on Network List and from the list you will see an option DefaultMediaCost. On this option make a right-click and then choose Permissions.
Step 5: Select the option Add.
Step 6: You will find a box where on the top it is written Enter the Object Names. There you have to enter the user name and then click on Check Names and finally select OK.
Step 7: Click on the user name that you have just added. Tick the box under for Allow beside the option Full Control. Then select Apply and then select OK.
Step 8: Make a double-click on the option Ethernet. Enter 2 in the Value Data. Select OK. Close the window.
Step 9: Reboot your PC.
Procedure 2: By updating the device drivers
If your device drivers are obsolete or incorrect, they can lead to this error. So, it is always better to update your drivers.


