Many users are facing a problem regarding windows key + X key menu as it has stopped working for them. Here in this article we have provided you the best fix for this problem.
If you have any of the given program on your PC, try to uninstall them first and then see, if your problem has been fixed or not. If the problem persists, try the methods given below.
Fix 1 – Uninstall Certain application interfering with Context Menu
Certain Users have reported that after installing QuickSFV, this problem evolved on their PC and once they uninstalled QuickSFV, the problem vanished. The reason behind this is that QuickSFV adds Context Menu and thus Create win Key + X Menu problem. So, Uninstall QuickSFV, if you have installed it.
Similarly, Airdroid and NCH Express Zip softwares seems to also interfere with context menu. Uninstall them also from your Computer, if they exist.
Some of the programs which are known to cause this problem are :-
- NCH Express Zip
- QuickSFV
- AirDroid
- RWipe & Clean
- JRiver Media Center
- WinMerge
Fix 2 – Install a New Language Pack
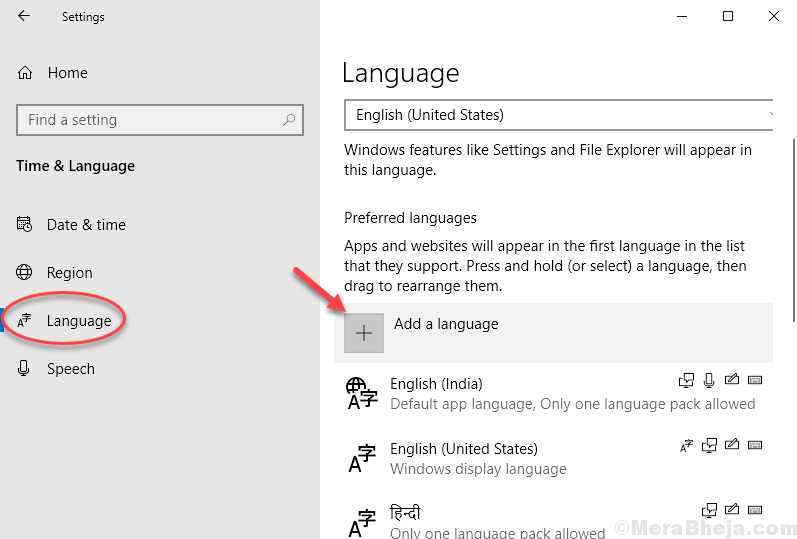
1. Press Windows key + I together to Open Settings.
2. Click on Time & Language

3. Click on Language from the left menu.
4. Now, Click on Add a Language

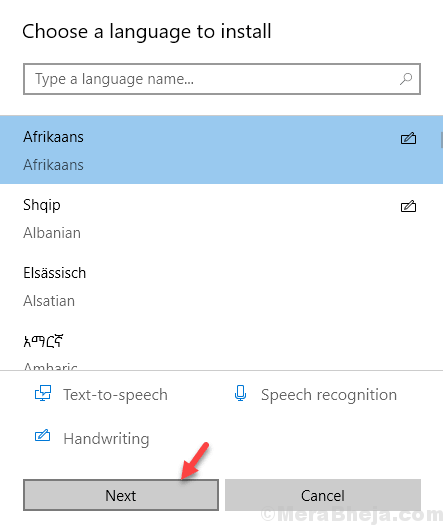
5. Select any Language from the Next screen of your Choice.

6. Expand Language Options By clicking on it.
7. Keep Clicking on the up arrow to push this new language to top to make it default.

8. Check Windows key + X menu again, if it is working , go ahead and remove this language pack.

Fix 3 – Disable Problematic Items from Context Menu
1. Go and Download ShellExView
2. Extract the software and and Click on shexview application to Open it.

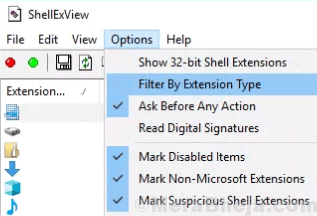
3. Click on Options > Filter By Extension Type

4. Select Context Menu and Click on OK.
5. Press and hold CTRL key and keep select Non Useful items which have come up due to installation of certain softwares on your PC.
6. Do a right Click and Disable Selected Items.
Fix 4 – Add a new Item to Win+ X Menu
1. Press Windows key + R together to open run.
2. Now, write %localappdata% in it and click OK.

3. Now, Browse to Microsoft > Windows > WinX folder.

4. Now, Go to any Folder either Group 1, 2 or 3 and Create a New Shortcut there.

After Creating Shortcut, the Win + X menu will start working again.
Fix 5 – Copy and paste Winx Folder from Default user to your user folder
1. Go to C:\Users\Default\AppData\Local\Microsoft\Windows from file explorer.
2. Now, copy Winx folder.

3. Press Windows key + R together to open run.
4. Now, write %localappdata% in it and click OK.

5. Now, Browse to Microsoft > Windows folder.
Pate the copied winx folder here. Press yes for any prompt to replace old winx folder.