System backup is one of the most useful windows feature, but many users are experiencing error while trying to take a system backup and it fails to complete with various kind of error codes. But, There is no need to worry if you are affected by this bug as this article here covers a working fix to solve this problem.
Fix 1 – Change Max Usage
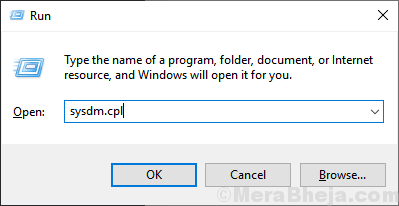
1. Press Windows key + R together to open run.
2. Write sysdm.cpl in it and click OK.

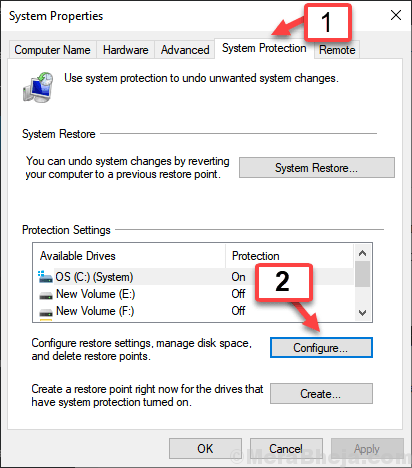
3. Click on system protection Tab and then click on Configure.

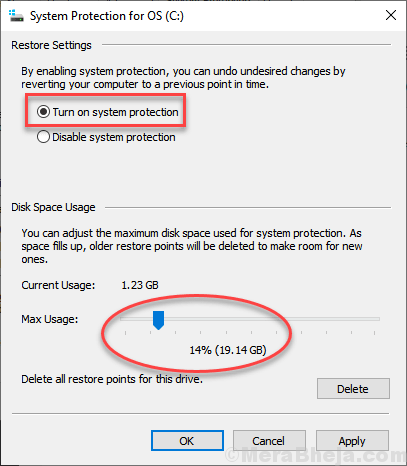
4. Make sure that Turn on System Protection is selected.
5. Slide the max usage slider and keep it up to 10-15% range.

Fix 2 – Run system Check
1. Right Click on C drive and Click on Properties.

2. Click on Tools Tab and then click on Check.

3. Follow On screen Instructions to scan the drive.
4. Next, Search cmd in Windows 10 Search Box.
5. Right Click and Run as Administrator.

6. Run the command given below in Command Prompt.
SFC /scannow
7. Once the process finishes , Run again this command in Command Prompt window.
DISM /Online /Cleanup-Image /RestoreHealth
8. Wait for the command to get executed completely.
Fix 3 – Get rid of EFI partition
Warning : This Method will delete all the data on the Disk
1. Open Command Prompt as admin.
2. Type DISKPART and Hit enter.
3. Now, type List Disk and Hit enter Key.
4. select disk “0“ where 0 is the backup disk.
5. Now, Execute the command Given below.
clean

create partition primary
6. Once you reach disk management console, Right click the on the backup drive,then choose format (NTFS) and then again do a right click on it again.
once you have created a volume , change the drive letter also.
Now, try the backup process again.