You install the latest version of Windows 11 update and the PC restarts. But, suddenly, a blue screen shows up with CRITICAL_PROCESS_DIED on it. Again and again. Maybe it crashes a few minutes after you sign in. Maybe it never reaches the desktop at all. Either way it can be maddening for you, because nothing about your PC changed except the update. Good news, though. Your drive is probably not dying, and your files are most likely fine.
Where This Comes From
Short version: the update and your SSD disagree about memory.
A lot of SSDs borrow a small slice of your PC’s RAM to keep track of where files are stored. That borrowed slice is called the Host Memory Buffer, or HMB. Windows 11 25H2 offers the drive 200MB of it. But the firmware on certain drives (firmware is the small built-in software that runs the drive) has a hard limit of 64MB.
So the drive gets handed more than it can take. It trips. And Windows goes down with it, instantly.
Which drives? Only the 2TB models, oddly. The WD SN770 is one. So is the SN580. And the WD Black SN850X and the SanDisk Extreme are on the list too.
Fix 1 – Update the Drive’s Firmware With WD Dashboard
This is the real cure. Western Digital released an emergency firmware patch for the 25H2 bug, and it removes the cause instead of working around it.
NOTE – Recently, WD has dicscontinued the support for the Western Digital Dashboard. You should move on to
WD Kitfox – WD HDD users
Sandisk Dashboard – SSD users
1 – Download the Western Digital KitFox app from WD’s support site.
2 – Install the app and open it.
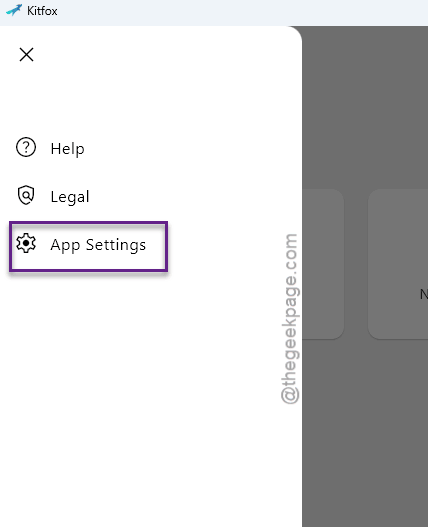
3 – Select your 2TB NVMe drive in the dashboard.
4 – Open the Tools section. On some versions it is called Firmware Update instead.
5 – Apply the firmware update it offers.
6 – Restart your PC.
Do not switch the PC off while the update is running. Let it finish first.
And open Dashboard again every couple of months. Drive firmware usually doesn’t arrive through Windows Update, so nobody tells you when a fix like this one comes out.
Fix 2 – Turn Off the Host Memory Buffer in the Registry
No patch for your drive? That happens with drives that came pre-installed in a laptop (WD doesn’t always cover those). You can tell Windows to stop lending RAM to the SSD altogether. No loan, no crash.
The Registry is Windows’ big settings database. You’re adding one small entry to it, so copy the names exactly.
1 – Press Windows + R.
2 – Type regedit and press Enter. Click Yes if Windows asks for permission.
3 – Go to this address –
HKEY_LOCAL_MACHINE\SYSTEM\CurrentControlSet\Control\StorPort
You can paste that path into the address bar at the top and press Enter.
4 – Then, right-click an empty spot in the right pane.
5 – Then, choose New, then DWORD (32-bit) Value.
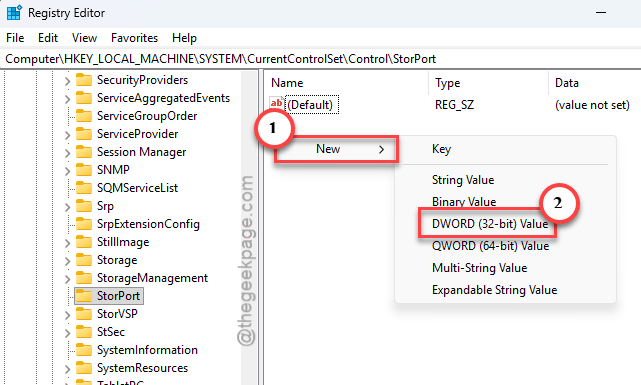
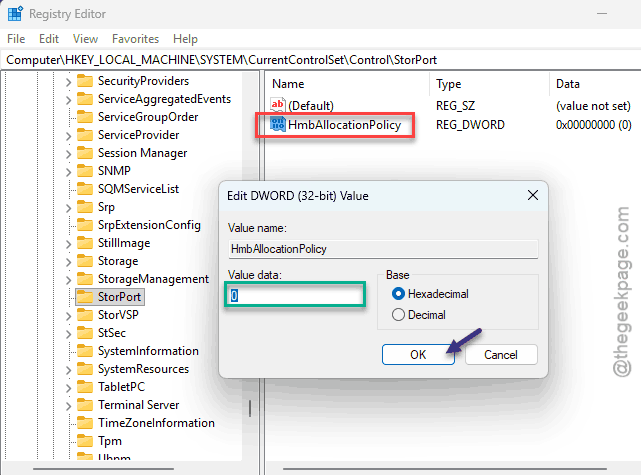
6 – Name the new value HmbAllocationPolicy. The spelling and the capital letters have to match.
7 – Double-click it and make sure Value data is set to 0.
8 – Click OK and restart your computer.
Is there a downside? A small one. The drive may feel a touch slower during big file copies, because it’s working without the borrowed memory. Still beats a blue screen.
Fix 3 – Apply the Same Registry Fix From the Recovery Screen
Stuck in a restart loop with no way to reach the desktop or Safe Mode? You can still make the Fix 2 change from outside Windows. It looks scary. It’s really just four lines of typing.
1 – Let the PC fail to start three times. Windows then loads a blue Automatic Repair screen.
2 – Click Advanced options.
3 – Click Troubleshoot, then Advanced options again.
4 – Click Command Prompt. A black window opens.
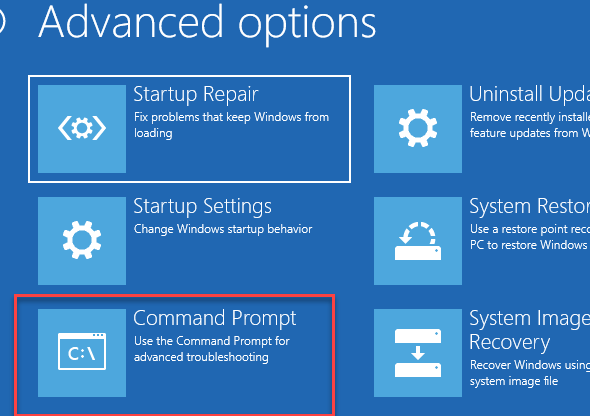
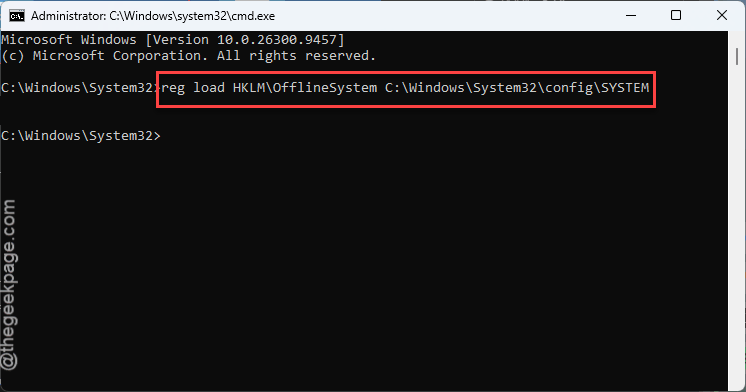
5 – Type this code, and press Enter.
reg load HKLM\OfflineSystem C:\Windows\System32\config\SYSTEM
6 – Next, paste this line of the code next, and press Enter.
reg add "HKLM\OfflineSystem\ControlSet001\Control\StorPort" /v HmbAllocationPolicy /t REG_DWORD /d 0 /f
reg unload HKLM\OfflineSystem
7 – Type and press Enter. This saves the change.
8 – Type exit and press Enter.
9 – Click Continue to Windows 11.
Check if this helps.
Fix 4 – Run Startup Repair
Still looping after the registry change? Then the repeated crashes may have damaged the files Windows needs to start. Let Windows try to repair them by itself before you do anything by hand.
1 – Turn your PC off completely.
2 – Later, turn it back on and wait for the sign-in screen.
3 – Click the Power icon in the bottom right corner.
4 – Hold the Shift key and click Restart.
5 – Click Troubleshoot.
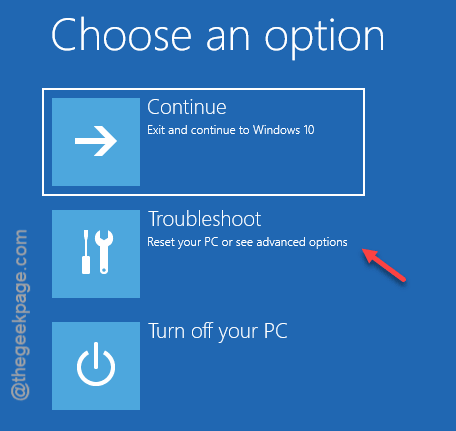
6 – Click Advanced options.
7 – Click Startup Repair.
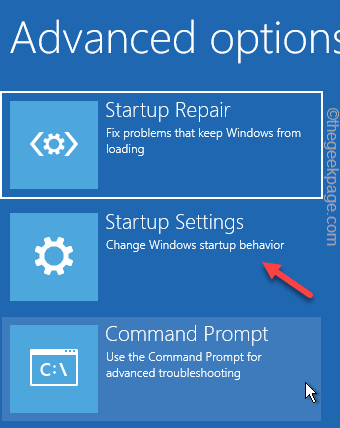
Windows scans for a few minutes and then restarts without asking. If you can’t get as far as the sign-in screen, the three-failed-starts trick from Fix 3 opens the same menu.
Fix 5 – Repair the Boot Files and Check the Disk
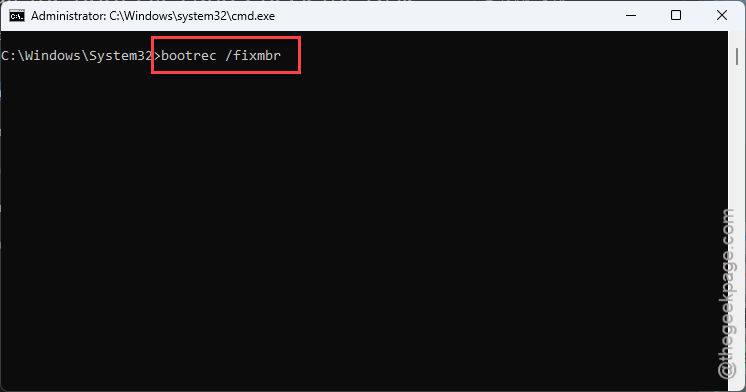
Startup Repair found nothing? Do the same job by hand. Open Command Prompt from the recovery menu like in Fix 3, then run these one at a time. Press Enter after each.
1 – Type bootrec /fixmbr.
2 – Type bootrec /fixboot.
3 – Type bootrec /scanos.
4 – Type bootrec /rebuildbcd.
5 – Type bootsect /nt60 sys.
6 – Later, type this code next, to check the drive for file errors and bad sectors.
chkdsk /f /r C:
sfc /scannow
exit
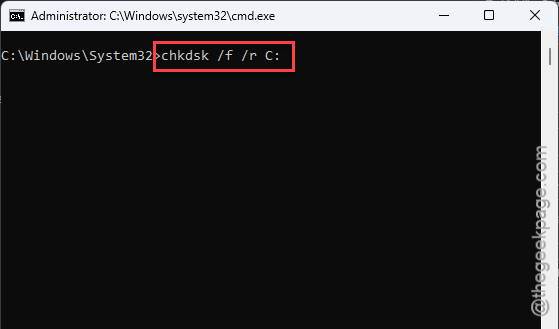
The disk check is the slow part. On a 2TB drive it can run for an hour or more, and the percentage sometimes sits still for a long while. That is normal.
Fix 6 – Roll Back to Windows 11 24H2/25H2
You can roll back to the previous version of the Windows.
1 – Press Windows + I to open Settings.
2 – Click System in the left sidebar.
3 – Click Recovery.
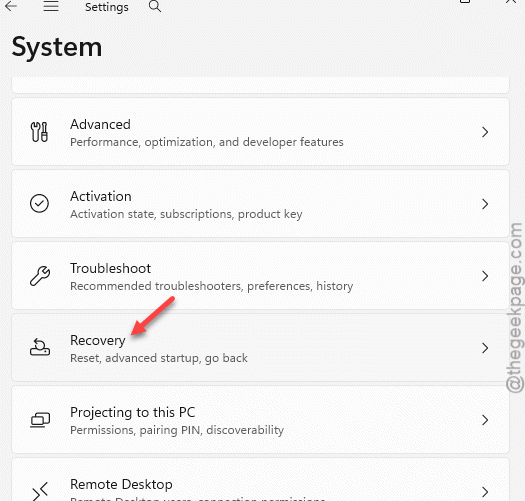
4 – Under Recovery options, find Previous version of Windows and click the Go back button next to it.
5 – Follow the prompts until Windows restarts on 24H2/25H2.
But there’s a catch. The Go back button only sticks around for about 10 days after an update. Greyed out? Then this route is closed, and the registry fix is your best bet.
So once you’re back on 23H2, download Microsoft’s Show or hide updates troubleshooter and use it to block the 24H2 feature update. Otherwise Windows will happily install it again (it won’t ask first). Keep it blocked until the firmware is patched or you replace the drive.
People Also Ask
How to fix critical_process_died?
Start with what changed. Did the crashes begin after the 24H2 update on a PC with a 2TB WD or SanDisk SSD? Update the drive’s firmware with WD Dashboard.
It means a process Windows can’t run without stopped suddenly. So Windows shuts everything down to protect your data. 0xEF is just the code for that error. Damaged system files are a common trigger. A bad driver is another, and so is a drive that stops responding for a moment.