The INACCESSIBLE_BOOT_DEVICE error may look catastrophic at first glance. But this one is usually easily survivable. You won’t be losing be any files or drive durign this process. There are some reports indicate that a Windows 11 update broke the driver your PC uses to communicate with the disk. This is solvable for most people, within the hour. The fixes below run roughly easiest to most involved.
Where This Comes From
The update shipped new storage driver pointers. And on machines running Intel VMD or RST (controller tech that manages fast NVMe drives, common on newer laptops), those pointers landed corrupted. Windows reboots, reaches for its disk, and finds nothing where the driver should be. Hence the name.
Microsoft has broken storage drivers with an update before. More than once, honestly — KB5101650 is just the current offender in a pattern that’s years old.
But sometimes it isn’t the update at all. A loose drive or scrambled boot files throw the exact same code, so the last two fixes cover that side too.
Fix 1 – Do a Full Power Drain
Two minutes, zero risk. And yes, it clears real cases — leftover charge in the hardware can hold a failed device state across restarts.
1 – Unplug every external device and cable: USB drives, hubs, printers, everything except your monitor and keyboard.
2 – Press and hold the power button for a full 30 seconds. Count it out — most people let go way too early.
3 – Turn the PC back on.
Fix 2 – Let Windows Roll the Update Back
Windows has a built-in tripwire: fail to boot three times in a row, and it offers to repair or uninstall the update on its own. So trip it deliberately.
1 – Turn the PC on.
2 – The moment the Windows logo appears, hold the power button until the machine shuts off.
3 – Repeat that two more times (three interrupted boots total — the screen going dark each time is the point).
4 – On the next start, leave it alone. You should see “Preparing Automatic Repair” under the logo.
5 – Follow the prompts and let the repair or rollback run. This part can take a while — 20 minutes or more is normal, so don’t touch it.
Feels wrong, force-killing a PC three times on purpose? Sure. It’s also the official recovery path.
Fix 3 – Run Startup Repair or System Restore
If the Automatic Repair screen appears but the rollback didn’t take, the recovery menu has two more tools sitting right there.
1 – On the Automatic Repair screen, click Advanced options.
2 – Go to Troubleshoot, then Advanced options.
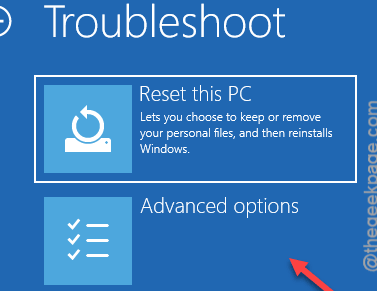
3 – Click Startup Repair and let it scan. It fixes broken startup files by itself when it can.
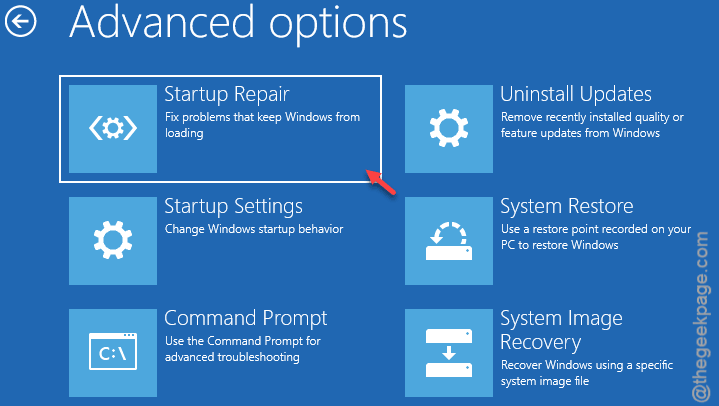
4 – If it comes back with nothing, return to the same menu and pick System Restore instead.
5 – Choose a restore point dated before the update and confirm.
System Restore rewinds Windows system files, not your documents. Your files stay where they are.
Fix 4 – Tell the Update to Abandon Its Changes
Still blue-screening? The update may be stuck half-installed, retrying its broken changes on every boot. One command makes it give up.
1 – From the recovery menu, go to Troubleshoot,
1 – Go to the Advanced options panel. Load up the Command Prompt.
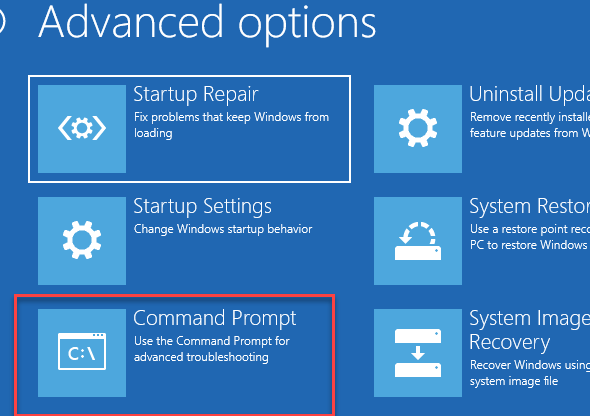
2 – Type this and press Enter:
dism /image:C:\ /cleanup-image /revertpendingactions
3 – Wait for it to report that the pending actions were reverted, then type exit and restart.
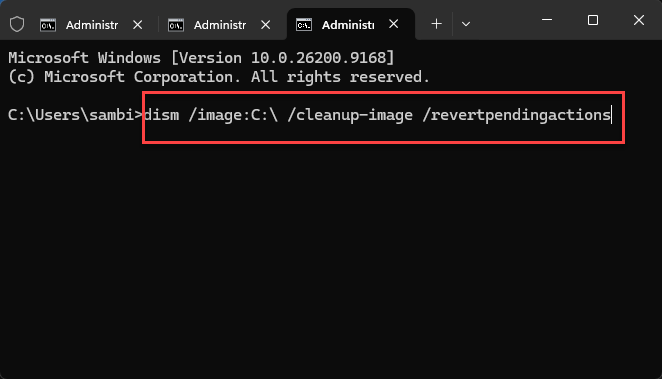
The command takes a minute or two and prints its progress as it goes, so you’re not staring at a dead screen.
If your Windows drive isn’t C: in the recovery environment, swap the letter in the command. It’s almost always C:, though.
Fix 5 – Uninstall the Update From Safe Mode
Safe Mode loads a minimal set of drivers, which is often enough to sneak past the broken storage pointer and boot. And once you’re in, you can strip the update out properly.
1 – From the recovery menu, go this way –
Troubleshoot > Advanced options > Startup Settings
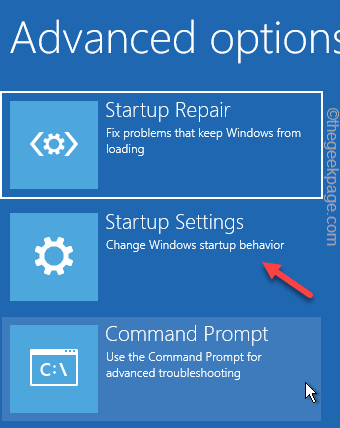
2 – FInally, click Restart.
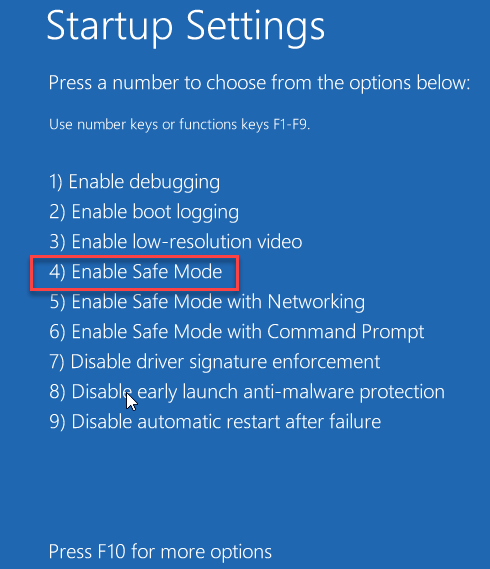
3 – When the numbered list appears, press 4 to start Safe Mode.
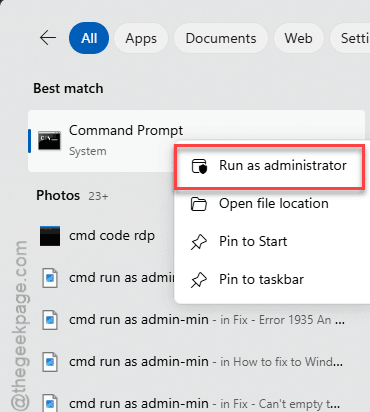
4 – Once Windows loads, type “cmd”, and click Run as administrator on the right side.
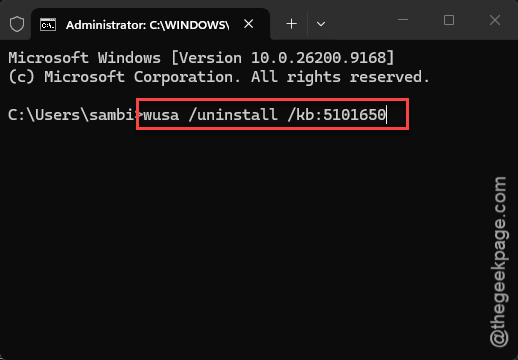
4 – Type this and press Enter:
wusa /uninstall /kb:5101650
5 – Confirm the prompt and restart when it finishes.
And Windows will try to reinstall the same update later. Fine — by then Microsoft has usually patched the patch. The prevention section below buys you the waiting time.
Fix 6 – Switch the Storage Mode to AHCI in the BIOS
The update loves breaking the VMD and RAID controller stack specifically. Falling back to AHCI (the plain, boring disk mode) lets Windows see the drive again.
1 – Restart and rapidly tap your BIOS key during startup — usually F2, DEL, or F12.
2 – Go to the Advanced or Main tab and find Storage Configuration (on some laptops, pressing Ctrl + S on the Main tab reveals hidden settings).
3 – Find VMD Controller, SATA Mode, or Intel RST.
4 – Change it from RAID/Intel RST or Enabled to AHCI or Disabled.
5 – Press F10 to save and exit.
The first boot after the change can take a little longer than usual while Windows sorts out the new disk mode. Let it think.
While you’re in there, check the boot order too — your Windows SSD should sit at the top of the boot sequence list. And if the switch somehow makes booting worse instead of better, go back in and flip it to what it was. No harm done.
Fix 7 – Rebuild the Boot Files
When it’s not the driver, it’s the boot record — the little map telling the firmware where Windows lives. Scrambled map, same blue screen. So rebuild it.
1 – Open the recovery Command Prompt like in Fix 4.
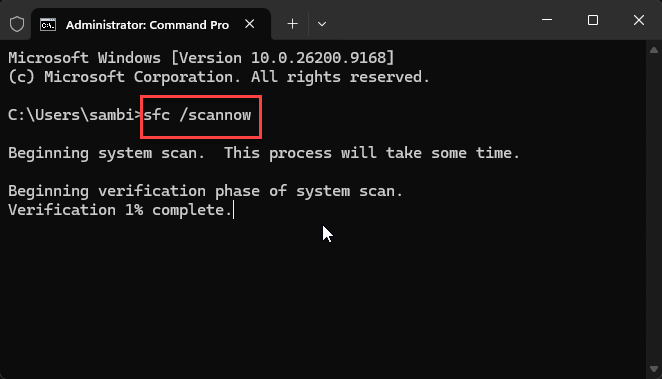
2 – Run these four commands one at a time, pressing Enter after each: , then, then then .
sfc /scannow
bootrec /fixmbr
3 –Then, run these two codes simaltenously.
bootrec /fixboot
bootrec /rebuildbcd
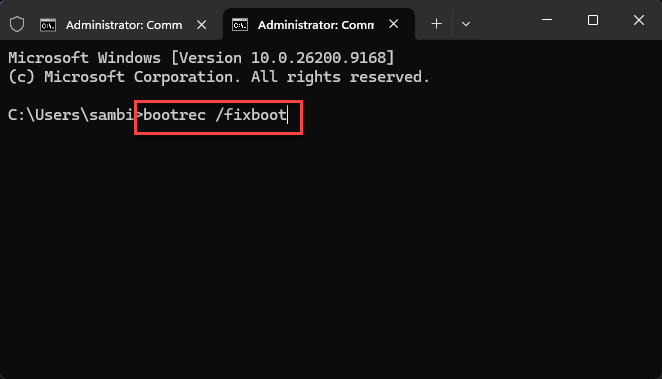
4– The first one is the slow one — several minutes. The bootrec commands finish in seconds.
5 – Type exitand restart.
Check if this works.
Fix 8 – Reseat the Drive
Rare, but real. An update reboot is sometimes just the moment a marginal drive connection finally shows itself. And no amount of software fixing helps a loose plug. Desktop or laptop with a removable panel? Check the physical side.
1 – Power off completely and unplug the machine.
2 – Open the case or bottom panel (a small Phillips screwdriver handles most).
3 – Disconnect the SSD — the M.2 stick or the SATA cable — and blow off any dust.
4 – Reinsert it firmly, close up, and boot.
So It Doesn’t Happen Again
- Pause updates for a week or two after a big patch drops. Settings > Windows Update > Pause updates. Let other people find these bugs first.
- Make a recovery USB drive now, while the PC works. Blue screens don’t schedule appointments.
- If you don’t actually use RAID, stay on AHCI. And the plain mode gives updates nothing to break.
- Check that System Restore is on (search “Create a restore point”). It was the two-minute fix here — but only for people who had a point saved.
Quick Answers
How do I fix the inaccessible boot device error in Windows 11?
Start with three interrupted boots to trigger Automatic Repair — Windows can roll back the broken update itself. If not, use the recovery menu’s Startup Repair or System Restore, uninstall the update from Safe Mode, or switch your BIOS storage mode to AHCI.
Why does Windows 11 say inaccessible boot device after an update?
The update replaced storage driver files and corrupted them mid-install, most often on systems using Intel VMD or RST controllers. Windows restarts, can’t load the driver for its own disk, and stops with this code. Rolling the update back restores the working driver.
Will I lose my files fixing this?
Almost never. The rollback, System Restore, Safe Mode uninstall, and BIOS changes all leave your personal files alone — the drive and its data are fine, Windows just can’t reach them yet. Only a full reset would touch your data, and that’s a last resort.
What if none of these fixes work?
Then the drive itself becomes the suspect rather than the update. Reseat it first, and try it in another PC or an external enclosure to confirm it still reads. If it does, a repair install from a Windows 11 USB keeps your files while replacing the system.