How To Fix USB Ports Not Working Issue In Windows:- USB ports may suddenly close their doors right onto your face and leave you clueless about what’s going on. In such cases, going to IT guys may seem like the best solution available. But if you can solve the problem on your own and be proud of yourself, you would take that option instead of going through all the pain of calling the IT guys up and paying them a lot of money, wouldn’t you? Well, that is exactly what we are here for, to help you solve the problem of USB ports not working on your own. What are you waiting for then? Dig into the article!!
Solution 1
This is the simplest of all the solutions. Before diving into anything deep, let’s try the simplest solution to fix the issue of USB ports not working.
STEP 1
- First of all, remove the power source/charger from the PC. Then restart the system.
STEP 2
- After restarting, try connecting the USB device to any of the USB ports. That’s it. This solution works in most of the cases.
STEP 3
- Now you can plug in back the power supply and start using your PC with a working USB port.
Solution 2
In this method, let’s try fixing the faulty USB device. Follow the steps below:
STEP 1
- You can attach the USB device that is not being recognized, to any of the USB ports.
STEP 2
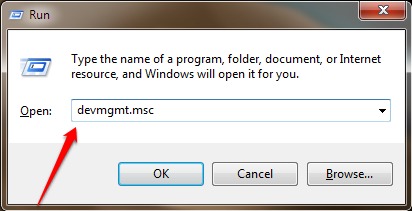
- Press WIN+R keys together to open the Run dialog box. Once it opens up, type in devmgmt.msc and hit enter key.
STEP 3
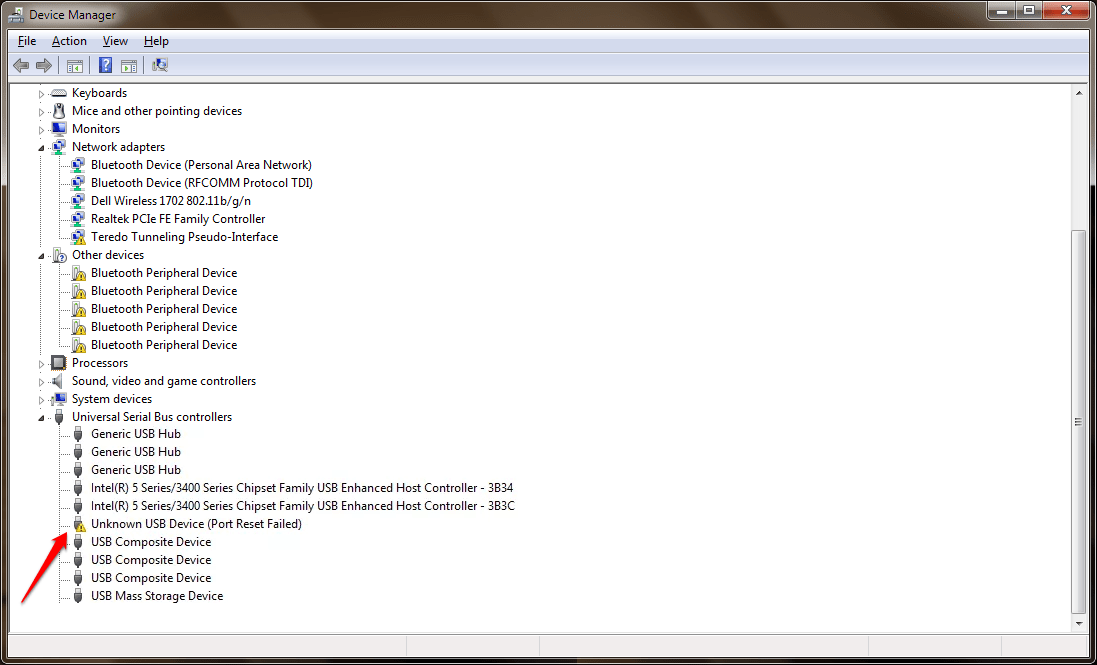
- A separate window named Device Manager opens up. You need to find and expand the entry named Universal Serial Bus Controllers. Under the entry, find Unknown USB Device marked with a yellow warning sign.
STEP 4
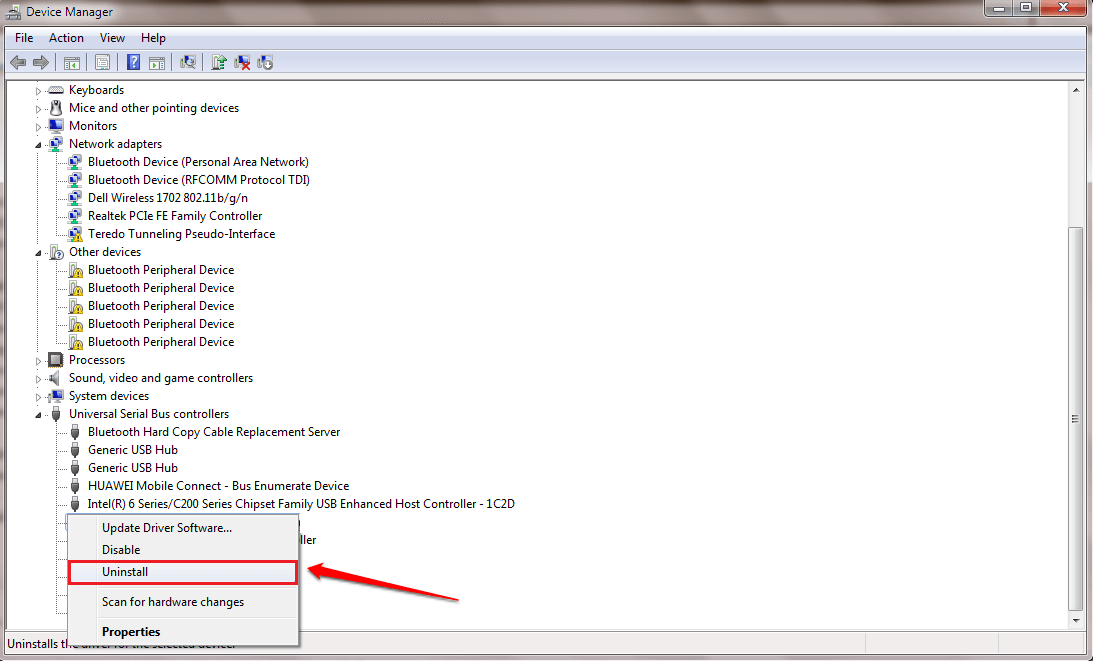
- Right click on it and click on the Uninstall option.
STEP 5
- Finally, find the tab named Action at the top and choose Scan for hardware changes as shown in the screenshot given below. That’s it. Your USB device should work now.
Solution 3
If both the above solutions do not work for you, try out the third one.
STEP 1
- Firstly, right click on the battery icon at the bottom right corner of your task bar and choose the Power Options entry as shown in the screenshot given below.
STEP 2
- Click on the link that says Change plan settings from your selected power plan as shown below.
STEP 3
- As next, click on the link that says Change advanced power settings.
STEP 4
- A window named Power Options opens up. Expand the entry named USB settings by clicking on the Plus arrow associated with it. As next, expand USB selective suspend setting. Then choose Disabled from the drop down menus for both On battery and Plugged in entries. When you are done, hit Apply and OK buttons. That’s it. You are done.
Hope one of the above given solutions work for you. Feel free to leave comments if you are still stuck with the same issue. We would be happy to help.


