Why would a cloud printer stop taking jobs the moment you turn on a proxy setting? There is a chance that the Microsoft’s own proxy auto-discovery gets in the way of Microsoft’s own printing service. So the job sits in the queue. Sometimes it vanishes completely from there. There will be no error code or prompt worth reading will appear in there. The printer itself is fine, which is the maddening part, this is a software side of issue.
The Short Version
Universal Print doesn’t talk to the printer on your network. It sends the job up to Microsoft’s cloud, and the printer pulls it back down. Fine in theory.
WPAD (Web Proxy Auto-Discovery) is the setting where your PC asks the network “is there a proxy I should use?” every time it connects. And here’s the catch. You turned that on as your user account. But the Universal Print service runs in the background as SYSTEM, a separate account that doesn’t inherit your proxy settings. So the print job leaves with no route and gets dropped. Microsoft’s own Universal Print troubleshooting page admits this is how it works.
Second problem, if your office has a security gateway. WPAD often sends traffic through a box that opens up encrypted connections to inspect them. Universal Print refuses to be inspected (it checks that it’s really talking to Microsoft’s certificate). The gateway swaps the certificate, the check fails, and the connection dies.
And sometimes the auto-discovery just times out for background services. Because of course it does.
Which one you have depends on where you are. Home or small office with no real proxy? Fixes 1 and 2. Company network with a proxy? Fixes 3 to 5. Fix 6 is the escape hatch for everyone.
Fix 1 – Restart the Print Spooler
Quick one first. A failed job can jam the spooler (the Windows service that lines up print jobs), and nothing behind it moves until you clear it.
1 – Press Windows + R.
2 – Type services.msc and press Enter.
3 – Scroll down to Print Spooler. It’s alphabetical, so look under P.
4 – Right-click it and click Restart.
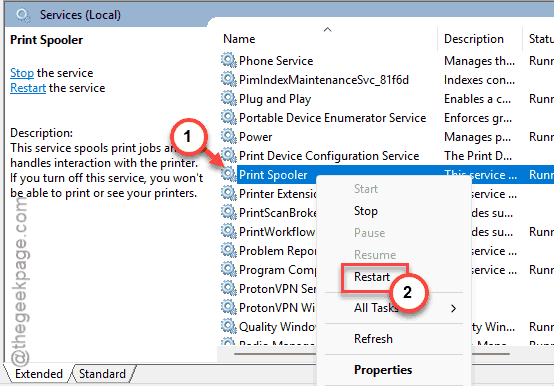
5 – Print a test page.
Went through? The queue was just stuck. Didn’t? Keep reading, because the proxy is the real problem.
Fix 2 – Turn Off Automatic Proxy Detection
If nobody ever told you that your network needs a proxy, it doesn’t. And WPAD is doing nothing for you except breaking printing. Turn it off.
1 – Press Windows + I to open Settings.
2 – Click Network & internet in the left sidebar.
3 – Click Proxy. It’s near the bottom of the list.
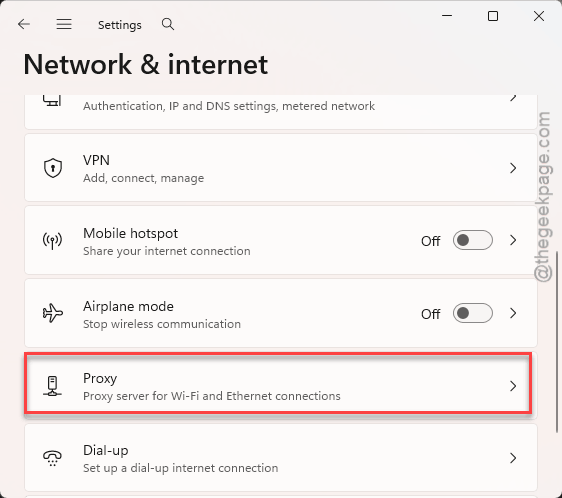
4 – Under Automatic proxy setup, turn off Automatically detect settings.
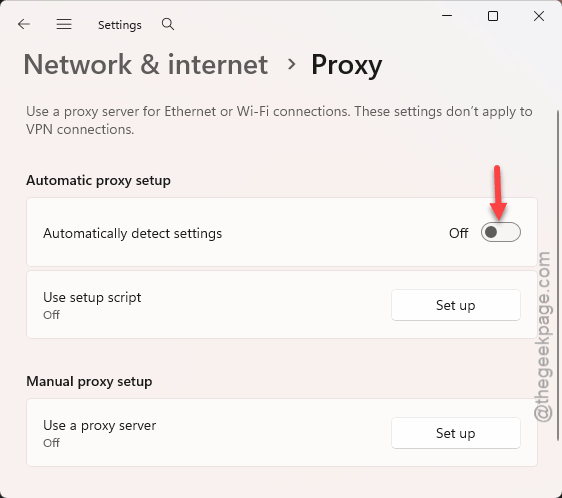
5 – Close Settings and send a print job.
Leave it off. Windows Update and some IT tools like to flip it back on, so if printing dies again in a month, this is the first place to look.
Fix 3 – Copy the Proxy Into the System Account
This is the real fix for office networks. You tell Windows to take the proxy settings your user account already has and hand them to the SYSTEM account, so background services (including Universal Print) can finally see them.
1 – Right-click the Start button.
2 – Click Terminal (Admin). On older builds it’s Command Prompt (Admin).
3 – Click Yes when Windows asks for permission.
4 – Type netsh winhttp import proxy source=ie and press Enter.
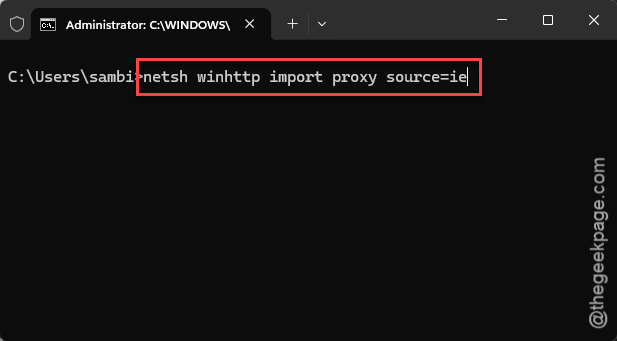
5 – Read the output. It should say the proxy settings were imported and list the proxy server.
6 – Restart your PC. The services only pick up the new route on boot.
7 – Send a test job through your Universal Print queue.
Know your proxy address and port already? You can skip the import and set it directly with netsh winhttp set proxy 10.0.0.5:8080, swapping in your own address and port. Same result.
One habit worth building. After any feature update, run the import command again. Windows has a way of resetting this quietly, and you’ll only find out when the printer goes dead.
Fix 4 – Set the Proxy Manually Instead of Auto-Detecting
Auto-discovery relies on DHCP or DNS broadcasts to find the proxy, and those time out more than Microsoft would like to admit. Hardcoding the address takes the guessing out. You’ll need either the PAC script address or the proxy IP and port from whoever runs your network.
1 – Press Windows + I and go to Network & internet, then Proxy, like in Fix 2.
2 – Turn off Automatically detect settings.
3 – Got a script address? Click Set up next to Use setup script, turn it on, paste the address, and click Save.
4 – Got an IP and port instead? Scroll down to Manual proxy setup, click Set up, turn it on, and type the address and port.
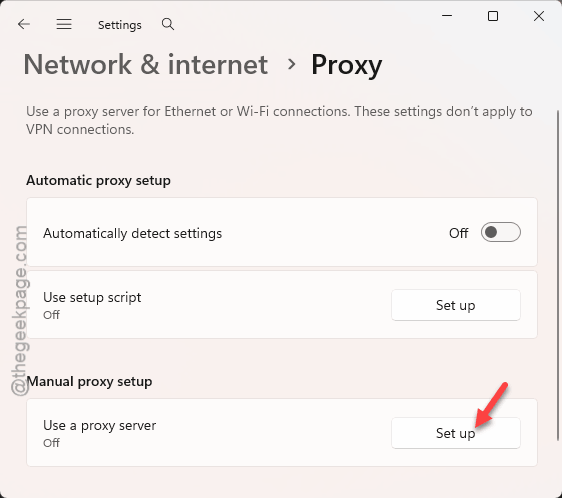
5 – Click Save.
6 – Restart your PC, then run the netsh import from Fix 3 so the SYSTEM account gets the same setting.
Skipping step 6 is the classic mistake. You set the proxy, Edge works, Teams works, and printing still fails. Because the background service never got the memo.
Fix 5 – Let Microsoft’s Print Servers Skip the Proxy
If you manage the network, this is the permanent answer. Two parts. Stop the gateway from inspecting Universal Print’s encrypted traffic, and tell the PAC file to send that traffic straight out with no proxy at all.
First, the inspection bypass:
1 – Sign in to your firewall or web proxy admin console.
2 – Open the SSL inspection (sometimes called HTTPS decryption) exclusion rules.
3 – Add a bypass for *.print.microsoft.com.
4 – Add a second bypass for graph.microsoft.com so sign-in traffic passes through untouched.
5 – Save and push the policy to your appliances.
Then, if WPAD serves a PAC file, the DIRECT rule:
6 – Open the active .pac file in a text editor on the server that hosts it.
7 – Add this line near the top of the function:
if (shExpMatch(host, "*.print.microsoft.com")) { return "DIRECT"; }
8 – Add a second one for sign-in:
if (shExpMatch(host, "login.microsoftonline.com")) { return "DIRECT"; }
9 – Save the file.
10 – On the affected PC, open Command Prompt as admin, run ipconfig /flushdns, and restart so it fetches the new script.
Do this before rolling Universal Print out to more machines, not after the help desk tickets pile up. Ask me how I know.
Fix 6 – Add the Printer by IP Address Instead
Need to print in the next five minutes and not the next five days? Skip the cloud. Connect straight to the printer on your network. Not elegant. But it works every time.
1 – Press Windows + I to open Settings.
2 – Click Bluetooth & devices, then Printers & scanners.
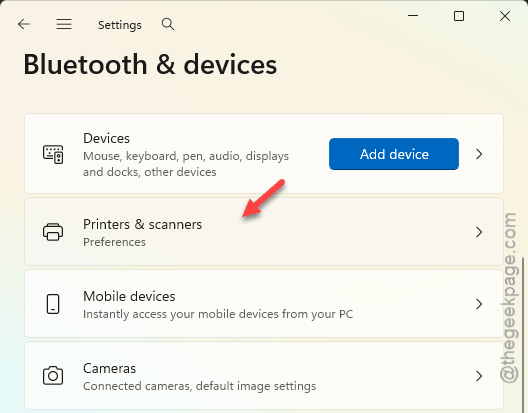
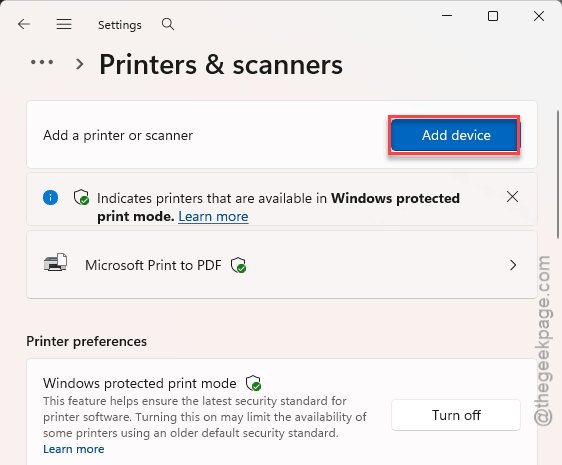
3 – Click Add device at the top right. Wait about ten seconds for the scan.
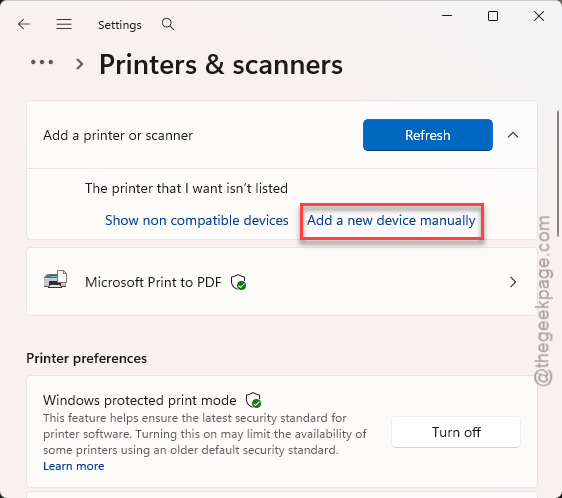
4 – Click Add a new device manually when the link appears at the bottom of the list.
5 – Pick Add a printer using an IP address or hostname and click Next.
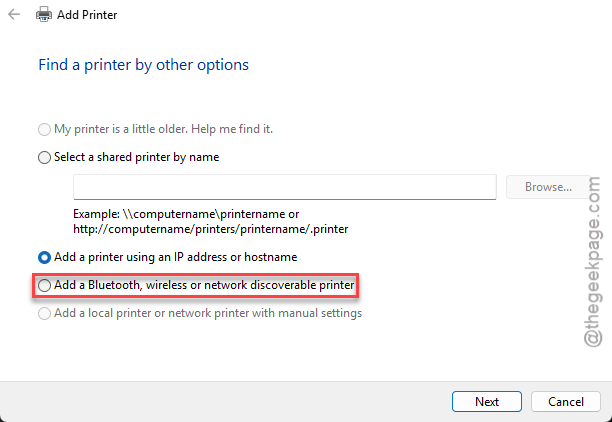
6 – Type the printer’s IP address (it’s usually printed on the printer’s own network settings page) and click Next.
7 – Follow the prompts to finish.
This bypasses Universal Print completely, so the proxy never comes into it. Keep it as a backup printer even after you fix the cloud one. Trust me.
People Also Ask
Why is my Universal Print printer not accepting jobs?
Run netsh winhttp import proxy source=ie in an admin terminal and restart. No proxy on your network? Turn off Automatically detect settings instead.
What should I do if I get a Universal Print access denied error?
That one is permissions, not the proxy. Your account hasn’t been given access to that printer share in the Universal Print portal, or it has no Universal Print license assigned. Ask your admin to check the share’s members. And if the printer worked last week, ask whether the share was recreated recently.
Does turning off Automatically detect settings break the internet?
Only if your network actually uses a proxy. At home or in most small offices it does nothing, and turning it off just stops Windows from hunting for a proxy that isn’t there. On a corporate network, ask IT first. They’ll usually give you a script address or a proxy IP to enter manually instead.