A logic bug in Windows Update causes most of these issues. There’s a registry flag that tells Windows a Secure Boot update is waiting, and when that flag sits on the wrong value, the update fails again and again. DBX is Secure Boot’s blocklist (a list of known-bad boot programs your PC refuses to run). The failing update just adds new entries to that list. And until it lands, Windows Update will keep retrying forever, which makes this issue recursive in nature.
What’s Actually Failing
Wondering how such a tiny update manages to fail at all? It writes to protected firmware storage on your motherboard, not to a normal folder. So more things can block it than usual.
The stuck registry flag is the big one. Leftover payloads from earlier failed attempts jam it too. And on some boards, Secure Boot itself refuses the write mid-reboot — the firmware being overly cautious about its own update. Annoying, but every one of these has a fix below.
Fix 1 – Reset the Stuck Registry Flag
Start here. This is the known logic bug, and the update refuses to apply unless the flag reads zero. So most stuck DBX installs end right at this fix.
1 – Press Windows + R,
2 – Next, typeregedit, and press Enter.
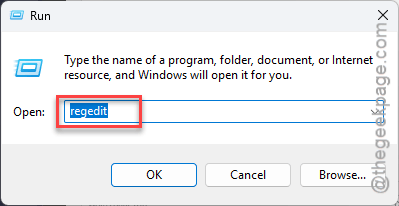
3 – Paste this into the address bar at the top and press Enter:
HKEY_LOCAL_MACHINE\SOFTWARE\Microsoft\SecureBoot
4 – In the right pane, double-click AvailableUpdates.
5 – Change the value to 0 and click OK.
Restart your PC.
6 – Open the Windows Update section, and click Check for updates.
Stick to this one value while you’re in there — the registry is not a place to browse. Your files aren’t touched by any of this, by the way. It’s just a flag.
Fix 2 – Clear Out the Broken Update Payloads
Every failed attempt leaves half-downloaded files behind. And those broken leftovers get reused on the next try, which fails it all over again. Clearing the cache forces a fresh download.
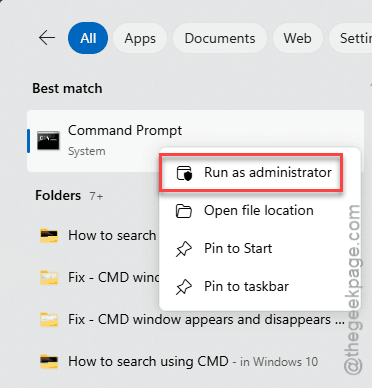
1 – Press the Windows key, type “cmd”, and click Run as administrator on the right side.
2 – Type this code, and press Enter. This pauses the update service.
net stop wuauserv
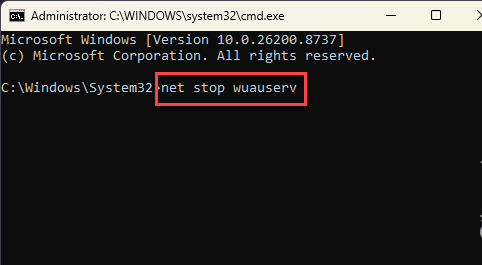
3 – Open File Explorer and go to:
C:\Windows\SoftwareDistribution
4 – Select everything inside that folder (press Ctrl + A) and delete it. Don’t worry — Windows rebuilds all of it on its own.
5 – Back in the command window, type net start wuauserv and press Enter.
6 – Run Check for updates again like in Fix 1.
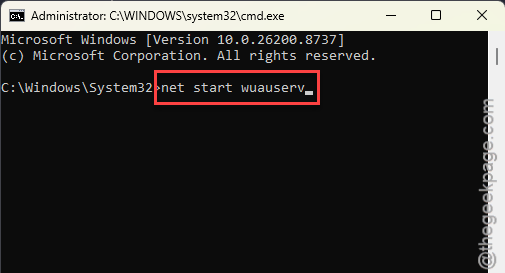
Your update history display may look empty afterward. That’s cosmetic. The installed updates themselves are all still there.
Fix 3 – Install the DBX Update by Hand
Still failing? Then skip the update engine entirely. Microsoft publishes the same package as a standalone file, and running it directly unpacks the security list straight onto the boot partition.
1 – Open the Microsoft Update Catalog in your browser and search for the DBX update’s KB number. The number is shown in your Windows Update error entry.
2 – Download the .msu file that matches your system (x64 for almost everyone).
3 – Press the Windows key, type “cmd”, and click Run as administrator.
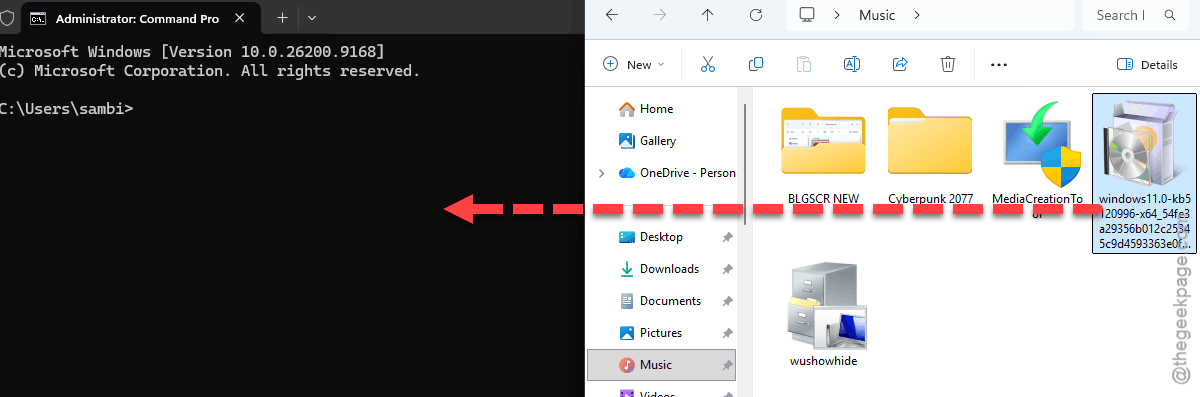
4 – Drag the downloaded .msu file into the command window — that types its full path for you — and press Enter.
[If that does not work, right-click the .msu package, and tap copy as path. Once you have got the path, execute the same from the terminal.]
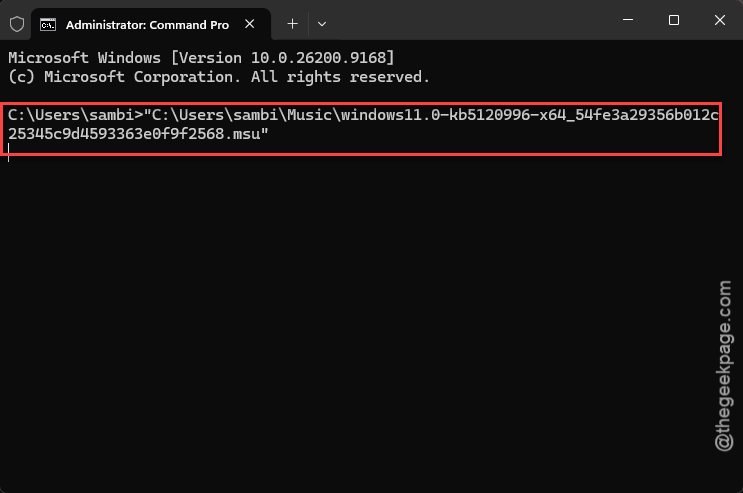
5 – Follow the installer prompts, then restart.
The install itself takes under a minute. The interesting part happens during the reboot, when the new entries get written.
Fix 4 – Turn Off Secure Boot Just for the Install
Sound backwards? It is, a little. But on some boards, active Secure Boot checks block the very update meant to strengthen them. Turning it off for one boot lets the write go through.
1 – Restart your PC and tap your BIOS key repeatedly during startup (usually F2, DEL, F10, or F12 — the boot screen shows which).
2 – Find the Secure Boot option under the Security or Boot tab (the exact tab name varies by manufacturer).
3 – Change it to Disabled.
4 – Save the changes and boot into Windows.
5 – Install the DBX update through Windows Update.
6 – Restart, enter the BIOS again, and switch Secure Boot back to Enabled.
And that last step is not optional. Secure Boot off permanently leaves your PC less protected and can trip up anti-cheat software and Windows 11 upgrade checks later. Turn it back on the same day.
Fix 5 – Update Your Motherboard BIOS
The long way around, but it settles the argument for good. New BIOS releases ship with the latest DBX hashes already baked in — so after flashing, Windows Update sees nothing missing and skips the patch entirely.
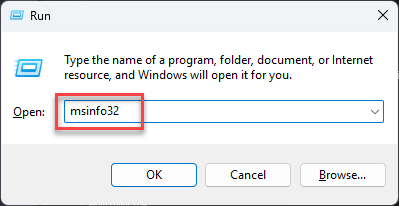
1 – Find your exact motherboard model. Press Windows + R,
2 – Type msinfo32 there, and press Enter.
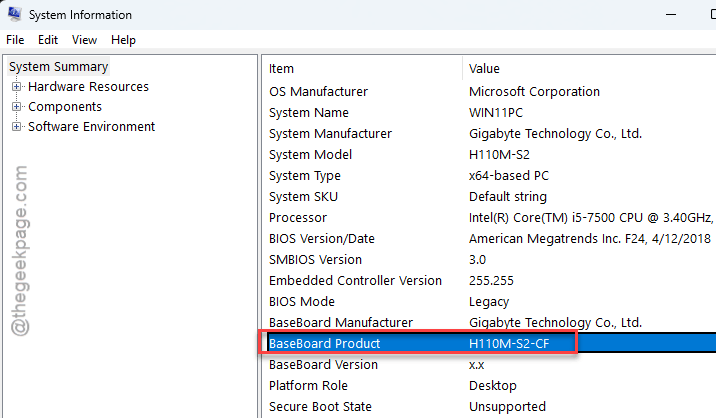
3 – Read the BaseBoard Product line.
4 – Go to the manufacturer’s support page for that model and download the newest BIOS file (it’s free).
5– Copy the file to a USB drive, formatted the way the vendor’s instructions say.
6 – Follow those instructions exactly to flash it — most boards have a built-in flash tool inside the BIOS.
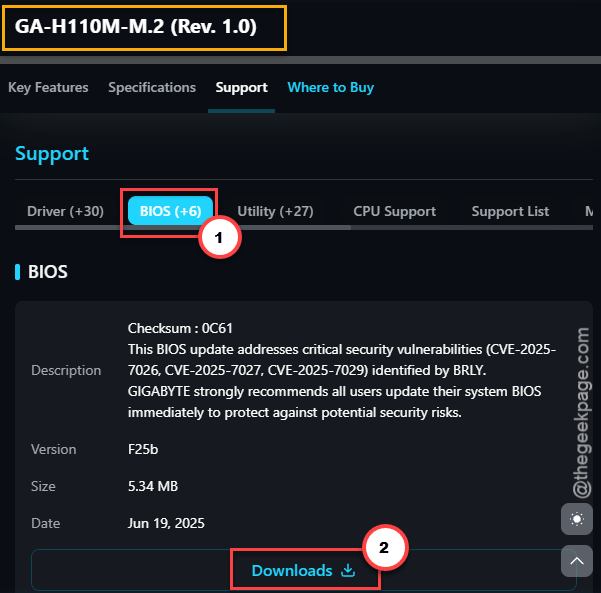
But don’t rush this one, and do not cut power mid-flash. A BIOS update also future-proofs you a bit: boards on current firmware rarely hit these DBX failures again.
People Also Ask
How do I fix Secure Boot on Windows 11?
Check the state first: press Windows + R, type msinfo32, and look at Secure Boot State. If it says Off or Unsupported, enable it in the BIOS under the Security or Boot tab. For failing DBX updates, reset the AvailableUpdates registry value to zero and retry.
Why can’t I upgrade to Windows 11 due to Secure Boot issues?
The upgrade checker wants Secure Boot capability, and plenty of older boards ship with it disabled or set to legacy CSM mode. Switch the BIOS to UEFI mode, enable Secure Boot, and re-run the compatibility check. No Windows reinstall needed in most cases.
Is it safe to turn off Secure Boot temporarily?
For one boot to let an update through, yes — your files and Windows install are unaffected. Just switch it back on right after. Left off long-term, you lose boot-level malware protection, and some games’ anti-cheat systems will refuse to start.