Although Microsoft tries to fix bugs through every update, but right click not working on start menu and taskbar items has survived through various updates and is bugging many Windows 10 users. If you are also affected by this, you do not need to worry as here is a working solution for this problem.
Fix 1 – (Temporary Solution) Restart the file explorer
Restarting the file explorer instantly fix this issue.
1. Press Ctrl + Shift + Esc from your keyboard to open task manager.
2. Locate windows explorer and restart it.

Fix 2 – Using powershell
If it still does not work, just open powershell window with admin rights.
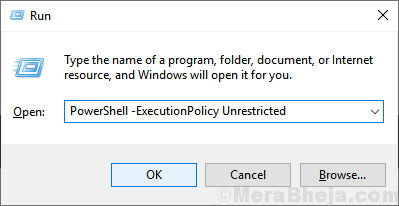
1. Press windows key + r together to open run.
2. Copy and paste the command given below to open powershell as admin.
PowerShell -ExecutionPolicy Unrestricted

3. Now, copy and paste the command given below and hit enter key to execute it.
Get-AppXPackage -AllUsers | Foreach {Add-AppxPackage -DisableDevelopmentMode -Register "$($_.InstallLocation)\AppXManifest.xml"}
Ignore warning and errors and let the program execute.
Once done, try right clicking on the start menu again. It will be fixed for sure.
Fix 3 – Replacing winx folder from somewhere else
Step 1 – Download this ZIP files from this link on your computer.
Step 2 – Extract it on your PC.
Step 3 – Go inside this extracted folder and Copy all three files (Group1, Group 2 and Group 3).
Step 4 – Open file explorer by pressing Windows key + E together.
Step 5 – Now, copy and paste the path in the address bar of file explorer.
%USERPROFILE%\AppData\Local\Microsoft\Windows\WinX

Step 6 – Paste the files you copied in this folder and replace all the files.
Step 7 – Now, Press Ctrl + Shift + Esc from your keyboard to open task manager.
Step 8 – Locate windows explorer and restart it.

Now, your problem will sure get fixed.
Fix 4 – Using Registry editor
1. Press Windows key + r together to open run command box.
2. write regedit and click OK to open registry editor.

3. Browse to the location given below in the registry editor.
HKEY_LOCAL_MACHINE\SOFTWARE\Microsoft\Windows\CurrentVersion\ ImmersiveShell\Launcher
4. Right click on the right side and Choose New > DWORD (32-bit) Value

5. rename it UseExperience
6. Double click on it to modify it.
7. Set the value data to 0.

8. Close the registry editor window and just reboot the computer.
Fix 5 – Use Shift and Right click Together
Many users stated that pressing Shift while right clicking sorted the issue. You can also try pressing SHIFT and then doing a right click to check out if that works or not.