Adobe’s 26.2 update broke the Camera Shake effect. That’s why your timeline crawls now. Drop it on a clip, scrub for a few seconds, and Premiere starts chewing through RAM like it’s free. No, it’s not your PC. People rolled back to 26.0.2 on the exact same machine, with the same drivers and the same projects, and the lag vanished. So this one’s on Adobe. Here are some tips to fix the issue.
Why Premiere Chokes on Camera Shake
Short version? Camera Shake is one of the newer AI-driven effects. It tries to keep all of its motion data in RAM so playback stays smooth. Nice idea.
But when Premiere’s memory setting is on Performance, it ignores your RAM limits. It starts dumping data into the Windows swap file (the chunk of your drive Windows uses as backup memory). That’s the leak you’re watching in Task Manager.
Then there’s the audio side, which is weirder. Premiere keeps checking your microphone the whole time you scrub. If Windows changes the mic’s sample rate, or the mic goes to sleep, the playhead just sits there waiting for it. Why does a video editor care about your mic mid-scrub? No clue. But it does.
Fix 1 – Update to 26.5 (or Roll Back to 26.0.2)
Start here. Adobe pushed version 26.5 specifically to patch the Camera Shake memory leak. Everything else in this article is a workaround. This is the actual fix.
1 – Save your project.
2 – Close Premiere Pro.
3 – Open the Creative Cloud desktop app. Its icon is usually in the system tray at the bottom right of your screen.
4 – Click Updates in the left sidebar.
5 – Click Update next to Premiere Pro.
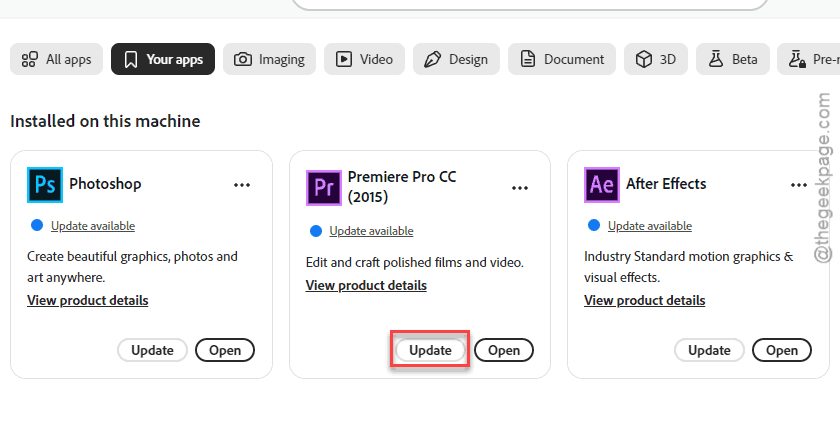
The download takes a few minutes. Wait for the button to change to Open before you launch it.
Can’t get 26.5 yet? Go backwards instead. In the Creative Cloud app, click the three dots (⋯) next to Premiere Pro, pick Other versions, and install 26.0.2. Older builds install side by side, so your newer one stays put.
And for next time: don’t install a fresh Premiere build in the middle of a big project. Give it a week or two. Let other people find the bugs first.
Fix 2 – Switch Memory Optimization to Memory
1 – Click Edit in the menu bar at the top.
2 – Hover over Preferences and click Memory.
3 – Find the drop-down labeled Optimize rendering for.
4 – Change it from Performance to Memory.
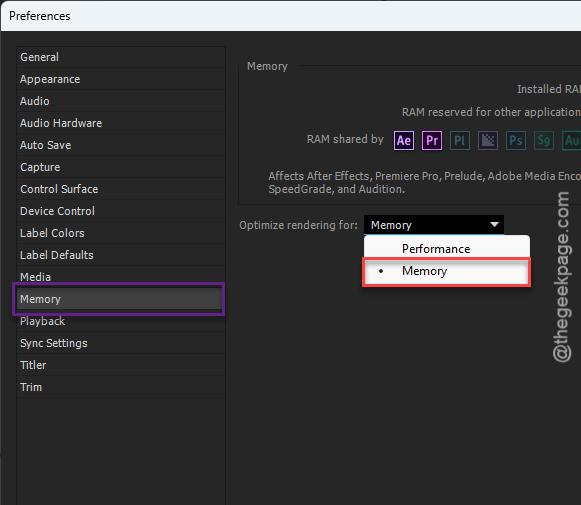
5 – Look right above it at RAM reserved for other applications. Set it to at least 4 GB.
6 – Click OK.
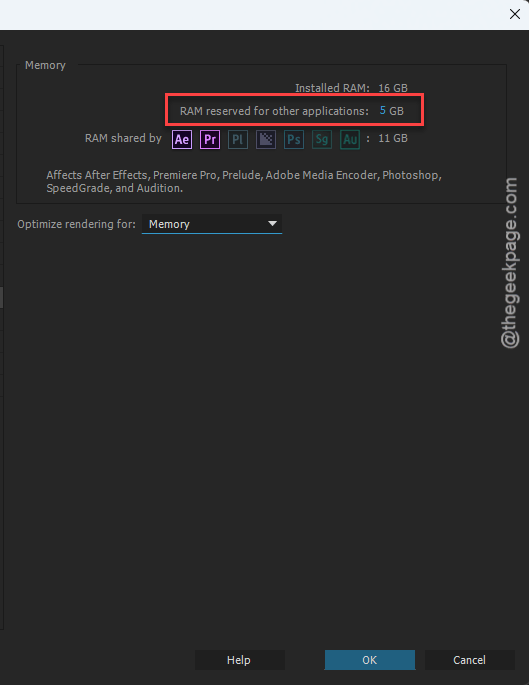
7 – Close Premiere Pro and open it again.
Do not skip the restart. Premiere only clears out the old cache data properly after a fresh launch. And that 4 GB reserve keeps Windows itself from getting starved (a starved Windows makes everything stutter, not just Premiere).
Fix 3 – Set the Audio Input to No Input
This is the one that fixes scrub lag for a lot of people. Annoying that it’s even needed.
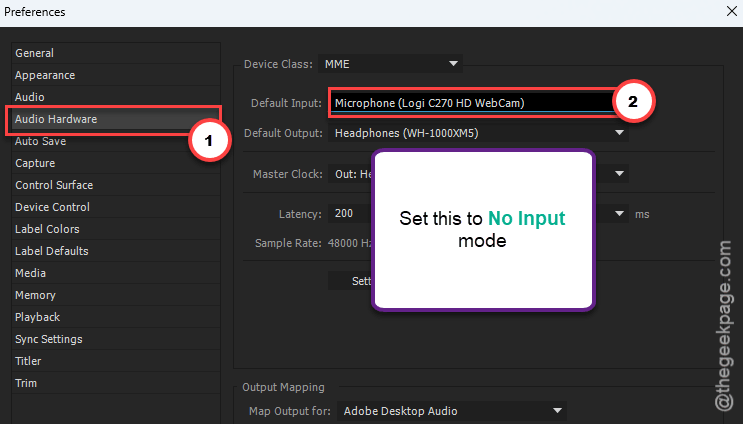
1 – Open the same Edit > Preferences menu from Fix 2, but click Audio Hardware this time.
2 – Find the Default Input drop-down near the top.
3 – Change it from your microphone (or System Default) to No Input.
4 – A warning pops up about deleting active track recordings. Click Yes.
That warning sounds scary.
5 – Click OK.
Now scrub the timeline. It should feel way lighter right away. Need the mic for a voiceover later? Switch it back, record, then set it to No Input again.
Fix 4 – Flip the Renderer Off and Back On
Weird one, but it helps.
1 – Go to File > Project Settings > General.
2 – Change the renderer to Mercury Playback Engine Software Only and click OK.
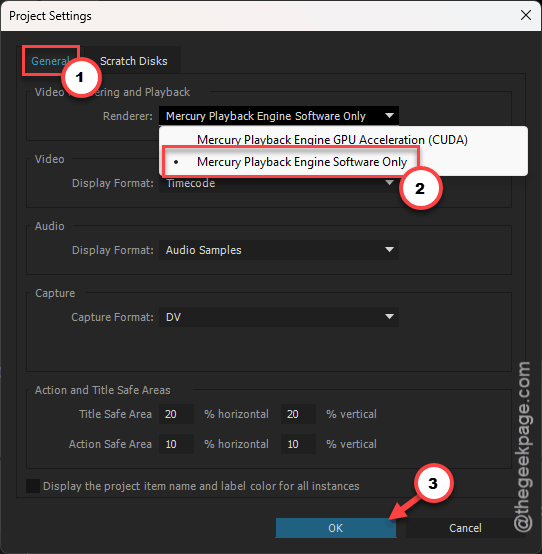
3 – Then open that same window again and switch it straight back to Mercury Playback Engine GPU Acceleration.
Check if this helps.
Fix 5 – Lower Playback Resolution and Turn Off High Quality Playback
These two won’t stop the leak. But they take a lot of pressure off your PC while you edit.
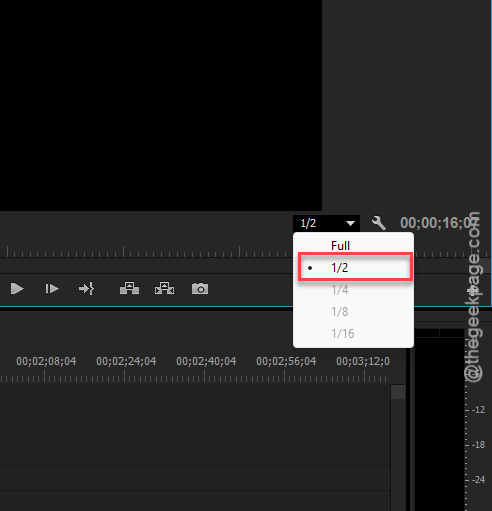
1 – Look at the bottom right corner of the Program Monitor (the preview window that plays your timeline).
2 – Click the resolution drop-down. It says Full by default.
3 – Pick 1/2. For 4K footage, go with 1/4.
4 – Click the wrench icon right next to it.
5 – Uncheck High Quality Playback if it has a checkmark.
Neither setting touches your export. The final video still comes out at full quality. You can flip back to Full anytime to check small details.
Honestly, 1/2 should be your default on any heavy timeline. Most editors work that way.
Fix 6 – Turn Off Async Rendering in the Hidden Console
Last resort, and a bit technical. Premiere 26 renders effects like Camera Shake on the GPU while the CPU handles the playhead on its own. Sometimes the two fall out of step. That’s the lag. Turning off async rendering makes them work in lockstep.
1 – Open Premiere Pro and press Ctrl + F12. A Console panel opens.
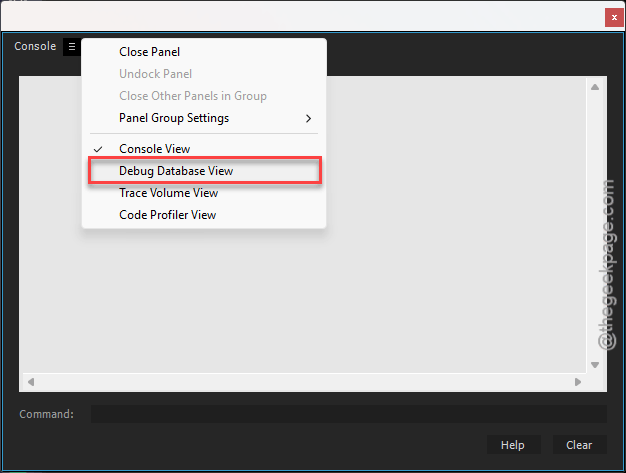
2 – Click the hamburger menu (three horizontal lines) in the top-left corner of that panel.
3 – Choose Debug Database View.
4 – Type Async in the search bar at the top.
5 – Find GFX.EnableAsyncRendering. On some builds it’s called Transmit.EnableAsyncRendering instead.
6 – Change its value from true to false.
7 – Restart Premiere Pro.
Change that one setting and nothing else. The debug list is full of switches that can break Premiere in brand new ways. If things get worse, go back in and set it to true.
People Also Ask
Why is Premiere Pro 2026 lagging and freezing?
Mostly a bug. Version 26.2 brought in UI lag that disappears completely when people roll back to 26.0.2 on the same hardware. Heavy AI effects like Camera Shake make it worse. So does Premiere constantly checking your microphone. Setting Default Input to No Input helps a lot.
How do I fix a shaky camera in Premiere Pro?
That’s a different job: steadying wobbly footage, not the Camera Shake effect. Use Warp Stabilizer. Drag it from the Effects panel onto your clip and let it analyze, which takes a minute or two. It’s heavy too, so drop your playback resolution to 1/2 while it works.