Deadlock’s Vulkan mode is experimental, and it breaks. That’s where the crash comes from. The neon pinks and greens have a different source: the upscaler fighting the game’s lighting.
Neither one means your graphics card is dying. Looks that way, though. A screen full of psychedelic colors is alarming.
So the plan is short. Get off Vulkan first. Then clear out the broken settings and switch off the upscaler.
What’s Actually Going On
Vulkan is one of two ways the game can talk to your graphics card (the other is DirectX 11). Valve’s version of it in Deadlock is still rough. Crashes at launch. Crashes mid-match.
But switching back isn’t always enough. The game saves its video settings in a file called video.txt, and a bad Vulkan setup can get stuck in there. Steam Cloud then copies the bad file right back after you delete it. Helpful? Not really.
And the neon glitch is a known community bug. AMD FSR (an upscaler, which draws the game at a lower resolution and stretches it to fit your screen) clashes with the lighting engine. Damaged shader files can cause the same mess.
Fix 1 – Switch From Vulkan to DirectX 11
Do this first. It gets you back into the game.
1 – Open your Steam Library.
2 – Right-click Deadlock and select Properties.
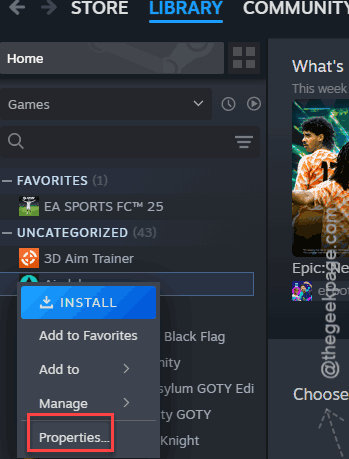
3 – Stay on the General tab and scroll down to Launch Options.
4 – Delete -vulkan if you see it in the box.
5 – Type -dx11 in the box.
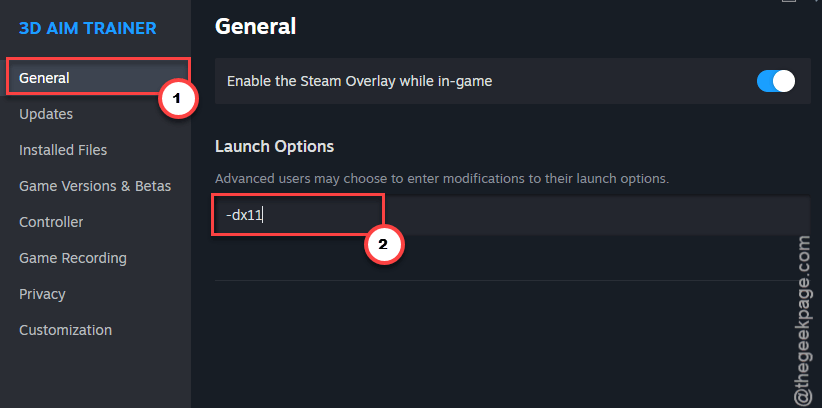
6 – Close the window and launch the game.
Leave -dx11 there for good. Vulkan can wait until Valve finishes it.
Fix 2 – Turn Off Steam Cloud for Deadlock
Before you delete the bad settings file, stop Steam from putting it back.
1 – Right-click Deadlock in Steam and select Properties.
2 – Find Keep games saves in the Steam Cloud on the General tab.
3 – Turn the toggle Off.
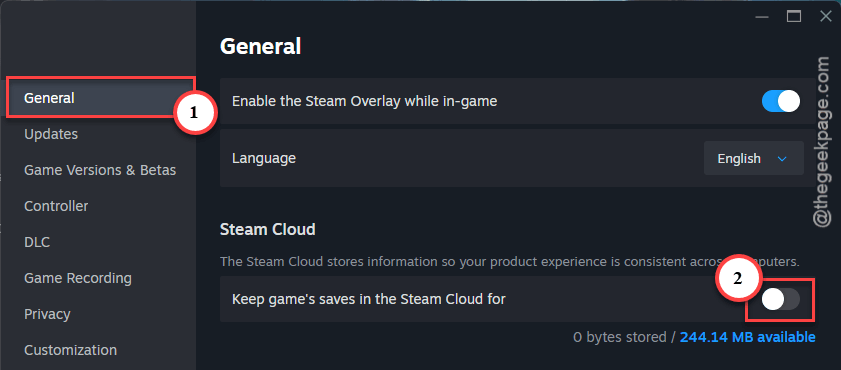
Not permanent. And you should turn it back on once the game is running properly again, so your settings follow you to other PCs.
Fix 3 – Delete the video.txt File
This file holds every graphics setting. Deleting it makes the game detect your hardware from scratch.
1 – Open File Explorer (press Windows + E).
2 – Go to your Steam folder, then open
steamapps\common\Deadlock\game\citadel\cfg
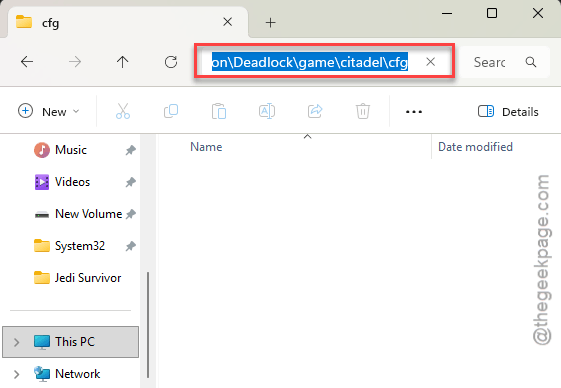
3 – Find the file named video.txt.
4 – Right-click it and select Delete.
5 – Restart the game.
Can’t find your Steam folder?
1 –At first, right-click Deadlock in Steam.
2 –Then, hover over Manage, and click Browse local files.
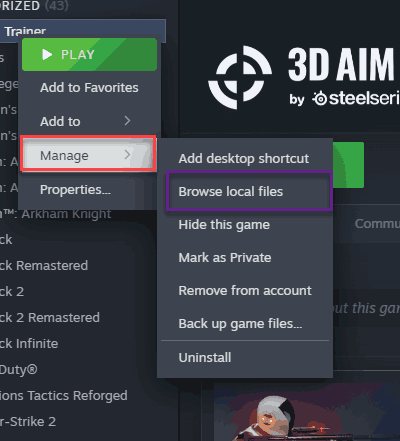
That opens the Deadlock folder directly,
3 – You can go into game, citadel, then cfg from there.
Your resolution and quality settings go back to defaults. You will have to pick them again.
Fix 4 – Reset Graphics With -autoconfig
Same idea as Fix 3, without touching any files. Handy if you’d rather not dig through folders.
1 – Open Launch Options again, like in Fix 1.
2 – Add -autoconfig after -dx11, with a space between them.
3 – Launch the game once.
4 – Close the game.
5 – Remove -autoconfig from the box.
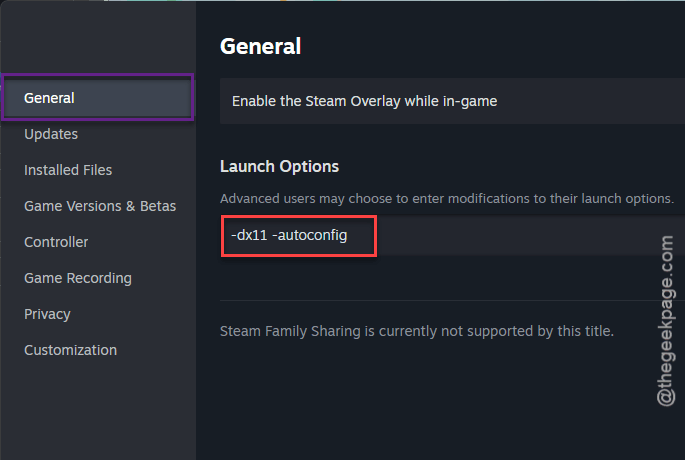
Do not skip step 5. Leave it in and the game resets your settings on every single launch. Annoying way to find out.
Fix 5 – Turn Off FSR and Upscaling
This is the neon fix.
1 – Launch Deadlock and open Settings.
2 – Go to the Video tab.
3 – Scroll down to Advanced Video. The upscaling options are there.
4 – Change the upscaling method to Native or Off.
5 – Apply the change and restart the game.
The pink and green mess should be gone when you load back in. So expect a slightly lower frame rate without the upscaler (that’s the trade).
Fix 6 – Clear Steam’s Download Cache
Still seeing corrupted textures? Steam downloads ready-made shader files for Deadlock, and they can get damaged during a background update.
1 – Click Steam in the top left corner of the Steam window.
2 – Select Settings.
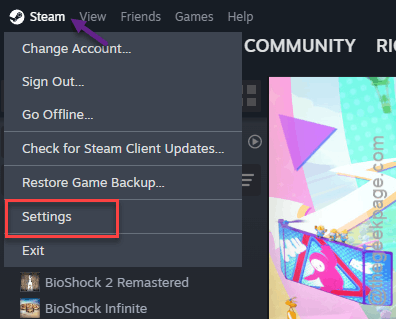
3 – Click Downloads in the left menu.
4 – Scroll down and click Clear Cache next to Clear Download Cache.
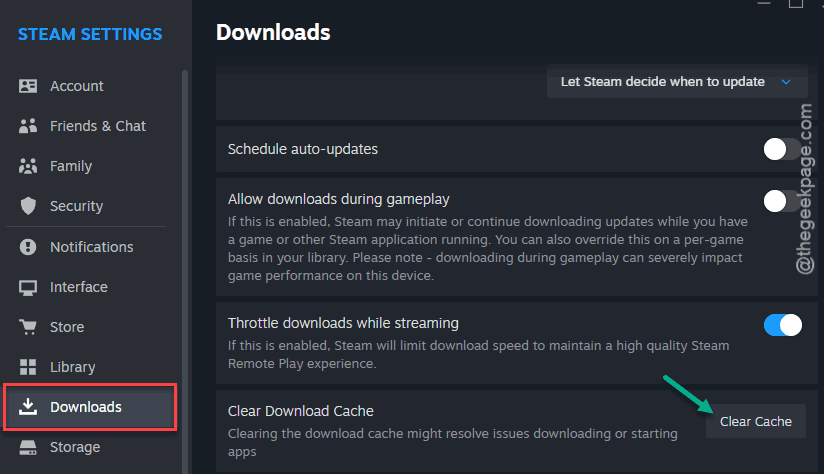
5 – Sign back in when Steam restarts.
6 – Launch Deadlock.
The first loading screen takes longer than usual, because the game is rebuilding its shaders. Don’t close it.
Fix 7 – Close Your Overlays
Overlays draw on top of the game. On a shaky renderer, that’s asking for trouble. Switch these off:
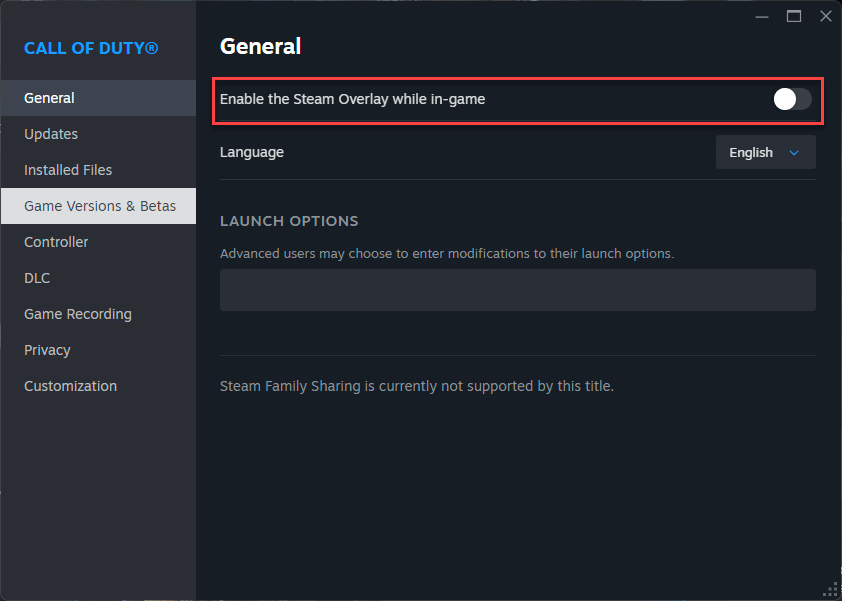
- Steam: open Settings, go to In-Game, and turn off Enable the Steam Overlay while in-game.
- NVIDIA: open the NVIDIA settings and disable In-Game Overlay.
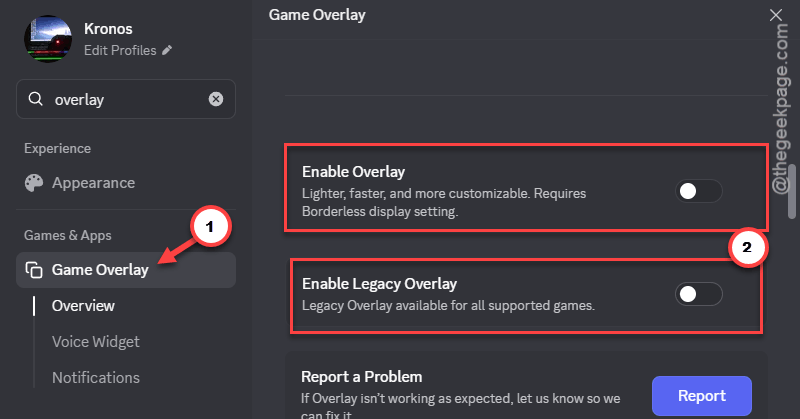
- Discord: open User Settings, click Game Overlay, and turn off Enable in-game overlay.
- MSI Afterburner / RivaTuner: close them, or turn off the on-screen monitoring display.
Fix 8 – Check the CPU If You Have an i9-14900K
If you crash around the 7 to 10 minute mark no matter what you change, read this one. A player spent ages blaming Vulkan. It was the CPU.
Their fix was in the BIOS (the setup screen you reach by pressing Delete or F2 as the PC starts). On a Gigabyte board the path was Tweaker, then Advanced CPU Settings, then Active Turbo Ratios set to Manual. They changed every P-core turbo ratio to 56.
After that, they played three full matches on DirectX 11 with no crash.
But this is not a beginner tweak. If BIOS menus make you nervous, ask someone who has done it before. Other board brands name these settings differently, too.
People Also Ask
How to fix deadlock crashing?
Force DirectX 11. Right-click Deadlock in Steam, open Properties, and type -dx11 in Launch Options. Remove -vulkan if it’s there. If the game still crashes, delete the video.txt file from the game’s cfg folder so the graphics settings reset. Close overlays like Discord and MSI Afterburner too.
How to switch deadlock to vulcan?
Right-click Deadlock in your Steam Library and select Properties. In the Launch Options box on the General tab, type -vulkan and remove -dx11 if it’s there. Then launch the game. But be warned. Vulkan is still experimental in Deadlock, and it is the reason a lot of players crash.
Is Vulkan or DirectX 11 better for Deadlock?
DirectX 11, for now. It’s the stable one. Vulkan can give some setups a few extra frames, but Valve’s version is still experimental and crashes for plenty of players. Try it again after a few game updates. Until then, -dx11 is the safer launch option.