Exclude Folders is one of the most attractive features of Windows 10, which actually helps you in saving a lot of space on your drives. You can save a lot of space while copying, by using this feature, and make use of the saved space sometime later on something else. So you are upto transfering a huge amount of data from your laptop to a USB drive. That’s when the system tells you that there is not enough space on the disk in order to accommodate every single thing. In such a situation, you can opt to Exclude Folders from File History in order to free some unwanted space and use it to actually store something useful. This article aims at getting you familiarized with the Exclude Folders feature of Windows 10.
See also : – How to delete Quick access History in Windows 10
STEP 1
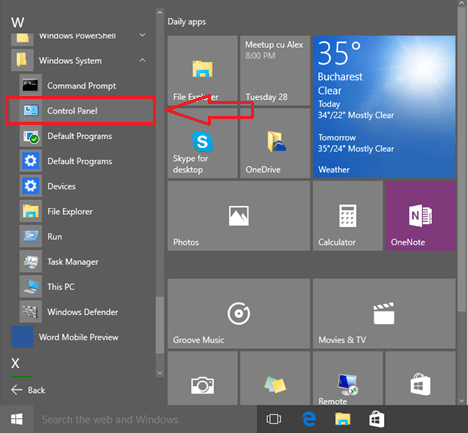
- Click on the Start panel inorder to find the Control Panel option or simply use WIN+X. Once you have found it, click on it to proceed to the next step.
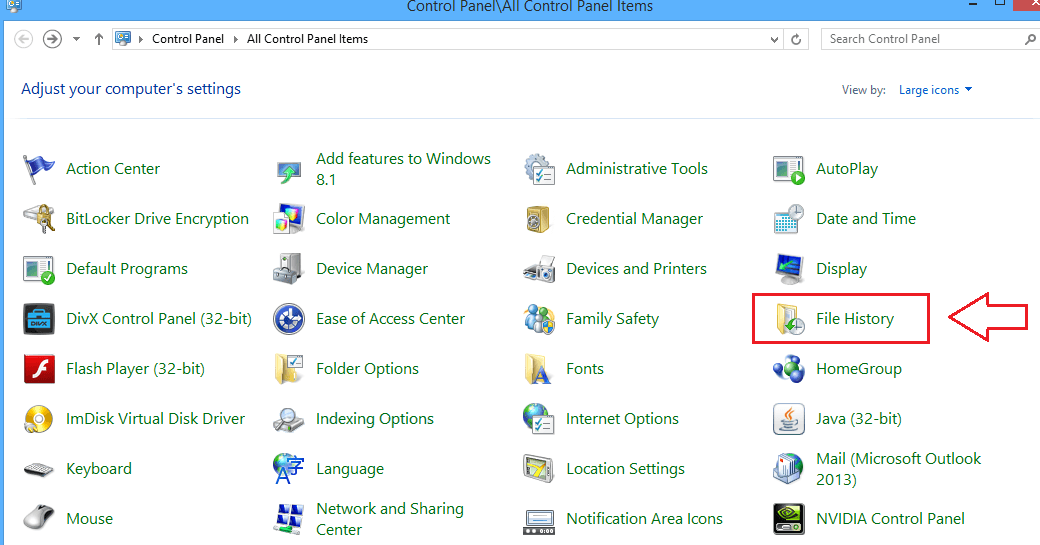
- From the Control Panel applet, find the File History pane and click on it.
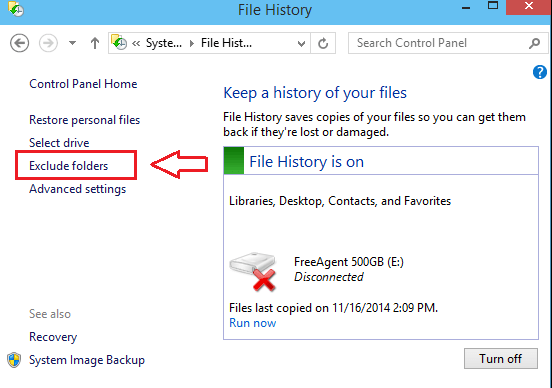
- Now that you have clicked on the File History pane, it will expand to give you more options. Find an option named Exclude Folders from the left side of the File History window and click on it.
- Now a new window opens up. This is where you get to add the folders which you want to apply Exclude Folders feature to. Click on the add button at the bottom of the window, to browse and select folders to save the space.
- A browsing window appears. Choose the folder by browsing through the libraries. In the screenshot given below, I have selected a folder named CollegeDays, to which I wish to apply the Exclude Folders option. Once you have selected a folder, click on Select Folder button at the bottom of the page.
- Once you have selected a folder, It appears in the list of folders under Exclude Folders. If you want to add more folders, you can repeat steps just like before. Once you are done with adding all the folders, click on Save changes inorder to see the applied changes.
That’s it. You are done. You have successfully saved some space on your drives. The folders added under Exclude Folders have optimized space complexity. Now if you want to remove this feature off some of the added folders, you can simply use the Remove button which happens to be located right next to the Add button. It’s as simple as that. Hope the article was found useful.


