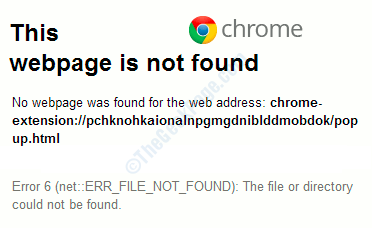
When you try to open a specific webpage in Google Chrome, you might get the error that says:
This webpage is not found. No webpage was found for the web address: chrome-extension://some html page link, followed by the error code, that is Error 6 (net::ERR_FILE_NOT_FOUND): The file or directory could not be found.
This error is usually caused by a problematic extension that you have installed in your Google Chrome. The Error message also clearly states that the problem is caused by some chrome – extension. This is one common error reported by many users and can be fixed in some simple steps. Please try out the methods listed below one by one and check which one solves your problem.
Method 1: Remove extension from Chrome’s data folder if it keeps coming back
Even after removing the extension and resetting Google Chrome, if you notice that the problematic extension keeps coming back automatically once you restart Chrome, then you have to manually delete it from Google Chrome’s user data folder.
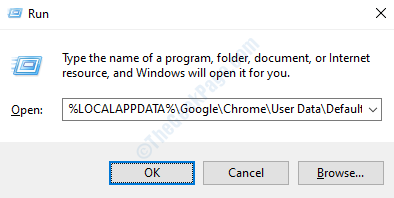
1. Press WIN + R keys together and bring up the Run dialog box. Now type in or copy-paste the following,
%LOCALAPPDATA%\Google\Chrome\User Data\Default\Extensions\
and then hit Enter key to open the Google Chrome user data folder.
2. Now you have to check your Error 6 (net::ERR_FILE_NOT_FOUND) error message. In your error message, you will find the same combination of characters that one of the folders in the Chrome user data folder has its name as. Delete that folder by clicking on it and then hitting the Delete key.
3. That’s it. Restart your PC. This should fix your issue.
Method 2: Uninstall DefaultTab Program and its Associated Extension
Sometimes, the error Error 6 (net::ERR_FILE_NOT_FOUND) could be caused because of the presence of a program called DefaultTab in your machine. You need to uninstall it from your machine if present. Also, you need to search for the extension DefaultTab among your Google Chrome extensions and remove it, if it is installed.
1. Bring up the Run dialog box by pressing the keys WIN+R together. Once the Run window opens up, type in appwiz.cpl and then press the Enter key.
2. Previous step would open up Programs and Features window of your Control Panel. You need to search for the program named DefaultTab among the applications that are installed.
If it is not found, then that means DefaultTab is not the cause of your issue. You can proceed to Method 2.
However, if you do find DefaultTab program in the list, then you need to uninstall it by right clicking on it and then by clicking on the option Uninstall.
3. If you get a UAC prompt like the one below, click on Yes button.
4. Wait while the Windows Installer finishes the removal of the application.
5. Now that you have successfully uninstalled DefaultTab program from your machine, let’s move on to removing the DefaultTab extension from your Google Chrome.
Open Google Chrome browser and click on the three-dots icons at the top-right corner of the page. Select Settings option from the menu that spans out.
6. Settings window would now be open to you. In the left window pane, locate and click on the option that says Extensions.
7. You will now be able to view all the extensions that are installed in your Google Chrome. Look for the extension by the name DefaultTab. You can use the Search bar at the top to find it quickly as well. If DefaultTab extension is present, remove it.
To remove an extension, simply click on the Remove button associated with it.
8. Restart your Google Chrome for the changes to take over. Check if your issue is fixed or not.
Method 3: Find and disable the extension that is causing the issue
As the error message clearly states that the error Error 6 (net::ERR_FILE_NOT_FOUND) is caused because of a Google Chrome extension, we need to find the extension that is causing the issue and remove it, if Method 1 didn’t solve your issue.
1. Open Google Chrome browser and click on the three-dots icon at the top-right corner of the page. Once the menu expands out, click on the option Settings.
2. Now, from the left pane of the Chrome Settings window, find and click on the link that says Extensions.
3. You will now be able to view all the Chrome extensions that are installed in your Google Chrome. Disable all the extensions by turning off the toggle button shown in the screenshot below.
4. Restart Google Chrome and see if the error is gone or not. If the error is gone, then it means that one of the extensions is indeed the problem creator.
In that case, enable the disabled extensions one by one and find out upon enabling which extension problem comes back. Remember to restart your Chrome when you check each extension.
You can enable the extension just by turning on the toggle button that you previously turned off.
5. Once you find out the extension that is causing the problem, you can either keep it disabled by turning off the toggle button or you can click on the Remove button associated with it to remove it permanently.
Method 4: Reset Google Chrome Browser
If both the methods listed above do not solve your issue, then we have to try the next method, that is, resetting your Google Chrome.
1. After opening Google Chrome, click on the three-dots icon at the top right corner of the page and then click on Settings option.
2. When the Settings page opens, in the left window pane, locate the section that is named Advanced. Once you locate it, click on the arrow icon associated with it, to expand its sub sections. Click on Reset and clean up next.
3. As next, click on the option that says Restore settings to their original defaults under Reset and clean up.
4. You will now get a confirmation window that warns you about what all settings will be reset. Click on Reset Settings button once you’re done checking it out.
5. That’s it. Restart you Chrome and see if this solves your issue.
Please tell us in comments which method worked for you.


