Quota Management is one of the most important tools used in Windows Platform. In terms of Hard Disks, Quota Management is defined as setting limits for disk usage per user. It helps in proper allocation of data. It is usually done on those systems/servers where the amount of users is high.
Disk quota is used to control and examine Disk Space Usage. Basically, there are two types of disk quotas. They are:
- Usage Quota or Block Quota
- File Quota or Inode Quota
Usage Quota is used in limitation of Hard Disk Space to be used whereas File Quota is used in limitation of Files and Folders to be used.
Other quotas, such as ‘Soft Quota’ is used when the user is near to its usage limit and, ‘Hard Quota’ is used when the user is reaching its effective limit.
Now, this article will guide you certain steps on “how to enable quota management for hard disks” in Windows 10:
Step 1:
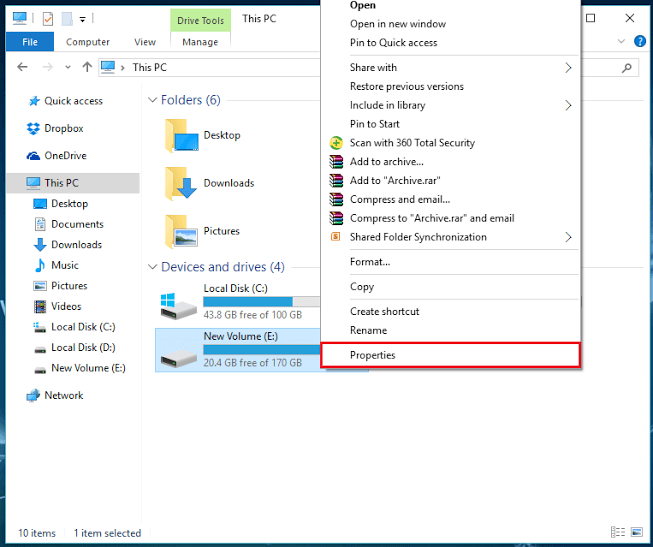
On your desktop screen, Double-click on “This PC”. In “This PC” Window, Right-click on any Hard Disk (i.e. Local Disk (C:), (D:) etc.) and then click on “Properties”.

Step 2:
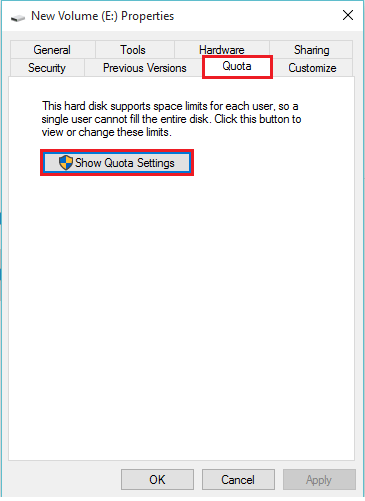
Look for “Quota” section and click on it. Under “Quota” section, click on “Show Quota Settings”.

Step 3:
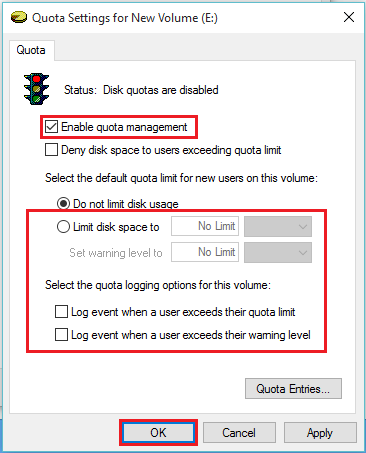
Check mark the “Enable Quota Management” button. After enabling it, you can limit disk space to a certain size. You can also set warning level to display warning messages when the allocated disk space is near to its full size. Click on “OK” after making your desired changes.

Step 4:
A dialog box shall with a warning message displaying as “You should enable the quota system only if you intend to use quotas on this volume. When you enable the quota system, the volume will be rescanned to update disk usage statistics. This might take several minutes. Press OK to enable the quota system now”.
Click on “OK” to allow Quota Management for this Hard disk.
