Hyper-V is a wonderful feature that allows users to create virtual machines on their systems without downloading any third-party applications. This feature helps developers, testers to check new builds from the system itself. But, sadly this feature this available only with the Windows 10 Professional or Enterprises editions. If you want to use the Hyper-V platform you have to spend a staggering am0unt of $99!
Not any more!
You can now use the Hyper-V on your Windows 10 Home edition just by running a simple script. Just enact the steps mentioned in this article to do this.
How to enable Hyper-V in Windows 10 Home
Follow these steps.
1. Go to this link.
2. Then, click on the “Download” to download the script on your computer.

Close the browser after downloading the file.
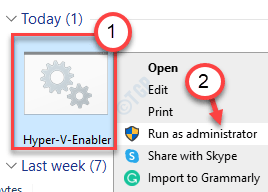
3. Right-click on the “Hyper-V-Enabler” script and click on “Run as administrator“.

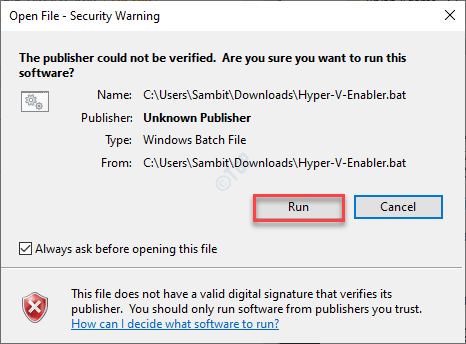
4. Then, click on “Run” to run the script on your computer.

5. The script will run on your computer.
6. Once this message appears, ‘Press any key to continue…’ type “Y“.

Your computer will restart. Windows will start installing the Hyper- V on your computer. This process may take a while.
That’s it! Once your computer normally boots up, Hyper-V is enabled and ready to use.
You can check it from here –
a. Right-click on the Windows key and click on “Run“.
b. Then, type “optionalfeatures” and hit Enter.

c. Just check if that the “Hyper-V” option is checked.

How to disable Hyper – V on Windows 10 Home
If you want to disable the Hypervisor feature, enact these steps –
1. You need to right-click on the Windows key and then, click on “Run“.
2. After that, write this code and hit Enter.
optionalfeatures

3. From the list of features, just uncheck the “Hyper-V” option.
4. After doing so, click on “OK“.

Windows will now start the process of disabling the HyperVisor on your computer.
5. Finally, click on “Restart now” to restart the system.

Once your computer restarts, the Hyper-V feature will be disabled on your Windows 10 Home.