How many times you have launched your new laptop/PC and stumble upon the annoying ‘Set up OneDrive’ message? This annoying message persistently comes along the Desktop screen after a fresh OS install. In this article, we will discuss a step-by-step approach to disable the ‘Set up OneDrive’ prompt on your Windows 11/10 machine.
How to disable the ‘Set up OneDrive’ prompt in Windows 11/10
There are several distinct methods you can use to put an end to this annoying pop-up reminder.
Way 1 – Disable the OneDrive using the GPO
There is a policy that can block the usage on OneDrive, which you can use in this case.
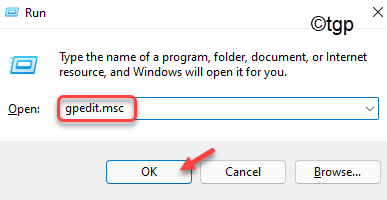
1. At first, press the Windows key+R keys together.
2. Then, type “gpedit.msc” and click on “OK“.

3. When the Group Policy Editor opens up, go this way ~
Local Computer Policy > Computer Configuration > Administrative Templates > Windows Components > OneDrive
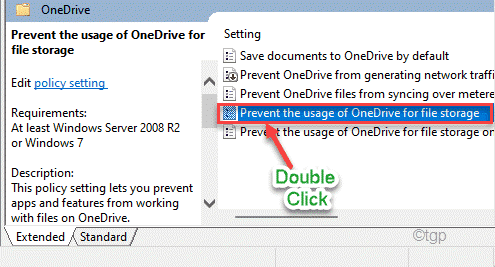
4. Here, on the right-hand side, you will find the “Prevent the usage of OneDrive for file storage” policy.
5. You have to double-click on the policy to modify it.

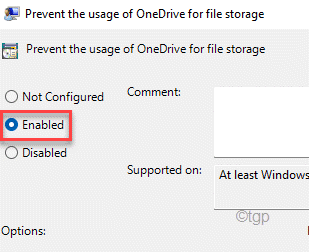
6. Now, choose the “Enabled” option.
7. Further, tap on “Apply” and “OK” to save the changes.

Once you are done, close the Local Group Policy Editor window and restart your machine.
After the restart, OneDrive will be disabled on your computer. So, there is no question of seeing any further prompts.
Fix 2 – Disable the OneDrive startup
If you disable the OneDrive auto-start, you won’t see the prompt.
1. At first, right-click on the Windows key and tap on the “Task Manager“.

2. When the Task Manager opens up, go to the “Startup” tab.
3. Here, scroll down to find the “OneDrive“. Simply, right-click on it and click on “Disable“.

Finally, close the Task Manager and reboot your computer. You won’t see the annoying prompt again.
Fix 3 – Uninstall OneDrive
If the other two methods don’t work out and you are still seeing the annoying error message, you can just uninstall the OneDrive app.
1. At first, open the Settings window pressing the Windows key+I keys together.
2. Then, tap on “Apps” from the left-hand side.
3. Same way, go “Apps & Features” from the right-hand side.

4. In the App list, scroll down to find the “OneDrive” app.
5. Then, tap on the “OneDrive” to select it. After that, click on the three-dot menu and tap on “Uninstall” to uninstall the application from your computer.

This will uninstall the OneDrive app. If you are unable to uninstall the OneDrive app, you have to do it using the Command Prompt.
1. Press the Windows key and type “cmd“.
2. Then, right-click on the “Command Prompt” and click on “Run as administrator“.
3. When the terminal opens up, type this command and hit Enter.
taskkill /f /im OneDrive.exe

4. Then, input this command and press the Enter to uninstall the OneDrive app.
For 32-bit Windows –
%SystemRoot%\System32\OneDriveSetup.exe /uninstall
For 64-bit Windows –
%SystemRoot%\SysWOW64\OneDriveSetup.exe /uninstall

After uninstalling the OneDrive app, close the Command Prompt window.
Test if this has actually worked or not.