Some Windows 10 users have complained about an issue of seeing an annoying ‘Test Mode‘ message on their desktop. If you are seeing a similar message on your computer, don’t worry. In a few steps, you can remove the text message from your desktop.
Fix 1- Remove Test Mode message using Command Prompt-
To remove the text from your desktop screen all you have is to pass a single command through PowerShell or Command Prompt.
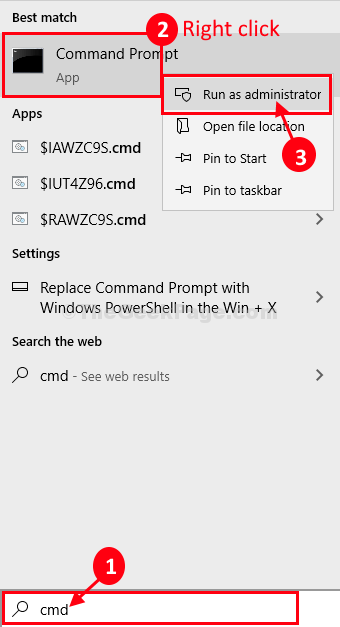
1. What you need to do is to click on the Windows icon and type “cmd“.
2. Then, right-click on “Command Prompt” in the elevated search result and choose “Run as administrator“.

3. To switch the test signing mode ‘Off‘, copy-paste this simple command and hit Enter to execute it in the terminal.
bcdedit -set TESTSIGNING OFF

When you see the confirmation message “The operation was completed successfully“, close Command Prompt window.
Now restart your computer to complete the process.
Note: – If you see a message which says The boot configuration data store could not be opened ,Access is denied, then you will have to disable secure boot in BIOS.
Fix 2 – Make sure your windows is activated
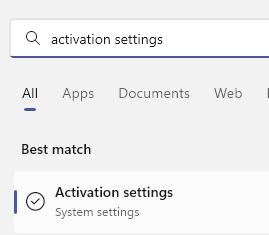
1 -Search Activation settings in windows search and click on it

2 -Now, make sure windows is activated

That’s it! The ‘Test Mode’ text will not bother you anymore.