Microsoft Edge prompt has become more annoying than ever in recent Windows Updates as Microsoft is desperately trying to push the browser to more users, even if they don’t want it. If you are annoyed with the ‘Recommended browser’ tag, you are just in the right place. In this article, we are going to show you how to completely disable the Microsoft Edge on your system and use your favorite browser instead.

How to completely disable the Microsoft Edge in Windows 11
You can easily disable the Microsoft Edge in Windows 11.
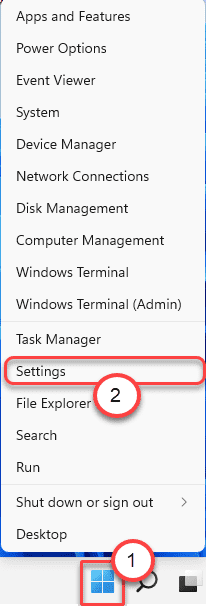
1. At first, right-click on the Start icon on the middle of the Taskbar and then, click on the “Settings“.

2. When the Settings menu opens up, on the left-pane, click on the “Apps“.
3. On the right-hand side, tap on the “Default apps“.

4. Then, on the right-hand side, go to the ‘Set defaults for applications’.
5. Write “Microsoft Edge” in the box.
6. Then, click on “Microsoft Edge“.

7. You will find the list of extensions associated with Microsoft Edge browser.
8. Click on the first extension to change it. You will be stomped by another annoying prompt.
9. Just click on “Switch anyway“.

10. Further, you will notice a list of browsers installed on your computer.
11. Choose your favorite browser from the list. If you can’t see it, click on “More apps“.
12. Once you have chosen it, click on “OK“.

13. Repeat the same steps for other extensions currently associated with Microsoft Edge.

Close the Settings screen. Restart your computer and you will be done.
That’s it! You won’t be seeing the Microsoft Edge unless you open it on your own.