DCFWinService or Dell Foundation Software Windows Service is a tool that provides suggestions to Dell users about various things. If you are seeing that this particular service is eating up a major chunk of your CPU resources, you can just manually disable/uninstall this software from your system.
Fix 1 – Clean boot the system
In the Clean boot mode, you can disable all the unnecessary services (including the DCFWinService).
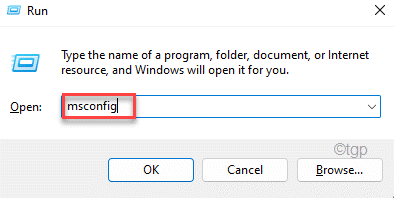
1. At first, press the Windows key+R keys together.
2. Then, write this UTR command in the terminal, and after that, hit the Enter key.
msconfig

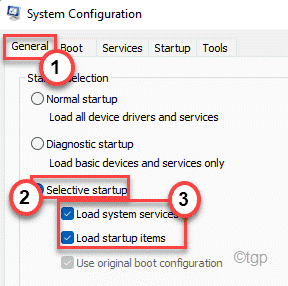
3. Just, go to the “General” tab.
4. After that, go to the General section, click on the “Selective startup‘ option to check it.
5. Now, finally you can tick the option “Load system services“.

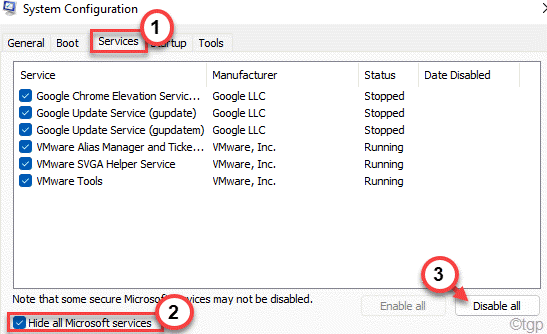
6. Then, go to the “Services” tab.
7. As the second step involves, you have to check the “Hide all Microsoft services“.
8. This way, only third-party services will be selected. Finally, click on the “Disable all“.

All the unnecessary services, including the DCFWinService, will be disabled.
9. You have to go to the “Startup” section.
10. Here, you have to click on the “Open Task Manager“.

Task Manager will open up.
11. Here, locate the “DCFWinService” or any other Dell related service in the list of other services.
12. Then, right-click on the service and tap on “Disable“.

When you have disabled all the startup of unnecessary applications, close the Task Manager window.
13. Just, click on “Apply” and then on “OK“.

After this, you will notice that a prompt has appeared on your screen.
14. Just, click on “Restart” to reboot the system applying those changes.

After your computer restarts, DCFWinService won’t be eating the CPU resources.
Fix 2 – Disable the DCFWinService


Fix 3 – Uninstall the Dell Foundation Services

