Cyclic Redundancy Check is a common practice in all the storage devices you use. So, when a CRC check fails with the following message “DiskPart has encountered an error: Data error (cyclic redundancy check)“, Diskpart itself if unable to operate on the storage device. The reason can be many, but you aren’t here for the cause, are you? So, go through this guide to quickly troubleshoot the problem on your own.
Fix 1 – Run the CheckDisk command directly
Before using the clean or format code from within the Diskpart terminal, run a disk checking scan to fix it.
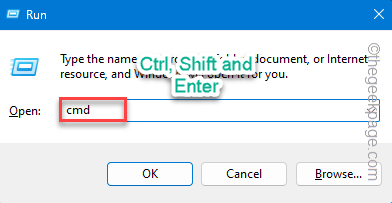
Step 1 – You need the CMD terminal. So, call upon the Run box by holding the Win+R keys together.
Step 2 – Then, type this command. Use the Ctrl, Shift and Enter all these keys together.
cmd
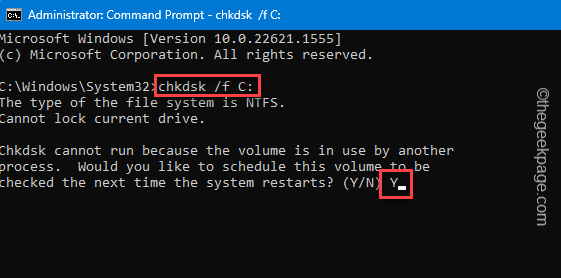
Step 3 – Next, write this disk-checking command and hit Enter.
chkdsk /f C:
It will give you this prompt –
Would you like to schedule this volume to be checked the next time the system restarts?
Tap “Y” and hit Enter.
You may have to restart the system and Windows will automatically start the scan at the system startup.
Wait for Windows to fix it.
Fix 2 – Rescan the disk
Try rescanning the disk first, before cleaning it in Diskpart.
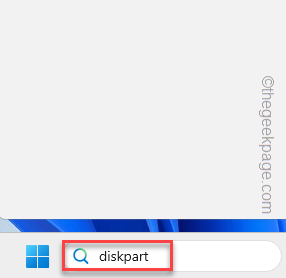
Step 1 – Hit the Start button once and type “Diskpart” in the search box. Hit Enter to open that up.
Step 2 – Directly, type this rescan command and hit Enter to scan for newer disk drives.
RESCAN
After running the rescanning command, you can use the other diskpart commands. So, try cleaning the drive once more. Watch what this does. Go to the next solution, if this one fails.
Fix 3 – Clear the System Files
If there aren’t enough free space available on your C drive, CRC check may fail.
Step 1 – Open the File Explorer.
Step 2 – Next, go to the “This PC“. Then, right-tap the “Local Disk (C:)” drive on the left pane and tap “Properties“.
Step 3 – Go to the “General” tab.
Step 4 – Check whether you can find “Disk Cleanup” tool*. Tap that to start it up.
[*If you can’t find Disk Cleanup tool, do this –
a. Open a Run box.
b. Then, type this and hit Enter.
cleanmgr
This will open up the Disk Cleanup directly. Choose C drive and tap OK to start the procedure.
]
Step 5 – Check all the items that you want to clean up.
Step 6 – Tap “OK” to start clearing up the system.
After clearing out unnecessary files, you may attempt to use the Diskpart commands.
Fix 4 – Format the drive from Disk Management
If all the solutions till this point has failed, try formatting the drive first.
Step 1 – Press the Win key and the X keys together.
Step 2 – Next, tap “Disk Management” to open it.
Step 3 – Look for the problematic drive. Now, right-click that drive and tap “Format…” to format the drive.
Step 4 – Carefully select the Volume Label, Allocation size, File System for the drive.
Step 5 – Once you are done selecting that, check the “Perform a quick format” box and tap “Format“.
Wait for the formatting process to be complete. Depending upon the size and class of the device.
Soon after this, try to use the Diskpart commands again. Test if this solves the problem.
Fix 5 – Test the system
Bad sectors in the hard drive or corruption in the system file may cause this problem.
Step 1 – Simply start to type “command” in the box.
Step 2 – Then, as soon as you see “Command Prompt“, right-click that and tap “Run as administrator“.
Step 3 – Type this command and hit Enter.
sfc /scannow
Wait until the System File Checker scan works out.
Step 4 – Then, run this code to start the disk checking scan. Check if this works.
chkdsk C: /r
It will give you this prompt –
Would you like to schedule this volume to be checked the next time the system restarts?
Tap “Y” and hit Enter.
Exit the terminal and restart your computer.


