Routing and Remote Access Service or RRAS allows a main computer to act like a router, works quite well when everything is normal. But, when there is a connectivity issue, RRAS may not start on your computer. This is quite problematic as it won’t allow you to connect to the mother system from any remote locations. So, you have to solve the issue and start the RRAS as soon as possible.
Fix 1 – Edit the RasMan key
Modify the SvcHostSplitDisable value in Registry Editor to fix the problem on your own.
NOTE – This is a registry edit, which is not always riskfree. So, you should just create a registry backup before proceeding further. You can read this guide on how to backup the system registry in Windows 11/10.
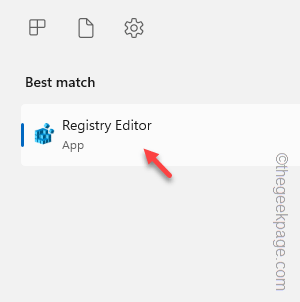
Step 1 – Write “regedit” in the Search box.
Step 2 – Then, click “Registry Editor” as you see it on the search results.
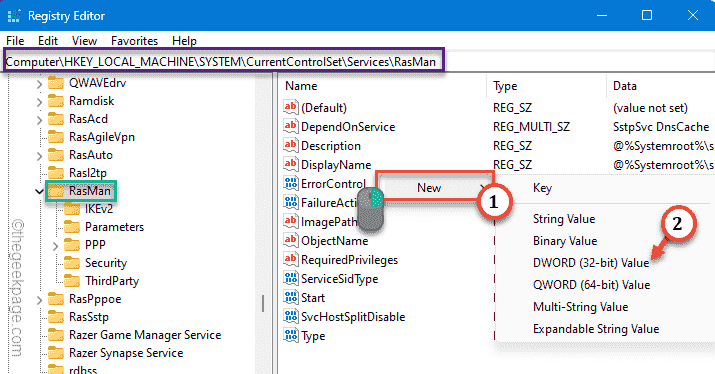
Step 3 – Reach the RasMan service following the left-pane –
Computer\HKEY_LOCAL_MACHINE\SYSTEM\CurrentControlSet\Services\RasMan
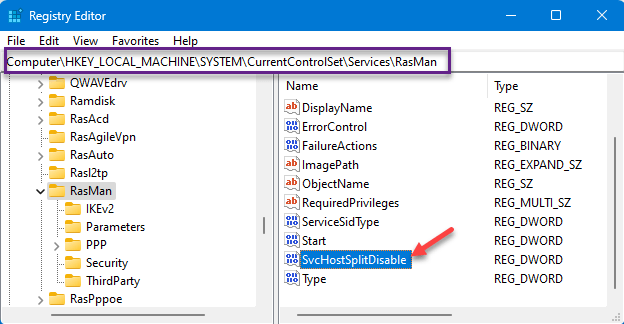
Step 4 – On the opposite side of the page, identify the “SvcHostSplitDisable” value.
[
If you can’t see this value, you have to create it on your own.
a. Just make sure that you have selected the “RasMan” key.
b. Then, right-tap on anywhere of the right-part of the Registry Editor. Then, click “New>” and tap “DWORD (32-bit) Value“.
c. Name this as “SvcHostSplitDisable“.
Continue to follow the instructions.
]
Step 5 – Then, double-tap the value so that you can edit it.
Step 6 – Set the value to “1“.
Step 7 – Then, tap “OK“.
Step 8 – Now, get to this location on your computer –
HKEY_LOCAL_MACHINE\SYSTEM\CurrentControlSet\Services\RemoteAccess
Step 9 – If you look on the right side of the screen, you will see the “SvcHostSplitDisable” value again (If you don’t see this value, you have to manually create it again, following the steps we have shown before).
Step 10 – Double-click this value.
Step 11 – Just set this value to “1” and hit Enter to save this change.
Close the Registry Editor page that you have opened up. After this, you can restart your computer to save this change.
Fix 2 – Disable the IPv6 using regedit
Without an additional registry edit, you can disable the IPv6 protocol on the affected machine.
Step 1 – Open the Registry Editor. To do that, you need to open a Run box, first.
Step 2 – Then, type “regedit” there and hit Enter to open it up.
Step 3 – Go directly to the address of the Parameters key –
HKEY_LOCAL_MACHINE\SYSTEM\CurrentControlSet\Services\Tcpip6\Parameters
Step 4 – Take a look on the right pane. Check whether you can find the DisabledComponents value. If you can find it, skip to Step 7.
Step 5 – Now, directly right-click on the right-hand side. Then, to create a new value, use “New>” and “Dword (32-bit) Value“.
Step 6 – Name this value as “DisabledComponents” .
Step 7 – Just double-click that value so that you can modify it.
Step 8 – Make sure paste this value in the ‘Value Data:’ box.
FFFFFFFF
Step 9 – Then, tap “OK“.
Finally, after doing all these things, exit the Registry Editor window. Check if this works out.
Fix 3 – Make sure RRAS is enabled and autostarted
Sometimes the RRAS is disabled on the system, you can enable and start the service.
Step 1 – Type “services” in the search box and hit Enter directly to open that.
Step 2 – Then, go to find the “Routing and Remote Access” service. Double-tap to open that service.
Step 3 – On the General tab, switch the ‘Startup type:’ to “Automatic(Delayed Start)” mode.
Step 4 – Go to the “Recovery” mode. There, set the ‘Subsequent failures:’ to “Restart the Service” mode.
Step 5 – Similarly, set the ‘Restart service after:’ to “2” minutes.
Step 6 – Finally, click “Apply” and “OK” to save this changes.
After this, close everything and restart your computer. Now, try to check the status of the RrAS.
Fix 4 – Restart the RRAS
If the registry fix doesn’t solve the issue, try restarting the Routing and Remote Services. Check if this helps.
Step 1 – Quickly call a Run dialog box using the Win+R keys together.
Step 2 – Write “services.msc” there. Then, click “OK“.
Step 3 – If you go down enough through the same Services tab, find the “Routing and Remote Access” service.
Step 4 – Just right-click the service and tap “Start” if the service hasn’t started. If it is running, click “Restart” to restart the same service.
After this, check if it helps.
Fix 5 – Disable any conflicting app/service
RRAS won’t start or work properly if there are any other VPN or any other software is running on your computer. If you are using any dedicated VPN app or a third-party firewall, disable that or uninstall it completely from your computer. Run the RRAS after this and test.


