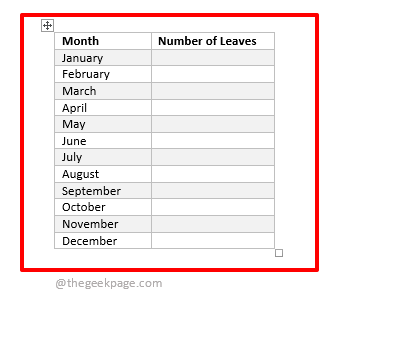
Let’s say you have a table template for recording the number of leaves for employees every month. For each employee, one Word document could be present. So in each of these Word documents, you might need to insert the abovesaid leave template.
Or you might have a different table with fixed data and you might need to insert this table in multiple places in a single document or in multiple documents. In both cases, copying the whole table structure and pasting it each time can be time-consuming.
But what if we tell you that you can assign a keyword shortcut to your table so that every time you enter this keyword and hit the Enter key, the table gets inserted into your document automatically? Well, read on, if you are all ears!
Prerequisite
To insert a table template automatically by typing in a keyword, the first thing we require is the table that needs to be assigned a shortcut keyword to. You can create any table with any formatting as you wish. The following is a simple table template that is used in this article for explaining the solution.
Solution
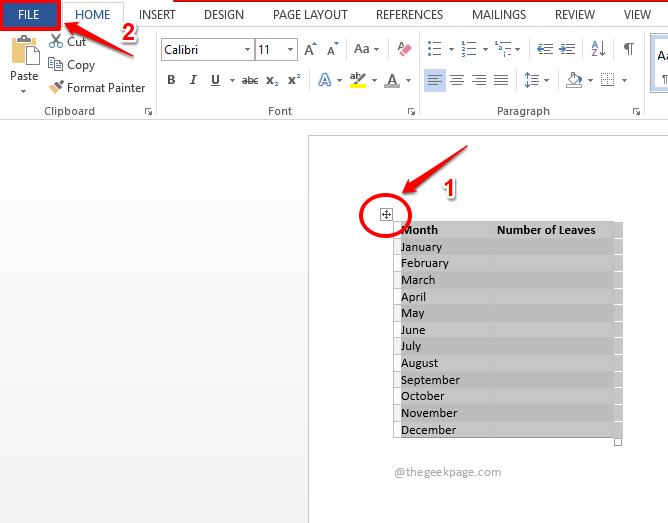
Step 1: Hover over the table template to view the table selector icon at the top left corner of the table. Click on it to select the entire table.
Now hit the FILE tab from the top ribbon.
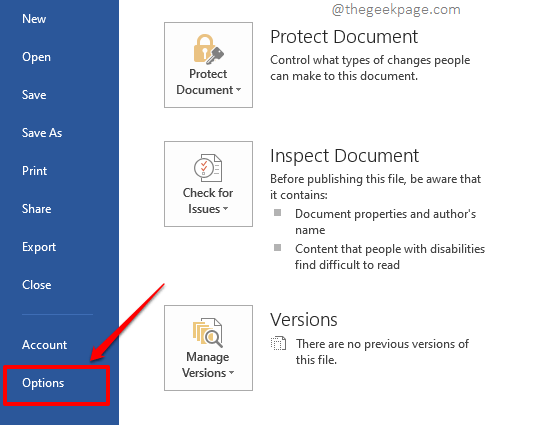
Step 2: Under the File options, on the left pane of the window, click on Options.
Step 3: Now the window for Word Options would open before you.
On the left pane, click on the Proofing tab.
Now on the right pane of the window, under the section AutoCorrect Options, click on the button with the same name.
Step 4: On the AutoCorrect window, make sure you are at the AutoCorrect tab.
The checkbox Replace text as you type will be automatically checked. If not, check it.
Under it, make sure the radio button against Formatted text is chosen.
Now, type in any keyword as you please, against the field marked as 4 in the screenshot below. This will be the keyword shortcut assigned to your table template. In the example below, we have chosen the keyword as geekPageTable.
Once you are all done, hit the Add button.
Step 5: If you now look at the replacements list, you can see that your table is assigned to the keyword you typed in. Hit the OK button to proceed.
When you are back at the Word Options window, simply press the OK button.
Step 6: Now, let’s test our changes. Simply type in the keyword that you assigned to your table template. Since the keyword I assigned is geekPageTable, I have typed it in. Oh, remember, cases do not matter. You can type geekPageTable or geekpagetable or geEkPageTablE; Word treats them all the same.
Step 7: Hit the Enter key and see the magic! Your table template is now successfully inserted, replacing your keyword shortcut.
Hope the article was indeed enlightening and was fun reading!
Stay tuned for more amazing tricks, tips, hacks, and how-to articles.


