A noticeable fact is that whenever a laptop’s lid is closed, the system goes to sleep. The user needs to press the Power button to revive it and might need to sign-in to the device again. This is default setting for Windows 10 systems and the intention is to save battery when the system is not in use.
However, it might not be absolutely favorable for users who might find it bothersome to sign-in to the system each and every time. A few others might need to hide their data totally by shutting down their system upon closing the lid. Windows 10 provides users with options to choose what happens upon closing their laptop’s lid.
Method 1 – Using Power options
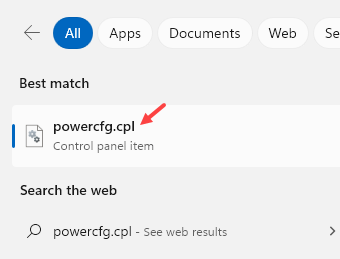
1] Searh POWERCFG.CPL in windows search box and click on it

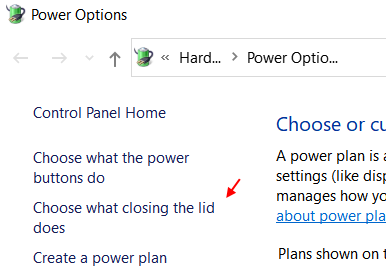
2] On the list on the left-hand side, click on the option “Choose what closing the lid does.”

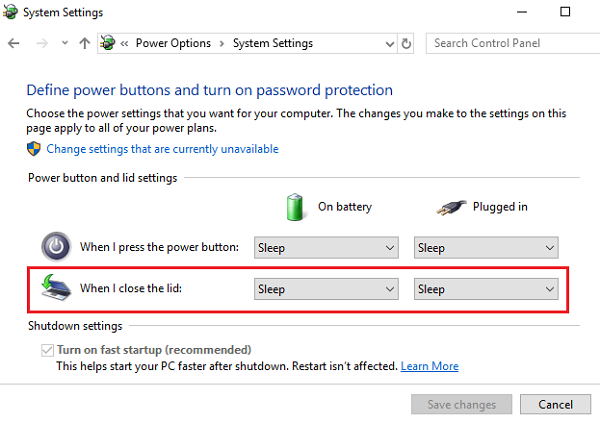
3] In the “When I close the lid section”, choose the action upon closing the lid for both plugged in and on battery states.
4] Click on Save Changes to save the new settings.
Method 2 – Using Advanced Power options
1] Press Win + R to open the Run window and type the command powercfg.cpl. Press Enter to open the Power Options window.

2] Click on Change plan settings corresponding to the currently selected power plan.

3] Select Change advanced power settings, and in the window that opens after that, expand Power buttons and lid. Then expand Lid close action and change the settings for both On battery and Plugged in.
4] Click on Apply and the OK.
Method 3 – Using Command Prompt
In case the above 2 methods fail, which is rarely the case, we could try changing the settings through Command Prompt.
1] Press Win + R to open the Run window and type the command cmd. Press Enter to open the Command Prompt window.
2] Type the following command in the Command prompt window and press Enter:
If your system is running on battery:
powercfg -setdcvalueindex SCHEME_CURRENT 4f971e89-eebd-4455-a8de-9e59040e7347 5ca83367-6e45-459f-a27b-476b1d01c936 Index_Number
If the power cable if plugged in to the system:
powercfg -setacvalueindex SCHEME_CURRENT 4f971e89-eebd-4455-a8de-9e59040e7347 5ca83367-6e45-459f-a27b-476b1d01c936 Index_Number
The Index_Number needs to be replaced by the following values:
0: Do nothing
1: Sleep
2: Hibernate
3: Shut down
So for exapmle if we want to change the lid action to sleep, then run the command given below by replacing the index_number with 1
powercfg –setdcvalueindex SCHEME_CURRENT 4f971e89-eebd-4455-a8de-9e59040e7347 5ca83367-6e45-459f-a27b-476b1d01c936 1
To save the changes, use the following command:
powercfg -SetActive SCHEME_CURRENT
Hit Enter and restart the system.
