How to Change the User Account Control (UAC) Level in Windows: – We are familiar with the User Account Control prompt in Windows. This prompt window appears when we install an app which requires administrative privileges. It also appears when we change some important system settings which require the administrator approval. This feature helps you to stay in control of your system. This feature was introduced in Windows Vista. This has been a core security feature in Windows. This feature has been incorporated to prevent unauthorized changes to your computer. These changes could be initiated by apps, viruses or other users. So this feature ensures that every change in your system is made with the permission of the administrator. For security, it is recommended to turn on this feature. But if you are fed up with the UAC prompt, you can change it’s level or turn it off. Read on, to learn the simple trick to change the UAC level in Windows.
- Head on to Control Panel -> System and Security -> Change User Account Control settings to open User Account Control Settings.
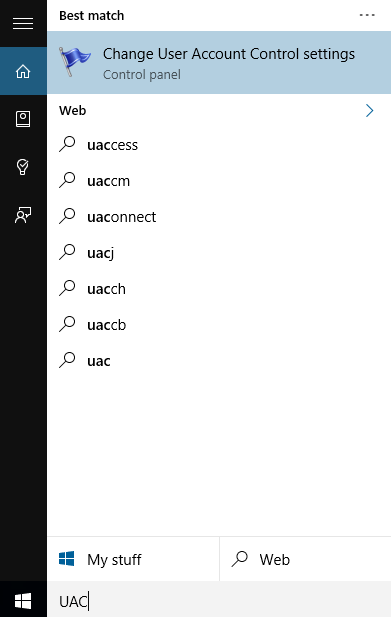
- Also, you can launch User Account Control settings by typing UAC in the Search box.
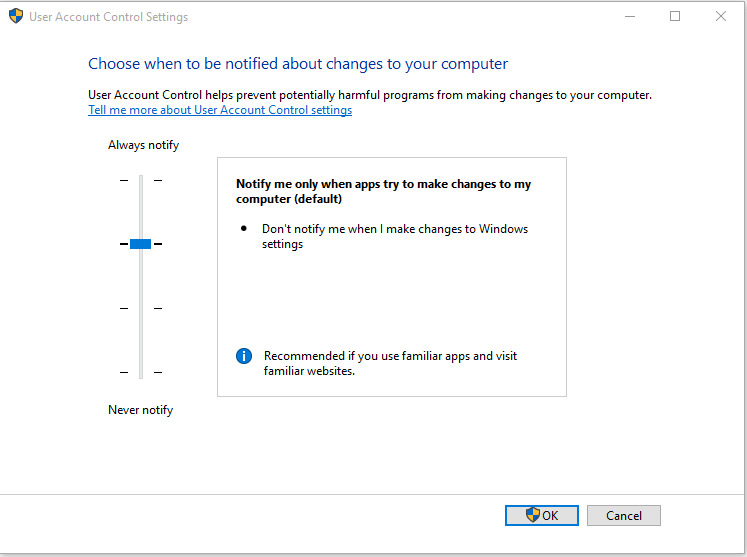
- Now the User Account Control window is open in your system. The window has a slider which can be adjusted to change the UAC settings. By default, you will be notified only when apps try to make changes.
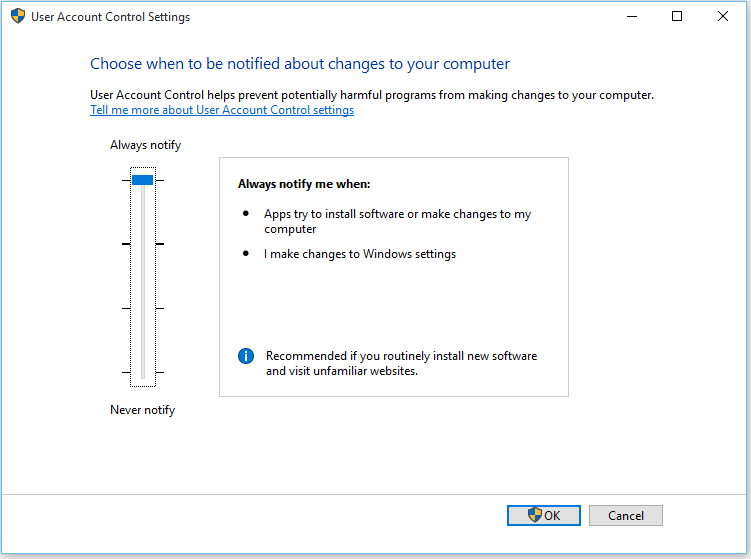
- You can switch between any of the four levels. In the Always notify level, you will be notified when apps make changes to your system or when you make changes to Windows settings.
- In the Never notify level you won’t be notified of any of the changes happening in your system, which is not recommended.
- After moving the slider to required position click on OK button. Depending upon previous UAC level that was set you will receive a User Account control prompt to confirm the action.
Changing The User Account Control level is a simple task in Windows. I hope you have enjoyed the article.


